Jekyll2024-08-03T09:03:29-03:00http://diegogiacomelli.com.br/feed.xmlDiego GiacomelliSenior .NET Developer | Azure | Web API | Framework | Unity 3DScientific papers using GeneticSharp (april 2024)2024-04-24T00:00:00-03:002024-04-24T00:00:00-03:00http://diegogiacomelli.com.br/scientific-papers-using-geneticharp-april-2024Another round with the newest scientific papers using GeneticSharp.
Design and optimization of a GFRP and steel hybrid prestressed SFRC beam based on numerical and analytical approaches
Abstract: Due to corrosion immunity, GFRP bars can be used in combination with steel bars and disposed in arrangements that take advantage of their specific properties. Since steel stirrups are the most susceptible to corrosion, significant advantages can be obtained with their replacement by fiber reinforcement, using Steel Fiber Reinforced Concrete (SFRC), which also allows to decrease the thickness of the beam’s web. In addition, prestressing the flexural reinforcement increases the service load-carrying capacity of the beams and their shear strength. This study highlights the flexural performance of hybrid prestressed GFRP-Steel SFRC beams considering the optimum design provided with the use of a genetic algorithm (GA) on simply supported I-shaped beams. The results show that the proposed GA-based optimization procedure provides an effective approach to obtain the balanced reinforcement ratio for these types of beams. (paper)
Software system for intellectual formation of starting populations
Abstract: The aim of the study. The main goal of the work is to improve existing methods genetic algorithm software development by providing opportunities for the intellectual formation of initial populations at the expense of using a component approach (paper)
Research of lift and transport machine systems plot of processing and food enterprises
Abstract: The work solves the actual problem of increasing efficiency production process of obtaining food products based on formation optimal structures of systems of lifting and transport machines of workshops and sites of processing and food enterprises. (paper)
Automatic refactoring for parallelization
Abstract: In modern software, adaptions like the parallelization are necessary to fully leverage the CPU’s capabilities. However, the parallelization introduces a new range of possible software faults. Thus, assisting utilities like static code analyzers are desirable. For instance, ones that inform engineers about the code fragments that can be safely adapted.
This thesis focuses on loops and introduces a conservative approach to verify that these can be parallelized. More specifically, it allows proofing that array accesses do not conflict between iterations. The procedure is a data flow analysis, which proofs the absence of conflicts by employing rules for a selection of binary expressions. Furthermore, its design allows it to profit from various code optimizations automatically. Experimental evaluations show that both, the prototype and the data flow analysis itself, do not incorrectly identify loops as parallelizable. Moreover, it pinpoints that the analysis can correctly identify most of the parallelizable loops, and only a negligible amount requires a more mature approach. (paper)
]]>Microsoft Certified: Azure Fundamentals2023-12-01T00:00:00-03:002023-12-01T00:00:00-03:00http://diegogiacomelli.com.br/microsoft-certified-azure-fundamentalsI’ve been working with Azure for years, but I had never stopped trying an official Microsoft certification until last month and after a month of studies, yesterday (30/11/2023) I successfully passed the exam for the Microsoft Certified: Azure Fundamentals (AZ-900).
In the post below I talk a little about the certification and the resources I used to study. If you are also trying to take the exam, it might be helpful.
What is AZ-900?
I did some research into what the introductory Azure certification should be for a developer and found that Azure Fundamentals (AZ-900) was the common ground for any professional trying to start obtaining Azure Certifications. Once you have it, you can decide which path you want to take based on your role: administration, data science, development, devops, or networking.
Candidates for this exam are technology professionals who want to demonstrate foundational knowledge of cloud concepts in general and Azure in particular. This certification is a common starting point in a journey towards a career in Azure.
Another good source of knowledge for the AZ-900 is the online course AZ-900: Microsoft Azure Fundamentals Exam Prep by Scott Duffy. I took the course myself and it is very useful to make information more clear. The more than 1 million students the course has are also a good sign of its quality.
If you are a Portuguese speaker, you can watch this series of videos from the Canal da Cloud.
Cheking your knowledge
The Scott Duffy course has a 50 questions test to validate your knowledge.
Microsoft also has the Practice Assessment for Exam AZ-900: Microsoft Azure Fundamentals: a test with 50 questions simulating the questions that can be in the exam. The nice thing about it is that you can check your answer and it will explaining the correct answer and point to the official documentation where you can learn more. My advice is to take some rounds of this practice assessment, because each time a small percentage of the questions are different from the previous one.
Taking the exam
If you feel prepare to take the exam, you can schedule it with Pearson VUE.
Good luck!
]]>Azure Utility Belt: Azure Diagrams2023-11-09T00:00:00-03:002023-11-09T00:00:00-03:00http://diegogiacomelli.com.br/azure-utility-belt-azure-diagramsI decided to start a series of posts about some Azure resources and tools that are very useful to have in our Azure Utility Belt.
an architecture advisor tool that enables you to design diagrams in a collaborative manner and provides guidance on which Azure services can be integrated and when they should be utilized in your architecture.
It’s amazing how easy it is to create Azure related diagrams in this tool, it’s all there and you can even see which services integrate with each other. Each item in the diagram already has a link to the documentation page, also a link to the price estimate page.
Using it you have a much better flow for creating diagrams than using a generic tool that knows nothing about Azure services.
Usage
For now it is completely free to use, so just create you account at https://azurediagrams.com and enjoy it.
]]>Using localized exception messages with T4 Templates2023-11-06T00:00:00-03:002023-11-06T00:00:00-03:00http://diegogiacomelli.com.br/using-localized-exception-messages-with-t4-templatesA common scenario in many projects is to use a Resource File (.resx) to store exception/validation messages.
An important and useful feature of the .resx files is that you can have one file for each culture that your application supports. For example, you can have one ErrorsMessages.resx as the default to support en-US (English - United States) messages and another with the name ErrorsMessages.pt-BR.resx to support pt-BR (Portuguese - Brazil) messages.
In this tutorial I will show you how to use a T4 Template to read the .resx file and generate a helper class to make very easy handle localized exception messages.
It is not the aim of this tutorial to go into details on how to work with T4 Templates, to do so read the documentation Code Generation and T4 Text Templates
Creating the .resx files
Open your .NET project where you want to have your localized exception messages (probably a class library).
Creating the English (fallback) messages resource file
Add a Resources file called ErrorMessages.resx to the project:
This file will contain the English exception messages for your project. It is also a fallback, if there is no other match for the current UICulture, this one will be used.
Add these lines to the file:
ProductHasMinWeight: The product ‘{0}’ must weigh at least {1}.
PropertyIsRequired: The property ‘{0}’ is required.
Creating the Brazilian Portuguese messages resource file
Repeat the same process, but name the file as ErrorMessages-pt-BR.resx.
This file will contain your projects Brazilian Portuguese exception messages.
Add these lines to the file:
ProductHasMinWeight: O produto ‘{0}’ deve pesar pelo menos {1}.
PropertyIsRequired
A propriedade ‘{0}’ é obrigatória.
Creating the T4 Template
Create a T4 template file in the same folder where you placed the .resx files, named Errors.tt.
Now, copy the content below to your Errors.tt:
Generating the code
If everything looks good, you should see the following code in the Errors.generated.cs file (expand Errors.tt in Solution Explorer to see it):
As you can see, two methods were generated within the Errors class: PropertyIsRequired and ProductHasMinWeight.
Every time you add, update or remove lines to .resx files and want your Errors class to be updated, just go to the menu “Build / Transform All T4 Templates”.
Validating the generated code
If you want to validate that you have followed the tutorial correctly so far, you can create the NUnit project and add this test fixture:
Customizing the T4 Template
You’ve probably noticed that inside the .tt file there is a line: CHANGE THE VALUES BELOW TO THE VALUES CORRESPONDING TO YOUR PROJECT.
In the 3 variables below this line you can customize the name of the resource file, the exception class that will be used (maybe you want to use a different exception or your project has a custom one) and the namespace that the Error class will be in.
Using the generated code
Finally it’s time to use the generated code.
PropertyIsRequired
In this case, it will be generate a InvalidOperationException with the message:
If UICulture is pt-BR: A propriedade 'First Name' é obrigatória.
Otherwise: The property 'First Name' is required.
ProductHasMinWeight
In this case, it will be generate a InvalidOperationException with the message:
If UICulture is pt-BR: O produto 'Amazing Product' deve pesar pelo menos 1KG.
Otherwise: The product 'Amazing Product' must weigh at least 1KG.
Error.tt checks for any {number} within the message and generates the appropriate method arguments.
ASP.NET tip
If you want to use this technique in an ASP.NET project remember to enable localization in the Startup.cs or Program.cs file:
Without throwing exceptions
In many projects, throwing exceptions is not possible or desired due to performance and design issues, in these cases you can use the same technique shown in this tutorial, but instead of throwing exceptions, you can adapt T4 to generate an error object business that can go through all layers of your architecture until reaching the UI or the serialization.
Conclusion
T4 is a powerful tool to help create an efficient development flow in the .NET stack. In cases like this tutorial, it drastically reduces the amount of code and improves the overall availability of the codebase.
]]>GeneticSharp in the Wild: Simulation-based layout optimization for multi-station assembly lines2023-11-02T00:00:00-03:002023-11-02T00:00:00-03:00http://diegogiacomelli.com.br/geneticsharp-in-the-wild-simulation-based-layout-optimizationI started a series of posts about some outstanding scientific papers and projects using GeneticSharp.
For this sixth post the chosen one is the Simulation-based layout optimization for multi-station assembly lines.
Introduction
Presents a novel approach for the automated 3D-layout planning of multi-station assembly lines. The planning method is based on a comprehensive model of the used production resources, including their geometry, kinematic properties, and general characteristics. Different resource types can be included in the planning system. A genetic algorithm generates and optimizes possible layouts for a line.
Usage
The optimization aims to minimize the line’s area and the costs for assembling the
line while simultaneously optimizing the resources’ positioning to perform their tasks. The line’s cycle time is considered as
a boundary condition. For the evaluation of different layout alternatives, a multi-body simulation is performed. A parameter
study is used to set the algorithm’s parameters. Afterward, the algorithm is applied to three increasingly complex examples
to validate and evaluate its functionality. The approach is promising for industrial applications as it allows the integration of
various resource types and individualization of the optimization function.
Examples for the evaluation of positions in the workspace of an LBR iiwa 7 robot
Results
The presented system is highly flexible and supports the positioning of multiple resource types.
It is also open to integrating more resource variants or customizing the fitness function to reflect the individual user’s
preferences accurately. The integration of more resource models and the modeling of more resource types would be the logical next step
to improve the system further.
The final layout of the first three runs of the first example
Authors
Daria Leiber, David Eickholt, Anh-Tu Vuong, and Gunther Reinhart wrote the paper for Department of Mechanical Engineering, Institute for Machine
Tools and Industrial Management, Technical University of Munich, Germany.
]]>Trijam 243 entry: The Cursed Idol2023-10-29T00:00:00-03:002023-10-29T00:00:00-03:00http://diegogiacomelli.com.br/trijam-243-entry-the-cursed-idolLast weekend I participated in Trijam #243.
Trijam is a weekly game jam where your goal is to make something playable (and fun!) in just 3 hours.
The theme
The theme for this game jam was “Cursed Relics”.
This was the third Trijam that I participated with purpose to test my small game engine: Blazorame.
This quick-time event game is based on the famous Indiana Jones - Raiders of the Lost Ark scene where Indy needs to swap a bag with the Golden Idol to try not to activate the temple traps (we all know how it turns out).
The game’s objective is to hit any key at the exact moment that Indy should swap the items.
You can try to collect as many Cursed Idols as you want, but if you miss the right moment you will lose them all and will be cursed.
]]>Scientific papers using GeneticSharp (october 2023)2023-10-18T00:00:00-03:002023-10-18T00:00:00-03:00http://diegogiacomelli.com.br/scientific-papers-using-geneticharp-october-2023Another round with the newest scientific papers using GeneticSharp.
Visualization of the process of solving selected optimization problems using genetic algorithms
Abstract: This thesis describes the process of developing an interactive tool for visualization of the process of solving selected optimization problems using genetic algorithms. The theoretical part provides an introduction to the evolutionary algorithms, more specifically then focuses on genetic algorithms. This part also lists typical optimization problems that are commonly solved using genetic algorithms. The practical part describes all the important steps in creating new functional software. This includes the comparison of existing solutions, analysis of possibly suitable technologies and libraries, and software documentation. The implementation of the application, using the Blazor WebAssembly framework, is also described in this part. The interactive tool provides the visualizations of three typical optimization problems and the problem of 2D bitmap image generation. At the end, the thesis lists the techniques used for testing and documentation of the application. The final result of this thesis is a functional interactive web application. (paper)
Study of methods of application of genetic algorithms for determining the viability of moving objects and their systems
Abstract: The purpose of the research is to identify effective methods of using genetic algorithms to determine the viability of moving objects and their systems, formalize and generalize the problem of optimizing their configuration and behavior using a genetic algorithm; development of a software system that would allow setting the conditions of a problem of this type in a formal and at the same time visual form, solving this problem and visualizing intermediate and final results. Development methods are based on Unity engine and GeneticSharp library. (paper)
Optimization of self-supporting steel towers for transmission lines with genetic algorithms
Abstract: Steel latticed towers are widely used as supports to conductors on transmission lines. On such projects, it is usual to use the same structural solution repeatedly along the line, what allows to achieve significant cost reduction due to structure’s design optimization. This work proposes the development of an optimization methodology based on the Genetic Algorithms concept to reduce self-supporting tower’s self-weight through the variation of its body base and top dimensions. To execute the algorithm, it was necessary to implement a system composed of modules for geometric parameterization, determination of loads, structural analysis, and sizing accordingly to ASCE 10-15. A 25-bar truss benchmark was optimized, and the results showed that the proposed methodology is effective. Besides, the performance of the methodology to optimize a self-supporting 525 kV cat-face tower was evaluated. The comparison of the results with the project of an equivalent tower which is in operation in Brazil proved the effectiveness of the proposed methodology for self-supporting towers optimization. (paper)
Artificial Intelligence for the Unstable Unicorns Game
Abstract: This work explores artificial intelligence for the game Unstable Unicorns. This game started on Kickstarter and over the years, the game creators released several expansions. This work aims to implement a game simulator for this game, analyze the game, and design the artificial intelligence for this game. First, we will analyze the game rules, game mechanics, and artificial intelligence in similar games. We implemented the game simulator as close as possible to the original rules. Afterward, we developed three different artificial intelligence algorithms. These are rule-based agents, Monte Carlo agents and evolutionary agents. Finally, we ran the experiments and comparison tests with the implemented agents. The best-performing agent is the evolutionary agent. It is quick with the best win rate. (paper)
About the possibilities of implementing genetic algorithms in the C# programming language
Abstract: The article discusses the possibility of creating genetic algorithms in the C# programming language, in particular using the GeneticSharp library. The application of a genetic algorithm to find the two most distant points on a rectangular area is shown. (paper)
Honorable mention
The GeneticDFA is not a scientific paper, but a very neat project available on GitHub that uses genetic programming to reverse engineer blackbox systems modeled in DFA form.
]]>Trijam 240 entry: Heat or Freeze2023-10-09T00:00:00-03:002023-10-09T00:00:00-03:00http://diegogiacomelli.com.br/trijam-240-entry-heat-or-freezeLast weekend I participated in Trijam #240.
Trijam is a weekly game jam where your goal is to make something playable (and fun!) in just 3 hours.
The theme
The theme for this game jam was “Hot and cold”.
This was the second Trijam that I participated with purpose to test my small game engine: Blazorame.
This time I kinda like the game jam theme and I ended up created I simple shooter where you need to use the right gun against each kind of enemy.
The final result is: Heat or Freeze.
You are the ship’s pilot and must survive waves of enemies as much as possible.
You have two types of enemies:
Hot enemies: can be killed by the Cold Cannon (right)
Cold enemies: can be killed by the Hot Cannon (left)
If you hit the enemy with the wrong cannon, the enemy will become stronger, greater, and faster.
]]>Trijam 239 entry: I need a medic - crossword2023-10-02T00:00:00-03:002023-10-02T00:00:00-03:00http://diegogiacomelli.com.br/trijam-239-entry-i-need-a-medic-crosswordLast weekend I participated in Trijam #239.
Trijam is a weekly game jam where your goal is to make something playable (and fun!) in just 3 hours.
The theme
The theme for this game jam was “I need a medic!”.
This was the second Trijam that I participated and it had a different purpose for me, because I wanted to test a small game engine that I I’ve been building from scratch, the idea of this game engine is to develop browser-playable games that look like games from Atari 2600 or Gameboy, for instance: it has a limited palette with just 4 colors like the classic Gameboy had. This game engine is entirely built in C# using Blazor. The games built with it are Blazor WebAssembly apps.
The name of this small game engine is Blazorame.
As I didn’t like much this Trijam theme, I ended up just creating a kinda of crossword game, even so This helped to understand the next steps needed to improve the Blazorame.
]]>Scientific papers using GeneticSharp (october 2022)2022-11-17T00:00:00-03:002022-11-17T00:00:00-03:00http://diegogiacomelli.com.br/scientific-papers-using-geneticharp-october-2022In October 2022 I discovered (TBH, Google Scholar notified me) that three new scientific papers using GeneticSharp have been developed.
Below you can appreciate them:
Framework for graphical user interface testing
Abstract: This thesis is describing the development of a framework for graphic user interface testing with usage of Soft Computing algorithms. Development is divided into four phases. The first phase is acquaintance with existing GUI testing frameworks and their analysis. The second phase is about choosing appropriate technologies for development, appropriate algorithms and implementation design. Then there is the framework implementation phase itself and last phase with the testing, result evaluation and improvements proposal. (paper)
Automated linear design integrated microwave amplifier with distributed gain
Abstract: Increasing the efficiency and reducing the cost of developing microwave integrated circuits (ICs) determines the trend in the development of software modules for automated synthesis of circuit and topological solutions. The article presents the results of the development of a methodology and algorithm that allow for automated synthesis of circuit solutions for integrated microwave amplifiers with distributed amplification (MW URA) based on
set of requirements for its linear characteristics. A feature of the proposed technique is the use of models of active and passive elements for the selected manufacturing technology of microwave ICs. it allows directly in the process of synthesis to obtain circuit solutions of microwave URU suitable for implementation
in a given technological process. The work of the presented CAD technique integrated microwave URU is demonstrated on the example of the development of a pre-amplification cascade for buffer amplifier for the frequency range from 20 to 30 GHz based on 0.25 μm GaAs pHEMT of the technological process of the domestic foundry. (paper)
Optimization of customer assignment problem
Abstract: One of the biggest problems of call center employees is fair customer distribution. Every
employee wants to deal equally with customers with similar characteristics and to distribute premiums equally. Because of the large number of parameter and input data for this problem, the search space is large. Therefore, the problem is a complex, in other words NP – hard problem. Genetic Algorithm, which is an heuristical search method, is preferred in order to provide an effective solution to such problems where the solution space is very large. Within
the scope of the study, an application was developed with the help of GeneticSharp library in C# programming language, which can assign fair customers to call center employees by using the Genetic Algorithm method, and the most appropriate solution was sought. It has been determined that the genetic algorithm can provide an effective solution to the assignment problems. (paper)
]]>6 modern C# features for cleaner Unity code2022-11-15T00:00:00-03:002022-11-15T00:00:00-03:00http://diegogiacomelli.com.br/6-modern-csharp-features-for-cleaner-unity-codeSince C# 7.0, many code improvements that help us write less code have been added to the language.
This tutorial will focus on six new features that can help us write more concise and readable code and how we can use these features on our C# for Unity.
I originally wrote this post as a guest writer for LogRocket’s blog
Tutorial sections
Prerequisites
Setting up our Unity project
Tutorial structure
C# features support in Unity
Switch expression
Property pattern
Type pattern
Constant pattern
Relational pattern
Logical pattern
Conclusion
Prerequisites
The following prerequisites are required to follow along with this tutorial:
Basic knowledge of Unity
Previous experience writing C# scripts in Unity
Setting up our Unity project
First, we need to create our Unity project. For this tutorial, we’ll use the version 2021.3.4f1, which, at the moment I’m writing, is the newest LTS Unity version.
On the project templates list, choose 2D(core), give it a name, and click the Create project button.
With the project started, create two folders called Scripts inside the Assets folder. We’ll use them to keep our project organized during the tutorial.
Tutorial structure
For each sample of how to use the new C# feature, we will first look at how it was done before and then how we could write less and more readable code with the new feature.
The classes below are just stubs that are used on all samples throughout the tutorial. You can add them to a script inside the `Scripts folder:
C# features support in Unity
In C# versions 8 and 9, a lot of new features were added to the language. You can read the full features list for each version in the links below:
Because of this, features like indices and ranges and init only setters will likely be supported in future versions of Unity. However, the chance of an unsupported feature for a very specific scenario gaining Unity support in the future is smaller than a feature like indices and ranges
Maybe you can find some workarounds to use these unsupported features in Unity, but I discourage you from doing this because Unity is a cross-platform game engine. A workaround in a new feature could lead you to problems quite hard to understand, debug, and resolve.
Fortunately, Unity supports some of the more common patterns and expressions from C# 8 and 9. Let’s review some of the most helpful ones below and see how they can enable us to write cleaner code.
Switch expression
The switch expression can dramatically simplify and reduce the LOC (Lines Of Code) to make a switch, because we can avoid a bunch of boilerplate code, like the case and return statements.
Doc tip: the switch expression provides for switch-like semantics in an expression context. It provides a concise syntax when the switch arms produce a value.
Often, a switch statement produces a value in each of its case blocks. Switch expressions enable you to use more concise expression syntax. There are fewer repetitive case and break keywords and fewer curly braces.
Before
After
Property pattern
The property pattern enables you to match on properties of the object examined in a switch expression.
As you can see in the sample below, using a property pattern, we can transform a series of if statements into a simple list of properties that the object on the switch statement should match.
The _ => has the same meaning as the default on a classic switch.
Doc tip: a property pattern matches an expression when an expression result is non-null and every nested pattern matches the corresponding property or field of the expression result.
Before
After
Type pattern
We can use type patterns to check if the runtime type of an expression is compatible with a given type.
The type pattern is almost the same logic as a property pattern but is now used in a context of an object type. We can transform a series of if statements that check an object type into a list of types that the object on the switch statement should match.
Before
After
Using the type pattern, we go from 16 lines of code to only 8 that have the same result and are quite clear to read and understand.
Constant pattern
A constant pattern can be used to test if an expression result equals a specified constant.
Probably the simplest pattern match, it just matches a constant value (for instance, a string) and then returns the result.
Before
After
A constant pattern can be used with any constant expression, like int, float, char, string, bool, and enum.
Relational pattern
A relational pattern will compare an expression result with a constant.
This one could seem the most complex pattern match, but at its core it’s not that complicated. What we can do with a Relational Pattern is directly use logical operators as <, >, <=, or >= to evaluate the object and then provide a result for the switch.
Doc tip: the right-hand part of a relational pattern must be a constant expression.
Before
After
Any of the relational operators <, >, <=, or >= can be used on a relational pattern.
Logical pattern
We can use the not, and, and or pattern combinators to create logical expressions.
This is like an extension of the relational pattern where you can combine the logical operators not, and, and or to create a more complex and elaborate pattern match.
Doc tip: you use the not, and, and or pattern combinators to create the following logical patterns:
Negation not pattern that matches an expression when the negated pattern doesn’t match the expression
Conjunctive and pattern that matches an expression when both patterns match the expression
Disjunctive or pattern that matches an expression when either pattern matches the expression
Before
After
Conclusion
In this tutorial, we’ve learned how to use the switch expression, property pattern, type pattern, constant pattern, relational pattern, and logical pattern to write less and more modern C# code on Unity.
Hopefully, you can use some of these in your next project to spare yourself time while writing cleaner code.
]]>Scientific papers using GeneticSharp (september 2022)2022-10-17T00:00:00-03:002022-10-17T00:00:00-03:00http://diegogiacomelli.com.br/scientific-papers-using-geneticharp-september-2022In September 2022 I discovered (TBH, Google Scholar notified me) that five new scientific papers using GeneticSharp have been developed.
Below you can appreciate them:
An Application-Oriented Cyber-Physical Production Optimisation System Architecture for the Steel Industry
Abstract: The new generation of steelworks shaped by Industry 4.0 are digitized, networked, flexible and adaptable. Production processes use distributed information and communication structures, are more autonomous and capable to react to dynamic evolutions of the environment. Cyber-physical systems are a fundamental component of Industry 4.0 and enable new generation of smart processes. This paper presents a modular architecture approach for the design of cyber-physical steel production processes. The approach is tested within a production facility for long products such as rails or tubes taking into account the main peculiarities of the sector. The use of an industrial-agent-based solution for enabling intelligent capabilities and interactions among cyber-physical modules is investigated and adopted. Experimental results highlight the industrial applicability of the adopted implementation scheme combining agent-based technology with the proper connection between models, communication and optimisation methods. (paper)
Optimisation of part orientation and design of support structures in laser powder bed fusion
Abstract: Part orientation and support structures are crucial to the quality of metal parts by laser powder bed fusion. Computer-aided solutions for part orientation can be used to support users during the process preparation. In this study, an original computer-aided approach to prepare parts for laser powder bed fusion was formulated and implemented. The proposed method consists of multi-objective optimisation of part orientation and a novel strategy for the simultaneous design of support structures. The automated part orientation optimisation considers both global and local objectives defined by the user. For this purpose, penalty functions measuring the building time, support volume, part distortion, surface roughness and supports contact points are adopted. Unlike in existing methods, the user has the opportunity to define the importance of these aspects in different regions of the part. Such functions are then optimised through a genetic algorithm. The proposed approach was applied to a real product imposing three different sets of objectives. The tested case studies were solved in less than 10 min, providing solutions that satisfied the imposed aims and constraints. Specifically, the results demonstrated that the orientation optimisation can reduce the building time by 68.1% or the material consumption by 66.8%, depending on user requirements. It was also shown how the proposed method can be used to minimise the surface and dimensional error of manufactured parts. The proposed approach allows to manually define the specific design requirements and translate them in terms of manufacturing decisions. This contributes to establishing a fruitful interaction between the user and the developed software during the process design. (paper)
An approach for the global search for top-quality six-bar dwell linkages
Abstract: A complete approach for the search of top-quality six-bar linkages based on four-bar linkages generating coupler curves with circular regions has been developed. The approach includes a robust algorithm to search for high-accuracy circular regions in coupler curves and a fitness function able to evaluate the quality of the resulting linkage. The approach is used to explore the design space in order to search for optimal dwell linkages and to identify the types of linkages that provide the best dwells according to the established criteria. Then, the global optimum is searched by means of an evolutionary algorithm. The results demonstrate the efficiency and versatility of the approach, that can be customized for specific applications, and the existence of a high number of six-bar linkages with long output dwells. A highly probable global optimum is identified. (paper)
Genetic-WFC: Extending Wave Function Collapse With Genetic Search
Abstract: This paper presents Genetic-WFC, a procedural level generation algorithm that mixes genetic optimization with Wave Function Collapse, a local adjacency constraints propagation algorithm. We use a synthetic player to evaluate the novelty, safety and complexity of the generated levels. Novelty is maximized when the synthetic player goes on tiles not visited for a long time, safety is related to how far it can see, and complexity evaluates the variability of the surrounding tiles. WFC extracts constraints from example levels, and allows us to perform the genetic search on levels with few local asset placement errors, while using as little level design rules as possible. We show that we are able to rely on WFC while optimizing the results, first by influencing WFC asset selection and then by re-encoding the chosen modules back to our genotype, in order to optimize crossover. We compare the fitness curves and best maps of our method with other approaches. We then visually explore the kind of levels we are able to generate by sampling different values of safety and complexity, giving a glimpse of the variability that our approach is able to reach. (paper)
Human-Robot Collaborative Workflow for Remote Decommissioning and Demolition
Abstract: The demand for new deconstruction and demolition approaches is escalating as structures built in 20th century development booms approach their end of life. Rehabilitation and careful deconstruction approaches are increasingly economically and environmentally motivating. For example, in Ontario, Canada multi-decade efforts to decommission nuclear power plants are challenging teams of engineers, researchers, venders, and laborers. In these hazardous scenarios, classical heavy demolition approaches are not an option, and the asset owners find that the costly development of novel workflows and technologies to plan and undergo these deconstruction operations is the only option. These trends present construction researchers with an opportunity to develop technologies and processes to achieve
deconstruction project goals with improved efficiency, certainty, and safety. This paper presents a modular framework for remote human-robot collaboration for waste management in decommissioning and demolition. The proposed framework includes robotic platform reality data capture, scan processing (e.g., segmentation, surface estimation, and recognition), gamified waste packing in virtual reality (VR), and packing plan execution. A comprehensive review of state-of-the-art technologies of each module is explored from the standpoint of applicability to deconstruction and demolition. Then, an autonomous robotic platform for reality data capture is presented. A reconfigurable semi-automated VR platform for waste packing optimization is presented as an example of this process workflow in the context of remote deconstruction and demolition. Finally, the ideas of robotic packing plan execution are discussed as future work. (paper)
]]>GeneticSharp v3.0.0 - .NET 62022-09-06T00:00:00-03:002022-09-06T00:00:00-03:00http://diegogiacomelli.com.br/geneticsharp-version-3-net6I’ve just released the GeneticSharp version 3.0.0.
.NET 6
With version 3.0.0, GeneticSharp now supports .NET 6.
Performance improvements
The performance of many operations has been improved just for use .NET 6:
]]>GeneticSharp in the Wild&colon; Procedural Music Generation2022-08-16T00:00:00-03:002022-08-16T00:00:00-03:00http://diegogiacomelli.com.br/geneticsharp-in-the-wild-procedural-music-generationI started a series of posts about some outstanding scientific papers and projects using GeneticSharp.
For this fifth post the chosen one is the State of the Art in Procedural Music Generation using Genetic Algorithms and Rule Based GA Implementation with Attractor Waves.
Introduction
The act of composing a piece of music in regarded as a creative process which encompasses objective and subjective rules. Objective rules can be pointed as the minimum necessary ones so that a given composition is considered structurally valid –
music theory. Subjective rules depend on the composer ability to make a creation that is pleasant to the majority of the human listeners – or at least an intended specific audience.
Usage
Given that the creation process uses the human composer’s experience and sensibility – which in some form is an unknown rule set – it is assumed by some authors that, by analyzing the characteristics of the produced pieces of music spanning from
several composers, underlying rules can be inferred.
Genetic algorithms will make the evolution of data encoded in a structure analogous to the chromosome. Traditionally, this piece of information is represented as a binary base, but it is not restricted to 2 symbols, as long as the needed processes for the evolution can be applied.
For the fitness function, we will use music theory as done in many previous papers, penalizing notes that are outside the chosen scale and giving bonus to those that match.
Results
To understand in a first approach, what rating values were most fitting, a first tryout was made by translating the start of some classical pieces into the chromosome output structure. This ideal output was then rated by the fitness algorithm. By obtaining each individual rating component for each tested sample, it was possible to predefine a start set of values to be used. The exception was the attractor wave, which was set subjectively.
Using two attraction waves, it is possible to visualize intended effect. In proximity with the wave, the notes fall into its attraction basin. When two waves are near, the effect either oscillates between the two or compromises during their proximity.
Overall, many of the generated compositions have a subjective pleasant tone to them.
Sample generated music
You can listen a sample music generated by the genetic algorithm:
Author
Rui Luz and Rafael Silva wrote the paper for Instituto Politécnico do Cávado e do Ave, Barcelos, Braga, Portugal.
]]>Free eBooks by Unity2022-08-09T00:00:00-03:002022-08-09T00:00:00-03:00http://diegogiacomelli.com.br/free-ebooks-by-unityThroughout all these years using Unity I’ve collected a lot of eBooks that Unity’s team has created. These ebooks are an incredible source of knowledge, but for some reason, I haven’t found any place on the Unity site or blog where all these eBooks are listed.
Thereupon, I created this post to list those eBooks. If you know any other of them created by Unity’s team let me know in the comments and I’ll update the post.
]]>The Fundamentals of Unity 2D colliders2022-07-22T00:00:00-03:002022-07-22T00:00:00-03:00http://diegogiacomelli.com.br/the-fundamentals-of-unity-2d-collidersIn the first years of Unity, there wasn’t solid support for 2D game development inside the engine — for years, the right way to refer to it was “Unity 3D”. Though it was possible to develop 2D games with Unity, without official engine support, it wasn’t a smooth process like it is nowadays.
Around 2013, Unity started to support 2D game development with built-in components, like a 2D physics engine, Collider2D, Rigidbody2D, Vector2, Sprite, Tilemap, etc.
In this post, we’ll cover the common properties and behaviors of 2D colliders, which messages are sent to their GameObjects, how we can use them in our scripts, and how each collider setup interacts with others.
I originally wrote this post as a guest writer for LogRocket’s blog
Tutorial sections
Setting up our Unity project
What are colliders?
Common properties and behaviors of colliders
Adding a 2D collider to a GameObject
What is a Rigidbody2D component?
Using PhysicsMaterial2D to add effects
Collision callbacks
Using collision callbacks on scripts
Without a trigger
With a trigger
Collider interactions
How do these setups affect collider interactions?
Physics2D settings
Source code and samples
Prerequisites
The following prerequisites are required to follow along with this tutorial:
Basic knowledge of Unity
Previous experience writing C# scripts in Unity
Setting up our Unity project
First, we need to create our Unity project. For this tutorial, we’ll use the version 2021.3.4f1, which, at the moment I’m writing, is the newest LTS Unity version.
On the project templates list, choose 2D(core), give it a name, and click the Create project button. We’ll call ours SampleScene.
With the project started, create two folders called Scripts and Physic Materials inside the Assets folder. We’ll use them to keep our project organized during the tutorial.
What are colliders?
Before we start using our Unity project, we need to take a little dive into the basic concepts of colliders.
Colliders are the way that Unity (and most of the available game engines, if not all) manages collisions between GameObjects. For the sake of this tutorial, we are only using the 2D colliders, but a lot of the rules mentioned below are applicable to 3D colliders, too.
In Unity, a 2D collider is a component that allows us to define a shape, where we want to receive notifications in our GameObject’s script whenever another GameObject (with another collider) collides with the first collider.
Unity doc tip: A collider is invisible, and does not need to be the exact same shape as the GameObject’s mesh. A rough approximation of the mesh is often more efficient and indistinguishable in gameplay.
Right now, Unity has eight built-in kinds of 2D colliders:
BoxCollider2D
CapsuleCollider2D
CircleCollider2D
CompositeCollider2D
CustomCollider2D
EdgeCollider2D
PolygonCollider2D
TilemapCollider2D
Common properties and behaviors of colliders
Every 2D collider in Unity inherits from a common class called Collider2D. As a result, they share common properties. Below is a list of the most notable and widely-used ones:
Shape (Edit collider) — Each kind of 2D collider has a different shape, but most of them allow us to change some properties of their shapes, like the scale and distance of vertices
Material — Defines the PhysicsMaterial2D that can be used by the collider to define things like friction and bounciness
isTrigger — If it’s checked, the collider will behave as a trigger. When a collider is not marked as a trigger, the physics engine will generate a collision; when the collider hits another collider, it produces the expected behaviors based on the colliders’ setups, like moving them to opposite directions or stopping them. However, when a collider is marked as a trigger, the physics engine will simply detect when it enters the space of another and no collision will be created
Used by Effector — Determines whether the collider will be used by an Effector2D attached to the GameObject.
Unity doc tip: Effector2D components are used to direct the forces when colliders come into contact with each other
Offset — As the collider will be attached to a GameObject, we can use this property to define an offset position relative to the GameObject
Adding a 2D collider to a GameObject
In our Unity project, add a Sprite (Square) to the opened scene (SampleScene):
Select the Sprite (Square) GameObject and add a component called BoxCollider2D:
Now repeat the process, but add a Sprite (Circle) to the scene and add a CircleCollider2D component to it.
Move the Circle GameObject a little on top of the Square GameObject:
If we hit the Play button now, nothing will happen, even if we move the GameObjects inside the editor. No collision will happen.
Why does nothing happen? Well, we need to talk about the Rigidbody2D component.
What is a Rigidbody2D component?
A Rigidbody2D is a component used to tell Unity that it should put the GameObject under the control of the physics engine. In other words, GameObjects without a rigidbody do not exist for the physics engine.
If we just add a 2D collider to our GameObject, nothing will happen because the physics engine is not aware of it. If we want the physics engine to control our GameObject, we need to add a Rigidbody2D component to it.
This means that now our GameObject is affected by gravity via the Gravity Scale property, and can be controlled from scripts using forces.
We Just need to add a Rigidbody2D to each of the GameObjects that we’ve already created and hit the Play button:
With the Rigidbody2D components added to our GameObjects, the physics engine is aware of them and has started making the gravity act.
Using PhysicsMaterial2D to add effects
In our sample, the two GameObjects are just falling, but what if we would like to have the Square GameObject stay in its position and the Circle GameObject hit it, before bouncing like a ball?
An easy way to achieve this is using PhysicsMaterial2D.
Let’s add that ball effect to our sample scene. First, on the Square GameObject, change the property Body Type of its Rigidbody2D to Static:
Create a new PhysicsMaterial2D, name it Ball physics material, and place it inside our Physics Materials folder:
Change its Bounciness property to 1:
On the Circle GameObject's Rigidbody2D, change the Material property to use the Ball physics material that we’ve just created:
Hit the Play button again. Now we should see this happen:
Collision callbacks
When one collider interacts with another collider, Unity sends some messages (e.g., call a method on any MonoBehavior attached to the GameObject). In the case of a 2D collider, there are six available messages:
When IsTrigger is not checked:
OnCollisionEnter2D: called in the first frame when the collision starts
OnCollisionStay2D: called in each frame while the collision is happening
OnCollsionExit2D: called in the first frame when the collision ends
When IsTrigger is checked:
OnTriggerEnter2D: called in the first frame when the collision starts
OnTriggerStay2D: called in each frame while the collision is happening
OnTriggerExit2D: called in the first frame when the collision ends
OnCollisionStay2D and OnTriggerStay2D are called each frame until they reach Time To Sleep (if the GameObject is not moving anymore).
We can change this setting on Project Settings / Physics 2D
Using collision callbacks on scripts
It’s time to write some code. Let’s create a script to log every time that our Circle GameObject hits the Square GameObject (OnCollisionEnter2D) to the console window. We’ll record how many frames they stay in contact (OnCollisionStay2D), and when they stop hitting each other (OnCollsionExit2D). We’ll also show what happens with and without a trigger
Without a trigger
Inside our Scripts folder, create a script called CollisionLogger and add it to the Circle GameObject:
Open the CollisionLogger script on editor and type these methods:
Hit the Play button, and we should see something like this in the Console window:
As we can see, OnCollisionEnter2D is called when the Circle GameObject hits the Square GameObject. OnCollsionExit2D is called when they aren’t hitting each other anymore, and OnCollisionStay2D has not been called because the two GameObjects are not keeping contact. To see OnCollisionStay2D being sent, just remove the Ball physics material from the Circle GameObject's Rigidbody2D:
Hit the Play button again and the output in our Console window should be:
Now we have one OnCollisionEnter2D and a lot of OnCollisionStay2D that will be called until the two GameObjects keep the contact or until Time To Sleep is reached.
Now, re-enable the Ball physics material on the Circle GameObject's Rigidbody2D and add the CollisionLogger to the Square GameObject too.
Hit Play, and the Console window should look like this:
As expected, the messages are called in all GameObjects involved in the collision.
With a trigger
What about the OnTrigger method? Right now, none of our colliders are marked as a trigger (IsTrigger), which is why only OnCollision has been called.
Triggers are useful when we need to detect that a given GameObject has reached a point or another GameObject. Let’s say we want to be notified on Square GameObject every time that the Circle GameObject passes through it. We can add a collider with IsTrigger checked on it and we will receive the notification when the physics engine calls the OnTriggerEnter2D method.
To see a trigger in action, mark the Square GameObject's collider as a trigger:
Play the scene, and we’ll see that Circle GameObject is passing through the Square GameObject:
This happens because the Square GameObject is a trigger now. The physics engine won’t generate the expected behavior when two objects collide, but will instead send the OnTrigger methods to the involved GameObjects.
If we look at the Console window, you’ll notice that it is empty because no OnCollision methods are called. To log the OnTrigger methods, open our CollisionLogger script and add these new methods:
Run the scene and we can see this log in the Console window:
Now only OnTrigger methods are called because there is a trigger involved in the collision.
An important thing to note is that all OnCollision and OnTrigger methods receive the parameter Collision2D/Collider2D. This parameter can hold information about the collision itself, such as:
Which other GameObject collides with the current GameObject
Which contact points are involved in the collision
The relative linear velocity of the two colliding objects
If we don’t need to use this information in our script, we can declare the OnCollision/OnTrigger methods without the logging parameter.
Collider interactions
You probably noticed in the last section that there is parity between the OnCollision and OnTrigger methods the physics engine calls on the GameObjects involved in the collision. Knowing when each kind of interaction raises each kind of message/method in the involved GameObjects can be a little tricky; despite this apparent similarity, there are some rules for interaction possibilities between different collider setups.
There are six different setups a collider can have that will differently affect how it interacts with other colliders. These setups can be done by a combination of the properties IsTrigger of the Collider2D and the property Body Type of the Rigidbody2D attached to the same GameObject. Below is a list of similar setups:
Static Collider
IsTrigger: false
Body Type: Static
Rigidbody Collider
IsTrigger: false
Body Type: Dynamic
Kinematic Rigidbody Collider
IsTrigger: false
Body Type: Kinematic
Static Trigger Collider
IsTrigger: true
Body Type: Static
Rigidbody Trigger Collider
IsTrigger: true
Body Type: Dynamic
Kinematic Rigidbody Trigger Collider
IsTrigger: true
Body Type: Kinematic
How do these setups affect collider interactions?
The answer to this question is in the table below, which I took from the Unity documentation site. It shows us where the collisions happen and when the collision callbacks (the OnCollision and OnTrigger methods) are called.
Looking at the table, we can figure out things like:
A Static collider only interacts with a Rigidbody collider
A Rigidbody collider can interact with a Static collider, Rigidbody Collider, and Kinematic Rigidbody Collider
These tables can be very useful during game development, when we get stuck with some sort of collider interaction that we expected to happen but it doesn’t.
To help us to better understand the colliders’ interactions, now and when we face the kind of problem mentioned above, I created a sample where we can move the GameObjects through each of the six possible interaction setups, see how they interact with each other, and what callbacks messages are sent.
Try it and move each collider setup to better understand what messages are sent for each interaction
For the last part of this tutorial, I would like to mention the Physics2D settings.
These settings are not within the scope of this tutorial — talking about some of them could fill another whole tutorial — but I think it’s important to know that they exist, what their default values are, and that we can adjust them to the needs of our project.
You can access these settings via Project Settings > Physics 2D.
Settings like Gravity are pretty straightforward, but things like Velocity Iterations and Position Iterations can be a little obscure and can affect game behaviors a lot.
Most of these settings are changed when we need to achieve some kind of non-conventional physics behavior or performance improvement, but you should be aware that you’ll need to retest gameplay after each change you make to these settings to ensure that you haven’t broken anything.
The bottom line is: make sure to only change these settings after studying and understanding their impact.
In this tutorial, we’ve explained the fundamentals of Unity 2D Colliders: what they are, what their common properties and behaviors are, how to add a BoxCollider2D and CircleCollider2D to a GameObject, what a Rigidbody2D is and how to use PhysicsMaterial2D, what the collision callbacks are and how to use them on our scripts, and, finally, the kinds of collider setups and how they interact.
The sprites used on the WebGL sample are from Kenney.
]]>NO MORE ROOM IN HELL released2022-06-14T00:00:00-03:002022-06-14T00:00:00-03:00http://diegogiacomelli.com.br/no-more-room-in-hell-releasedOn June 14th I released my newest solo game called “NO MORE ROOM IN HELL”.
A 2D top-down survival shooter game where you will be a rookie soldier in a secret government lab when a zombie apocalypse starts out of blue and now you need to find your way to the docks for a chance to be with your wife and son again.
Game development
I started this side project game development in early 2021, but stopped and restarted again now and then while doing other things.
The whole programming and Unity game development was made only by me.
I took a lot of features I wanted in this type of game and implemented them, like inventory management, lots of weapons, missions, and a backstory that you can try to discover as you play the game.
There are 7 weapons available: gun, double gun, shotgun, grenade launcher, mine launcher, ice caster and mine. Well, you can also drive a car and kill a lot of zombies while driving, so maybe there are 8 weapons available.
Another cool thing I developed for the game is that a lot of the environment can be blown up and destroyed, I used my destructible sprite library for that.
I organized the game as a series, so the first 4 levels available are like the 4 episodes of season 1.
Credits
Sprites
Almost all sprites used in the game are from Kenney.
Soundtrack
The incredible soundtracks used in the game were created by Daniel HDR, a comic book artist, working on projects for DC Comics (Green Lantern Corps, Superman, Nightwing, Legion of Super-Heroes), Marvel Comics (Avengers, X-Men Forever, Falcon and Winter Soldier) and Dynamite Entertainment (The Shadow, Red Sonja, Kiss) Winner of the Dragon Awards as 2020’s “BEST GRAPHIC NOVEL” with Battlestar Galactica: Counterstrike.
Daniel HDR also has a sound side project called D3FCON1. I had discovered D3FCON1 during the game’s development and thought that some of their music matched the mood of the game perfectly.
Daniel was very kind to give me permission to use the music in the game, as well as providing an art to be used as the cover of the game (as you can see at the top of this post)
]]>HTML5 audio tag, large files and ASP .NET2022-04-19T00:00:00-03:002022-04-19T00:00:00-03:00http://diegogiacomelli.com.br/html5-audio-tag-large-files-and-asp-dotnetIntroduction
If you have tried to change the current playback position (currentTime) of large audio files using the HTML5 audio tag, even using the preload attribute, you probably struggled with the fact that the audios would never play at that position but would start playing again from the beginning of the audio.
This happens because most browsers, Chrome included, request that the headers accept-ranges and content-range should be in the audio file response.
ASP .NET solution
If you are using ASP .NET, the easiest way to include those headers in the response is to use the third parameter of the Controller's File method:
Then, the result response will have the needed headers that make browsers happy and allow you to change the audio’s playback position.
]]>Trijam 154 entry&colon; Who Kills Who?2022-02-01T00:00:00-03:002022-02-01T00:00:00-03:00http://diegogiacomelli.com.br/trijam-154-entry-who-kills-whoLast weekend I participated in Trijam #154.
Trijam is a weekly game jam where your goal is to make something playable (and fun!) in just 3 hours.
The theme
The theme for this game jam was “There is a twist…!”.
When you have just 3 hours to make a game, even a simple one, you will need to thinking about the idea and plan a lot before start.
Besides, the theme “There is a twist…!” was a challenge one, at least to me. I took some time to realize a idea to develop.
The final result is an Atari 2600 kind of game: Who Kills Who?
There are 3 different elements in the screen: Red, Green and Blue.
In the start Red kills Green, Green kills Blue and Blue kills Red.
The player can make a twist (here came the theme) and change Who Kills Who, making Blue kills Green, Green Kills Red and Red kills Blue.
]]>Puzzimals on itch.io2022-01-20T00:00:00-03:002022-01-20T00:00:00-03:00http://diegogiacomelli.com.br/puzzimals-on-itch-ioNow you can play my game Puzzimals directly in the browser through itch.io: https://giacomelli.itch.io/puzzimals
What is Puzzimals?
Don’t let the cute look or super fun animations fool you, Puzzimals is a cube-matching game challenging you to match identical tiles in 100 levels of thought-provoking puzzles in a world map.
Packed with features and creative puzzles you can combine cubes of ice, wild cards, bombs and so much more!
Each level unlocks and increases in difficulty and offers an almost infinite number of combos.
Fans of casual puzzle games will enjoy the crisp, colorful graphics featuring cute animals and the compelling music offers great relaxation.
If you already worked on a project where the data access solution has used SQL commands, instead of some ORM solution, you probably saw some SQL commands inserted directly inside the C# code. I worked on projects with that approach too, but I saw a great problem with that: We were treating a complete language (SQL) as just a string inside our C# code. No IntelliSense, code completion, syntax validation, format, etc.
If
Some time ago, with that problem in mind, I created a small library to help us to use SQL commands in our project at that time. As we were using Dapper as our facilitator to access the SQL Server database, we needed to write SQL commands as our daily base activities.
That library, called SqlAsFile, helped us to write SQL commands in separated .sql files and use them inside the C# as typed string property of a static class (using T4 generator). This allowed us to write SQL with the whole help of IDE and with no chance to reference an invalid SQL file path.
Setup
Install the SqlAsFile on your Data project (where your .sql files will be created) using the Nuget package or using the source code from GitHub: https://github.com/giacomelli/sqlasfile.
Change the namespace of line bellow to the namespace of your Data project.
Add your .sql files inside any folder or subfolder of your Data project.
The Build Action property of the .sql files should be changed to Embedded Resource.
Run the SqlInfoGenerator.tt every time you add or remove .sql file from the project. You don’t need to that when you just change the content of already existing .sql file. (right click, Run Custom Tool)
Usage
Now you can access the content of your .sql files in a strongly typed way directly from your C# code:
Tags
You can use some tags to tell to SqlAsFile’s parser how to treat a portion of the file:
test-args
Anything inside of these tags will be strip off of the SQL that you can access on C#.
This tag is useful when you want to test the .sql directly against the DB without need to define the arguments every time.
cte
Use this tag if you want to read the CTE of your file in the Cte property on C#.
The Unity 2020.2 was official release on December 15, 2020 with a lot of fixes, API changes, changes, improvements and features.
You can find the new features directly on the Unity manual accessing this search: newin20202.
To read all items, access the complete release notes.
Stats
Fixes: 828
API Changes: 128
Changes: 86
Improvements: 261
Features: 66
My feature highlights
Below are the features that most caught my attention and that I believe can positively impact my development workflow.
Reorder Arrays and Lists in the Inspector
Arrays and Lists are now reorderable in the Inspector, and you can use the attribute [NonReorderable] to disable this function if you prefer
Root namespace in asmdef inspector
Root Namespace is now available as a new field in the asmdef inspector.
The Root Namespace will be used to add the namespace when creating scripts in Unity and in Visual Studio and Rider.
C# 8.0 support
Supports all the newest C# 8 features and enhancements, except for default interface methods.
You can learn more about C# 8 features in this posts.
Roslyn analyzers support
The compilation pipeline now supports Roslyn analyzers. This enables you to run C# code analyzers asynchronously in the background inside the Unity Editor without interrupting your iteration workflow. You can also run them synchronously from the command line.
Roslyn analyzers and ruleset files in Unity projects are powerful tools to help inspect your code for style, quality, and other issues. You can use existing analyzer libraries to inspect your code and write your own analyzers to promote the best practices or conventions within your organization.
Quick Search 2.0
Unity Quick Search is a handy package that enables you to search for anything in Unity. Quick Search 2.0 is now available and comes with more search tokens and the ability to provide contextual completion when typing queries. Scene searching is no longer limited to just the open Scene, but instead, it’s now possible to search through all the Scenes and Prefabs of your project at once.
Roslyn Reference Assemblies
Enables the Roslyn Reference Assemblies option by default when compiling C# scripts in the Editor, avoiding unnecessary recompiling of asmdef references. If you make changes that don’t involve code – for example, to materials, shaders or prefabs – the IL2CPP conversion from .NET assemblies to C++ will now be skipped entirely when building a player.
Conclusion
These were the features that brought my attention to Unity 2020.2.
What were the features that caught your attention?
]]>unitytips&colon; Editor internal menus2020-12-08T00:00:00-03:002020-12-08T00:00:00-03:00http://diegogiacomelli.com.br/unitytips-editor-internal-menusUnity Editor has a kind of an easter-egg where you can enable internal menus, like Project / Save As Template, Screenshots, etc.
Unity Editor internal menus
Enabling internal menus
To enable those menus, go to Help / About Unity, then type internal, after that, you will see some new menus available on Unity Editor:
Project / Save As Template
Packages / Reset Package Database
Window / Internal
Undo
Screenshot
Set Window Size
Set Window Size Small
Snap View
Snap View Toolbar
Snap View Extended Right
Snap Component
Snap Game View Component
Disabling internal menus
To disable the menus, go to Help / About Unity, then type internal again.
]]>unitytips&colon; Indices2020-12-08T00:00:00-03:002020-12-08T00:00:00-03:00http://diegogiacomelli.com.br/unitytips-indicesUnity started to supporting C# 8.0 with version 2020.2 beta and now we can start to use some new features like the Indices.
Introduction
Indices provide a succinct syntax for accessing single elements in array/collection.
Consider the array below:
The 0 index is the same as sequence[0].
The ^0 index is the same as sequence[sequence.Length].
Note that sequence[^0] does throw an exception, just as sequence[sequence.Length] does. For any number n, the index ^n is the same as sequence.Length - n.
]]>unitytips&colon; Tuple Patterns2020-12-01T00:00:00-03:002020-12-01T00:00:00-03:00http://diegogiacomelli.com.br/unitytips-tuple-patternsUnity started to supporting C# 8.0 with version 2020.2 beta and now we can start to use some new features like the Tuple Patterns.
Introduction
Some algorithms depend on multiple inputs. Tuple patterns allow you to switch based on multiple values expressed as a tuple.
The tuples provides concise syntax to group multiple data elements in a lightweight data structure.
Sample
In this sample MonoBehaviour, we will get the message to indicate the winner of the game rock, paper, scissors.
]]>unitytips&colon; Property Patterns2020-11-24T00:00:00-03:002020-11-24T00:00:00-03:00http://diegogiacomelli.com.br/unitytips-property-patternsUnity started to supporting C# 8.0 with version 2020.2 beta and now we can start to use some new features like the Property Pattern.
Introduction
Property Patterns enables you to match on properties of the object examined in a Switch Expressions.
The switch expression provides for switch-like semantics in an expression context. It provides a concise syntax when the switch arms produce a value.
Sample
In this sample, we will calculate the damage that an NPC can cause taking into account if it is an enemy, and if it is armed.
]]>unitytips&colon; Switch Expressions2020-11-17T00:00:00-03:002020-11-17T00:00:00-03:00http://diegogiacomelli.com.br/unitytips-switch-expressionsUnity started to supporting C# 8.0 with version 2020.2 beta and now we can start to use some new features like the Switch Expression.
Introduction
Switch Expressions can dramatically simplify and reduce the LOC (Lines Of Code) to make a switch.
The switch expression provides for switch-like semantics in an expression context. It provides a concise syntax when the switch arms produce a value.
Often, a switch statement produces a value in each of its case blocks. Switch expressions enable you to use more concise expression syntax. There are fewer repetitive case and break keywords, and fewer curly braces.
Sample
Classic switch
In the code below we have a classic switch statement:
Switch expression
And we can reduce 7 lines of code of this simple switch statement using a switch expression:
Visual Studio tip
If you are using Visual Studio, there is a Quick action (CTRL + .) to convert from a classic switch to a switch expression:
]]>ARC-8&colon; devlog &num;4 - CHIP-8 inside Unity Inspector2020-11-11T00:00:00-03:002020-11-11T00:00:00-03:00http://diegogiacomelli.com.br/arc-8-devlog-4Some years ago I coded a CHIP-8 emulator in C# just for fun, that emulator was hibernating in a private repository that I never released. Some days ago I started to working on it again with the idea to release it running on Blazor and as a Unity asset where any game developer could drag its prefabs as easter eggs directly to their games.
In this post, I will talk about how I put a CHIP-8 emulator to run inside the Unity Editor Inspector Window.
To help to understand everything in this post I recommend you read the previous ARC-8 devlog posts, in special the last one.
The source code is not yet published on GitHub, I will notify in this series of posts about ARC-8 devlog and on my Twitter too when this happens.
Introduction
I wanted to run the graphics of the emulator inside the Unity Editor Inspector Window. Maybe, you can ask “why?”, well there is an inside joke among Unity developers where we try to play not expected things inside the inspector window, as you can see in the links below:
In the method StartEmulator we start the emulation inside the Inspector Window.
After starting the emulator by calling the Run method of Chip8Loader passing our local EditorChip8Input to override the emulator input to always use the keyboard.
We use the EditorCoroutineUtility.StartCoroutine method from the Editor Coroutines package to start two coroutines for update and render emulator inside the editor.
The StopEmulator stops the emulation inside the Inspector Window using the EditorCoroutineUtility.StopCoroutine.
UpdateEmulator and RenderEmulator methods
In the method UpdateEmulator we call LateUpdate from Chip8Loader to run a emulation cycle.
The RenderEmulator calls the Repaint from Editor to redraw the inspector using the OnInspectorGUI.
OnInspectorGUI method
When the emulation is not running this method just draws the Chip8Loader inspector using the DrawDefaultInspector.
When we click on the button Test emulator on the inspector, the emulation is activated and the emulation will be rendered on the inspector.
When we use the GUI.BeginClip everything that we draw using the GL (Low-level graphics library) will be rendered inside the area passed as an argument to BeginClip. This is why we call Graphic.Render between the BeginClip and EndClip.
In the last step, we read the input using input.ReadKeys.
Next step
In the next ARC-8 devlog post I will probably talk about the release of the ARC-8 as an open-source project.
If you have any doubts about what I talk about above or any tip about the CHIP-8 emulator (or Unity) and you like to share it, please let me know in the comments section below.
]]>Gamedev Utility Belt&colon; Graphy2020-11-05T00:00:00-03:002020-11-05T00:00:00-03:00http://diegogiacomelli.com.br/gamedev-utility-belt-graphyI decided to start a series of posts about some game development resources that are part of my gamedev utility belt and that helps me on my game projects.
For this second post, the chosen one is the Graphy by Martín Pane that I used in a lot of my Unity projects.
Introduction
Graphy is:
a feature packed FPS Counter, stats monitor and debugger
My main use for it was to monitor the FPS of my mobile games, but Graphy has many other features:
With this tool you will be able to visualize and catch when your game has some unexpected hiccup or stutter, and act accordingly!
The debugger allows you to set one or more conditions, that if met will have the consequences you desire, such as taking a screenshot, pausing the editor, printing a message to the console and more! Even call a method from your own code if you want!
Just drag the [Graphy] prefab from folder Assets/Taxy/Graphy - Ultimate Stats Monitor to your scene and Play the scene to see it in action.
]]>ARC-8&colon; devlog &num;3 - Unity2020-11-04T00:00:00-03:002020-11-04T00:00:00-03:00http://diegogiacomelli.com.br/arc-8-devlog-3Some years ago I coded a CHIP-8 emulator in C# just for fun, that emulator was hibernating in a private repository that I never released. Some days ago I started to working on it again with the idea to release it running on Blazor and as a Unity asset where any game developer could drag its prefabs as easter eggs directly to their games.
In this post, I will talk about how I implemented the graphics, sound, input, and log systems for Unity 3D.
The source code is not yet published on GitHub, I will notify in this series of posts about ARC-8 devlog and on my Twitter too when this happens.
Introduction
If you were out of the planet in the last decade, maybe you don’t know what is Unity: Unity is a cross-platform game engine developed in C++, but the games made on it are developed using .NET and C#.
Unity is a cross-platform game engine developed by Unity Technologies, first announced and released in June 2005 at Apple Inc.’s Worldwide Developers Conference as a Mac OS X-exclusive game engine. As of 2018, the engine had been extended to support more than 25 platforms. The engine can be used to create three-dimensional, two-dimensional, virtual reality, and augmented reality games, as well as simulations and other experiences. The engine has been adopted by industries outside video gaming, such as film, automotive, architecture, engineering and construction.
In older versions, Unity only supported a subset of .NET Framework (4.x), but nowadays it’s supporting .NET Standard 2.0.
This is why we can use our ARC-8 Core, mentioned in the first devlog, because it is a .NET Standard class library and can run directly on Unity.
The 3D models of the arcade cabinet and arcade room were created by my talented friend Giusepe Casagrande.
Systems interfaces implementations
The system interfaces IGraphic, ISound, IInput, and ILog will be implemented as MonoBehaviour.
The MonoBehaviour class is the base class from which every Unity script derives, by default. TPovides the framework which allows you to attach your script to a GameObject in the editor, as well as providing hooks into useful Events such as Start and Update.
Chip8Graphic.cs MonoBehaviour (IGraphic)
This is the IGraphic implementation.
Intialize method
In the method Initialize we verify if will render to the main camera or to a specific target camera, then we set some camera configuration, create the material we will use to render the CHIP-8 graphic, get the screen size, then we initialize our Double Buffer array.
In most cases, we don’t use the main camera, but instead, use a target camera that uses a RenderTexture, and then we can use that texture on any surface on our game, like a TV screen or an arcade cabinet.
Render Textures are special types of Textures that are created and updated at run time. To use them, you first create a new Render Texture and designate one of your Cameras to render into it. Then you can use the Render Texture in a Material just like a regular Texture.
Draw method
This is one of the two methods that needed to be implemented of IGraphic interface. We received the array (64x32) of bytes representing the current state of CHIP-8 graphics and just update our local array variable _gfx.
OnRenderObject
The method OnRenderObject is called after the camera has rendered the scene.
OnRenderObject can be used to render your own objects using Graphics.DrawMeshNow or other functions. This function is similar to OnPostRender, except OnRenderObject is called on any object that has a script with the function; no matter if it’s attached to a Camera or not.
Render method
The method Render will be called by the OnRenderObject method.
This method is used to draw the state of CHIP-8 graphics (_gfx array) to the current camera using the GL (Low-level graphics library).
Use GL class to manipulate active transformation matrices, issue rendering commands similar to OpenGL’s immediate mode and do other low-level graphics tasks. GL immediate drawing functions use whatever is the “current material” set up right now (see Material.SetPass). The material controls how the rendering is done (blending, textures, etc.)
We use a second array called _buffer to implement a Double Buffer and reduce the screen flickering.
A byte with value 1 should be drawn (foreground color) and a byte with value 0 should not be drawn (background color).
Invalidate method
This is the second of the two methods needed to be implemented of IGraphic interface, but as we implemented a Double Buffer, this method does not need to perform any operation.
SetRenderTexture method
It just set the RenderTexture of the current target camera.
Chip8Sound.cs MonoBehaviour (ISound)
This is the ISound implementation.
Awake method
We just try to locate our AudioSource component that will be used to play the sound.
Play method
This is the only method we need to implement of ISound interface and it just calls the AudioSource’s PlayOneShot using the AudioClip defined on _beep field.
KeyboardChip8Input.cs MonoBehaviour (IInput)
This is the IInput implementation for the keyboard.
Key mapping
First, we create the dictionary _map to map the real keyboard keys to CHIP-8 keypad keys.
UpdateKeys method
The only method we need to implement for IInput interface.
In this method, we set to 1 the CHIP-8’s keypad keys that were pressed by the player using the Input.GetKey method.
Chip8Log.cs MonoBehaviour (ILog)
This is the ILog implementation.
Debug and Error methods
The two methods implemented for ILog interface use methods available on Unity Debug class to send log messages to the console window.
Chip8Loader.cs
This is a simplified version of the component responsible to load all systems (IGraphic, ISound, IInput, and ILog), initialize the Chip8 class emulator, and load the ROM.
Start method
Verifies if all the systems needed to run the emulator were configured in the editor, then sets the desired FPS and starts to run the emulator.
Run and Restart methods
These two methods have some overloads, but in the end, they will create a new instance of the Arc8.Chip8 class using the systems defined and will load the ROM.
LateUpdate method
We use the LateUpdate method from MonoBehaviour to run the emulator EmulateCycle method.
LateUpdate is called every frame after all Update functions have been called.
If you have any doubts about what I talk about above or any tip about the CHIP-8 emulator (or Unity) and you like to share it, please let me know in the comments section below.
]]>unitytips&colon; Scene Selection Toolbar2020-11-03T00:00:00-03:002020-11-03T00:00:00-03:00http://diegogiacomelli.com.br/unitytips-scene-selection-toolbarUsing Unity Toolbar Extender by Marijn Zwemmer’s and Ondrej Petrzilka’s you can easily add buttons side by side of play/pause/step buttons on the Unity editor toolbar.
Scene Selection Toolbar
I created a gist, called Scene Selection Toolbar, that uses the Unity Toolbar Extender and allows us to have a dropdown with the most used scenes right on the side of the Play button.
Usage
Import the Unity Toolbar Extender as described in the Import section on GitHub.
Then, just add it the gist below to any Editor folder of your project or use the Gist Importer.
Add the current scene to the list: with any scene opened, you can click on the + button to add it to the scenes dropdown.
Remove the current scene from the list: just click the - button to remove the current scene from the list.
Open a scene from the list: select any scene in the dropdown to open that scene on the editor.
]]>ARC-8&colon; devlog &num;2 - Blazor2020-10-29T00:00:00-03:002020-10-29T00:00:00-03:00http://diegogiacomelli.com.br/arc-8-devlog-2Some years ago I coded a CHIP-8 emulator in C# just for fun, that emulator was hibernating in a private repository that I never released. Some days ago I started to working on it again with the idea to release it running on Blazor and as a Unity asset where any game developer could drag its prefabs as easter eggs directly to their games.
In this post, I will talk about how I implemented the graphics, sound, input, and log systems for Blazor.
The source code is not yet published on GitHub, I will notify in this series of posts about ARC-8 devlog and on my Twitter too when this happens.
Introduction
Blazor is a feature of ASP.NET that extends the .NET developer platform with tools and libraries for building web apps.
Blazor can run your client-side C# code directly in the browser, using WebAssembly. Because it’s real .NET running on WebAssembly, you can re-use code and libraries from server-side parts of your application.
This is why we can use our ARC-8 Core, mentioned in the previous devlog, because it is a .NET Standard class library and can run directly on Blazor web assembly.
For some components, like menu, inputs, and buttons I use the Blazorise library.
Online demo
You can test and play the CHIP-8’s games directly on your browser with our online demo: ARC-8 Blazor Online Demo.
Systems interfaces implementations
The system interfaces IGraphic, ISound, IInput, and ILog will be implemented as Blazor components.
A component is a self-contained chunk of user interface (UI), such as a page, dialog, or form. A component includes HTML markup and the processing logic required to inject data or respond to UI events. Components are flexible and lightweight. They can be nested, reused, and shared among projects.
Chip8Graphic.razor component (IGraphic)
This a simplified version of IGraphic implementation (without of color selector that you can see in the demo).
C# side
JS side
OnAfterRenderAsync method
In the method OnAfterRenderAsync we verify if it’s the component’s first render, then we call a JS method that will initialize a JS helper for Chip8Graphic.razor that will return the size of the canvas to C# code, then we use this information to scale our 64 x 32 CHIP-8’s display.
OnAfterRenderAsync and OnAfterRender are called after a component has finished rendering. Element and component references are populated at this point. Use this stage to perform additional initialization steps using the rendered content, such as activating third-party JavaScript libraries that operate on the rendered DOM elements.
Draw method
This is one of the two methods needed to be implemented of IGraphic interface. We received the array (64x32) of bytes representing the current state of CHIP-8 graphics and just update our local array variable _gfx.
RenderAsync method
The method RenderAsync will be called by the Chip8Loader component during the Game Loop.
This method is used to draw the state of CHIP-8 graphics (_gfx array) to the HTML page.
We use a second array called _buffer to implement a Double Buffer and reduce the screen flickering.
A byte with value 1 should be drawn (foreground color) and a byte with value 0 should not be drawn (background color).
Invalidate method
This is the second of the two methods needed to be implemented of IGraphic interface, but as we implemented a Double Buffer, this method does not need to perform any operation.
Resize method
Called by the JS side every time that the user resizes the browser window.
ClearCanvasAsync method
We use this one to invalidate our _buffer and reset the canvas to the background color.
Chip8Sound.razor component (ISound)
This a simplified version of ISound implementation.
C# side
JS side
OnInitialized method
We just use the information from NavigationManager to set the audio file we want to play.
Play method
This is the only method we need to implement of ISound interface and it just calls a JS method that will get the audio tag on the component, set the AudioSource, then load, and play it.
Chip8Input.razor component (IInput)
This is the IInput implementation.
C# side
JS side
Key mapping
First we create the dictionary _map to map the real keyboard keys to CHIP-8 keypad keys.
The second dictionary we create is _keyDown. It will be used to map what keys the player is pressing.
OnAfterRenderAsync method
We call the JS method chip8Input.init that will add two event listeners, one for keydown and the other for keyup that will call the C# methods HandleKeyDown and HandleKeyUp.
UpdateKeys method
The only method we need to implement for IInput interface.
In this method, we set to 1 the CHIP-8’s keypad keys that were pressed by the player.
HandleKeyDown and HandleKeyUp methods
This method is responsible to set the _keyDown dictionary by the keyboard keys that the player pressed.
Chip8Log.razor component (ILog)
This is a simplified version of the ILog implementation.
C# side
Debug and Error methods
The two methods implemented for ILog interface use the Microsoft.Extensions.Logging.ILogger<T> to send log messages to the browser console.
Chip8Loader.razor
This is a simplified version of the component responsible to load all systems (IGraphic, ISound, IInput, and ILog), initialize the Chip8 class emulator, load the ROM and perform the game loop.
C# side
JS side
OnAfterRenderAsync method
Initializes the emulator with the systems, then calls the JS chip8Loader.init function that will use the browser window.requestAnimationFrame to call the C# method RunCycle.
The window.requestAnimationFrame() method tells the browser that you wish to perform an animation and requests that the browser calls a specified function to update an animation before the next repaint.
RunCycle method
This method is called by the JS (window.requestAnimationFrame).
We implement a Game Loop and in the end, call the Chip8Graphic.RenderAsync.
Next step
In the next ARC-8 devlog I will talk about the ARC-8’s implementation on Unity3D.
If you have any doubts about what I talk about above or any tip about the CHIP-8 emulator (or Blazor) and you like to share it, please let me know in the comments section below.
]]>ARC-8&colon; devlog &num;1 - Core and code design2020-10-28T00:00:00-03:002020-10-28T00:00:00-03:00http://diegogiacomelli.com.br/arc-8-devlog-1Some years ago I coded a CHIP-8 emulator in C# just for fun, that emulator was hibernating in a private repository that I never released. Some days ago I started to working on it again with the idea to release it running on Blazor and as a Unity asset where any game developer could drag its prefabs as easter eggs directly to their games.
In this post, I will talk about my premises for the ARC-8’s code design that guided me during its development.
The source code is not yet published on GitHub, I will notify in this series of posts about ARC-8 devlog and on my Twitter too when this happens.
Introduction
I always wanted to develop a video game emulator. Anybody that tried or even google about it quickly realizes that it is not an easy or simple task.
If you search a little further you will see developers talking about CHIP-8 as the best thing to emulate as your first emulator project. Why? Well, the CHIP-8 is quite a simple virtual machine that has only 35 opcodes, simple graphic, sound, and input systems too.
CHIP-8
According to Wikipedia:
CHIP-8 is an interpreted programming language, developed by Joseph Weisbecker. It was initially used on the COSMAC VIP and Telmac 1800 8-bit microcomputers in the mid-1970s. CHIP-8 programs are run on a CHIP-8 virtual machine. It was made to allow video games to be more easily programmed for these computers.
CHIP-8 is an interpreted minimalist programming language that was designed by Joseph Weisbecker in the 1970s for use on the RCA COSMAC VIP computer. Due to its hexadecimal format, it was best suited to machines with a scarcity of memory, as minimal text processing had to be performed by the interpreter before a program could be executed. This property inevitably led to its implementation on a variety of hobbyist computers aside from the VIP, such as the COSMAC ELF, Telmac 1800, and ETI 660.
ARC-8
I won’t get into details about how to implement each of CHIP-8’s 35 opcodes, because there are plenty of tutorials and resources talking about this on the internet (look in the section ‘Further reading’ in the of this post). My focus here is to explain my code design decisions to allow built a CHIP-8 emulator core in .NET Standard that will allow us to develop a graphic, sound, and input systems for Blazor and Unity3D (and any other platform where C# / .NET is supported).
Why the name ARC-8? well, the choice of the name was quite chaotic as any of the name ideas brainstorm that I have had with my friend Giusepe Casagrande. The name’s meaning and the way of speaking are Arcade because we want to remember that old day when we are kids playing some classic games in an arcade or fliperama as we call it in Brazil.
Premises
First of all, before started do develop the code, I needed to sit down and defined some premises of the ARC-8’s code design, they are:
Premise 1 - Cross-platform: the ARC-8 core solution should be cross-platform.
Premise 2 - Testable: code must be testable.
Premise 3 - 100% code coverage: Unit test code coverage for the core should be 100%.
Premise 4 - Benchmark: benchmark the code to verify and compare solutions performance.
Premise 1 - Cross-platform
To make the ARC-8 core solution cross-platform, the first decision is to implement it as .NET Standard class library. The second one is to define the graphic, sound, input, and logging systems of the emulator as interfaces that will only be implemented on specific platforms, like Blazor and Unity3d.
Systems interfaces
Premise 2 - Testable
The main part of a CHIP-8 emulation development is on the opcodes.
The common solution for many emulators is to put all opcodes inside a giant switch statement (some use nested switch to group some opcodes).
There is no problem in this kind of solution, but besides the code readability that can easily suffer from too many cases in the switch statement, there is a problem with the idea of unit testing, because we cannot test each opcode isolated.
Sure, you can still unit testing an emulator with opcodes in a switch statement, but I decided to define an interface that an opcode needs to implement to be used on the emulator.
IOpcode interface
An IOpcode’s implementation
Premise 3 - 100% code coverage
With the decision of implement each opcode in a separate classes and the decision of use interfaces for each system, we can easly unit test them and achieve the 100% code coverage:
To validate the code coverage I used the coverlet.msbuild and ReportGenerator Nuget packages combined with Cake’s recipe to generate a code coverage report:
Premise 4 - Benchmark
I like to benchmark the code to compare some solutions in a fast and precise way. To create a benchmark in the .NET system the BenchmarkDotNet is the right choice. BenchmarkDotNet is quite easy to use and you can set up a project with it in less than 5 minutes.
When I used it on ARC-8 implementation I discover that I could improve the performance in 18x just removing a Linq code and using a cached solution to locate the opcodes.
Next step
In the next ARC-8 devlog I will talk about the ARC-8’s implementation on Blazor.
If you have any doubts about what I talk about above or any tip about the CHIP-8 emulator and you like to share it, please let me know in the comments section below.
]]>unitytips&colon; Overview of .NET in Unity2020-10-27T00:00:00-03:002020-10-27T00:00:00-03:00http://diegogiacomelli.com.br/unitytips-overview-of-donet-in-unityUnity Official documentation has an amazing page called Overview of .NET in Unity that highlight 8 points about the usage o .NET in Unity.
I think it’s important to any pro programmer in Unity quite understand those points, because of this I list them below, in a brief way. You can (and should) read the full documentation to understand all the 8 points listed in more depth.
Mono uses just-in-time (JIT) compilation and compiles code on demand at runtime.
IL2CPP uses ahead-of-time (AOT) compilation and compiles your entire application before it is run.
Managed code stripping
When you build your application, Unity scans the compiled assemblies (.DLLs) to detect and remove unused code.
This process reduces the final binary size of your build, but increases build time.
Garbage collection (GC)
Garbage collector only runs for a limited period of time and does not necessarily collect all objects in one pass. This spreads the time it takes to collect objects over a number of frames and reduces the amount of stuttering and CPU spikes.
.NET system libraries
Unity tries its best to support as much of the .NET ecosystem as possible, there are some exceptions to parts of the .NET system libraries that Unity explicitly does not support.
You should use the .NET Standard 2.0 API Compatibility Level for all new projects.
Third-party .NET libraries
You should only use third-party .NET libraries that have been extensively tested on a wide range of Unity configurations and platforms.
You should profile the usage of your .NET system libraries on all target platforms.
C# reflection overhead
GC continuously scans the cached C# reflection objects, which causes unnecessary overhead.
To minimize the overhead, avoid methods such as Assembly.GetTypes and Type.GetMethods().
UnityEngine.Object special behavior
UnityEngine.Object is a special type of C# object in Unity, because it is linked to a native C++ counterpart object.
MonoBehaviour/ScriptableObject override the equality (==) and inequality (!=) operators.
Avoid using async and await
The Unity API is not thread safe and therefore, you should not use async and await tasks.
Async tasks often allocate objects when invoked, which might cause performance issues if you overuse them.
]]>Gamedev Utility Belt&colon; Unity Native Share Plugin2020-10-23T00:00:00-03:002020-10-23T00:00:00-03:00http://diegogiacomelli.com.br/gamedev-utility-belt-unity-native-share-pluginI decided to start a series of posts about some game development resources that are part of my gamedev utility belt and that helps me on my game projects.
A Unity plugin to natively share files (images, videos, documents, etc.) and/or plain text on Android & iOS.
When you use this plugin on the Android and iOS project you will be able to invoke the native share of the target operating system.
For example, here is the result when I used it on Android:
]]>Unity Game Growth Program&colon; Tips & Tricks2020-10-20T00:00:00-03:002020-10-20T00:00:00-03:00http://diegogiacomelli.com.br/unity-game-growth-program-tips-and-tricksIn this post, I will list some tips and tricks that I learned while applying my game Puzzimals to the Unity Game Growth Program.
Game Growth is a new game accelerator for mobile indie developers. We partner with indie game devs so they can quickly and effectively scale their games while remaining 100% independent. Becoming a partner gives you access to user acquisition funding alongside industry-leading tools and experts in game operations. The best part? You keep full ownership of your studio and intellectual property.
If you meet the criteria and we accept you into the program, Unity will fund user acquisition for your game and provide the technology and Unity experts to help manage player engagement and monetization. We take care of the process that helps grow your game while you concentrate on development.
Game Growth is a revenue-sharing program – Unity and the developer team split the revenue from advertising and in-app purchases 50/50 after the user acquisition spend has been recouped. Put simply, Unity covers the cost of bringing in new players while we both share in the reward.
According to documentation, the Unity Game Growth Program works through 4 steps:
Submit Game & Integrate Package
Getting started is easy. All you need is a published free-to-play mobile game made with Unity. Begin your application by submitting your project, advertising assets, and installing the Game Growth package.
Evaluation
This stage determines if your game is a good candidate for the program. We take a look at your core game performance, project details and overall program fit. If everything looks good, Unity covers the cost of a full user acquisition test.
Optimize Game Operations
If you become a partner, we work with you to design features, integrate business services, and optimize player engagement and monetization. You will also have access to a dedicated game ops team that works with you every step of the way.
Accelerate your Game
Game Growth gives you access to the user acquisition funding and resources to take your game to the next level - with a 50/50 revenue sharing model. We acquire the right players then effectively manage those lifecycles and provide guidance for monetization.
Requirements
There are 7 requirements that your game must meet to apply to the program:
Made with Unity: game must be made with Unity 2018.4 or later.
Mobile Free-to Play: game must be free-to-play on iOS or Android.
Published Games: game must be currently live and published on the Google Play or Apple App Store.
Connected to Unity Dashboard: game must be connected to the Unity Dashboard and have a valid project ID.
Age Restrictions: not accepting games aimed at audiences under 13 years of age.
Advertising Assets: submit images and videos for use in Unity ads.
Is not the intent of this post cover everything about how to get through the Unity Game Growth Program, I guess this quite well documented on Unity Game Growth Program page.
The idea of this post is focused on the first of the four-step: Submit Game & Integrate Package.
Read the docs
Please, if you did not read the official documentation yet, go to Game Growth Program page, click in the Apply button and follow the instructions
After you finish the 6 - Confirm come back here. You’ll better understand this post and tips & tricks after that.
Submit Game & Integrate Package
The Submit Game & Integrate Package step is divided into 3 sub-steps:
Download and Install Package
Run & Validate Integration
Publish & Validate Integration
Download and Install Package
Download the Game Growth package and integrate it into your project. Once installed, refer to the package documentation for next steps.
You need to download the package through the Download Package, then in Unity, open the Package Manager window install it from the tarball option.
if you are using Unity version previous 2019.4, you need to use the option Add package from disk
Tip & Trick
After installing the package, if your using UnityEngine.Purchasing in your project and you use Assembly Definitions too you can see a lot of errors in the console about it, like error CS0246: The type or namespace name 'IStoreController' could not be found (are you missing a using directive or an assembly reference?)
To fix it, just reference again the UnityEngine.Purchasing on the Assembly Definition references:
Easy On-Boarding
Now, open the menu Game Growth / Easy onboarding and follow the steps.
Run & Validate Integration
After the package has been installed and configured for sandbox, run your game on the devices . To confirm integration, make sure you remove the game from your device, reinstall, and then launch the game.
Build, install, and run the game on your target device (iOS / Android).
Then go to Unity Dashboard and try to confirm the Run & Validate integration, this can take minutes or even hours to allow you to confirm successfully.
Tip & Trick
Running the shell ./adb logcat -s Unity PackageManager dalvikvm DEBUG while running the game on an Android device I saw errors like this on the game log:
UriFormatException: Invalid URI: The hostname could not be parsed
at DeltaDNA.Network+<SendRequest>
[DDSDK] [WARNING] Event upload failed - try again later
I found out that the collect_url and engagement_url in the /Assets/DeltaDNA/Resources/ddna_configuration.xml file were empty and this was an error cause.
To fix it, I had to go to the Game Growth / Configuration menu, then click on the Configure SDKs button, so collect_url and engagement_url were correctly configured in the file.
Publish & Validate Integration
The final step is to publish your project on the Apple App Store and Google Play Store. Don’t forget to switch the package environment dropdown from Sandbox to Store in GGLauncher prefab. Run your game on the devices.
Build and publish the game to the store (App Store or Google Play), download/update the game and run it on your device.
Then go to Unity Dashboard again and try to confirm the Publish & Validate integration, this can take minutes or even hours to allow you to confirm successfully.
Conclusion
I hope that these tips and tricks that I learned while applying my game Puzzimals to the Unity Game Growth Program can be useful to you too.
If you have any other tips & tricks you use on the Unity Game Growth Program process and you like to share it, please let me know in the comments section below.
]]>OWASP ZAP Path Traversal and ASP .NET&colon; Notes2020-10-15T00:00:00-03:002020-10-15T00:00:00-03:00http://diegogiacomelli.com.br/owasp-zap-path-traversal-and-asp-dotnet-notesIn this post, I wrote some notes of my experience trying to understand the alerts about the Path Traversal attack while running OWASP ZAP against an ASP .NET project.
OWASP ZAP
OWASP ZAP (short for Zed Attack Proxy) is an open-source web application security scanner. It is intended to be used by both those new to application security as well as professional penetration testers.
A path traversal attack (also known as directory traversal) aims to access files and directories that are stored outside the web root folder. By manipulating variables that reference files with “dot-dot-slash (../)” sequences and its variations or by using absolute file paths, it may be possible to access arbitrary files and directories stored on file system including application source code or configuration and critical system files.
The most common way to use this kind of attack in ASP .NET applications is trying to download some configuration files, like the web.config file, from the server file system. By default, the IIS handlers will not allow download this kind of file.
Validating user input
It is good practice (mandatory in fact) to validate user input, especially on routes/actions where there is some kind of access to the file system.
OWASP ZAP docs say:
Validate the user’s input by only accepting known good – do not sanitize the data
ModelState.IsValid
An easy way to perform a basic user input validation is to use the ModelState.IsValid, this property will always be false if any data sent by the client has an invalid or unexpected value. This is a good way to only accepted the expected type for model properties.
Model state represents errors that come from two subsystems: model binding and model validation. Errors that originate from model binding are generally data conversion errors. For example, an “x” is entered in an integer field. Model validation occurs after model binding and reports errors where data doesn’t conform to business rules. For example, a 0 is entered in a field that expects a rating between 1 and 5.
A way that you can extend and either improve the validation is using the Validation attributes, like CreditCard, Compare, EmailAddress, Phone, Range, RegularExpression, Required, StringLength, Url, and Remote,
ValidateModelAttribute
You can even use a custom ActionFilterAttribute to validate all your action models like the MS official documentation suggest: Model Validation in ASP.NET Web API.
And use it on WebApiConfig:
Does not matter if you will use Validation attributes or another validation way, the important thing here is you should always validate the user input before use it.
Check all file system handling actions
If you have any action on your API that lets the user define a file system path, be sure to validate if it not passing strings like ../ or ..\. If you not validate inputs like this, you can allow an attacker to navigate on your app file system, even the host machine file system.
OWASP ZAP docs say:
Ensure the user cannot supply all parts of the path – surround it with your path code
False Positives
OWASP ZAP can report some false positives, especially for routes that have an argument with the same name of the action: https://localhost:8080/api/tests/test1?kind=test1
This happens because OWASP ZAP tries to use action name in all arguments in an attempt to see if can access a different resource or file.
In my case, all reports like this were false positives.
You can change the risk alert to False Positive for each URL in the context alert filters:
Remember: only mark an alert as false positive after had to validate that URL action code and you are certain that is a false positive
Conclusion
In most cases ASP .NET Web APIs/Apps are not exposed to a Path Traversal attack, but a poor user input validation in file system handling action can easily expose the whole API/APP.
These are the basic rules of OWASP ZAP documents:
How to identify if you are vulnerable
Be sure you understand how the underlying operating system will process filenames handed off to it.
Don’t store sensitive configuration files inside the web root
For Windows IIS servers, the web root should not be on the system disk, to prevent recursive traversal back to system directories.
How to protect yourself
Prefer working without user input when using file system calls
Use indexes rather than actual portions of file names when templating or using language files (ie value 5 from the user submission = Czechoslovakian, rather than expecting the user to return “Czechoslovakian”)
Ensure the user cannot supply all parts of the path – surround it with your path code
Validate the user’s input by only accepting known good – do not sanitize the data
Use chrooted jails and code access policies to restrict where the files can be obtained or saved to
If forced to use user input for file operations, normalize the input before using in file io API’s, such as normalize().
]]>unitytips&colon; Sprites Collection2020-10-13T00:00:00-03:002020-10-13T00:00:00-03:00http://diegogiacomelli.com.br/unitytips-sprites-collectionSometimes we have related sprites that can be used in a prefab, like sprites for the environment, props, and scenario. Would be cool if we can easily swap them directly on the prefab without need to find and set the sprite directly in the SpriteRenderer component?
SpritesCollection component
I created this SpritesCollection component that allows us to define a collection of sprites to a prefab/GameObject and then easily swap between the sprites available.
I strongly recommend that you use the Gist Importer to import this gist to your project, but if want to import it manually, just access the gist and add all .cs files to any folder on your Unity project, except the SpritesCollectionEditor.cs, this one should be added to an Editor folder.
]]>Triangle Classifier Made With Unity2020-09-24T00:00:00-03:002020-09-24T00:00:00-03:00http://diegogiacomelli.com.br/triangle-classifier-made-with-unityThese days were studying polygons and thought that would be cool build a triangle classifier to help people learn and teach about types of triangle.
The font and the vertice sprite used are from Kenney.
]]>unitytips&colon; ShadowCaster2DFromCollider Component2020-09-21T00:00:00-03:002020-09-21T00:00:00-03:00http://diegogiacomelli.com.br/unitytips-shadowcaster2-from-collider-componentIf you try to use a ShadowCaster2D in a SpriteShape the shadow produced will have a box form, no matter the form of your SpriteShape.
This happens because ShadowCaster2D does not update its internal shape according to the SpriteShape's form.
ShadowCaster2DFromCollider component
I created this script to help to have SpriteShape with ShadowCaster2D casting right shadows.
To use it you need to add a PolygonCollider2D or an EdgeCollider2D to your SpriteShape's gameobject and then add the ShadowCaster2DFromCollider component to the same gameobject.
Below you can see a video showing a scene with some SpriteShapes before and after applying the ShadowCaster2DFromCollider component.
This solution was based on this Unity Forum post: https://forum.unity.com/threads/can-2d-shadow-caster-use-current-sprite-silhouette.861256
]]>unitytips&colon; Editor Coroutines2020-09-15T00:00:00-03:002020-09-15T00:00:00-03:00http://diegogiacomelli.com.br/unitytips-editor-coroutinesRecently, I was doing a small experiment trying to run an CHIP-8 emulator inside the Unity Editor inspector window and for that I needed to update from times to time the inspector.
Initially I tried to use EditorApplication.update, but as it is only called when something changes in the inspector, it ended up not serving this purpose.
It was then that I discovered this official Unity package: Editor Coroutines
The Editor Coroutines package allows the user to start the execution of iterator methods within the Editor similar to how we handle Coroutines inside MonoBehaviour scripts during runtime.
Usage
At this time we cannot use any of the yield classes present inside the Unity Scripting API, like WaitForSeconds and WaitForEndOfFrame, except for the CustomYieldInstruction.
However, there is a specific yielding class for wait seconds on Editor: EditorWaitForSeconds
In my case, I used the yield return null to skip a frame within the Editor and get the refresh rate that I would like.
The result of using the EditorCoroutineUtility.StartCoroutine
]]>Using Gulp for Chrome Extension development workflow2020-09-11T00:00:00-03:002020-09-11T00:00:00-03:00http://diegogiacomelli.com.br/using-gulp-for-chrome-extension-dev-workflowIn this tutorial, we will learn how to create a development workflow for a Chrome extension, with different configurations and manifest.json for each environment, like DEV, TEST, and PROD.
Introduction
A few months ago we built a Chrome Extension to a customer to allow users to capture Netflix captions and sent them to the customer web site to study them later.
While we were developing it we needed to change some configurations on the extension to use different URLs of our API depending on what environment the Chrome Extension was using, like DEV (local), TEST, and Production.
Is not the intent of this tutorial explains how to create a Chrome Extension from scratch, for this you can use the official documentation: Getting Started Tutorial
Gulp
At that time we did not find any builtin or other solution to make this workflow easier and streamlined, so we decided to create our own solution using Gulp. This whole solution will be explaining below.
gulp is an open-source JavaScript toolkit created by Eric Schoffstall used as a streaming build system in front-end web development.
We decided to use gulp, because a Chrome Extensions is a bunch of .js, .html and .json files. Perfect to use gulp.
The problem
If we just try to open our download Hello Extension .zip file or the opened folder directly on the Chrome extensions page, it will work and you see the extension’s icon in the toolbar.
This is not a problem if you have only one environment or if you don’t need different configurations for different environments, but as I’ve already explained, we needed different configs for different environments.
To the purpose of this tutorial we will work with 3 environments: DEV, TEST, and PROD and will use our configuration file just to change our plugin hello.html text:
DEV: Hello, World! (DEV)
TEST: Hello, World! (TEST)
PROD: Hello, World!
Files structure
Move the Hello Extensions files to a subfolder called src.
At the end of this tutorial, our files structure will look like this:
If have any doubt about the files structure during this tutorial, you can download the full solution in section Download at the end of the tutorial
Installing gulp
To allow us to build our workflow, first, we need to install gulp.
In the section Create a project directory and navigate into it you just need to open the root folder of our file structure described in the previous section
In the section Create a package.json file in your project directory you can use the default values for all the questions of the npm init
You don’t need to perform the section Create a gulpfile, because we will perform it in the next section.
The gulpfile.js file
Create a file called gulpfile.js in the root folder.
This is the full gulpfile.js file that will allow our development workflow for different environments.
The gulpfile.js sections
Now I will explain each section of it.
Requires section
This section define the NPM packages need for our gulpfile.js.
The first one is gulp, then we need the package del that will allow us to clean our dist folder,
after gulp-merge-json to allow us to merge our environment config files. The last one is fs to allow read and write files.
Consts section
This is quite simple, we are just reading the command-line argument called config. If it is not present, the default value is DEV.
Exports section
Now we jump to the last line of the file to explain the exports.default.
Here we are basically defining the order of each function that will be called when we run our gulpfile.js file:
Clean section
Cleans our dist folder.
CopyAllFiles section
Copies all files from src folder to the dist folder
TransformConfig section
Transforms our config.json files, merging the source one with the environment one.
WriteConfigJsFile section
Writes our transformed config.json file to the scripts folder to allow our Chrome Extension’s .js files access the config values.
TransformManifest section
Transforms our manifest.json file too.
Watch section
Watches for any change in the src folder and automatically repeat the previous steps.
packages.json file
Change the content of packages.json file to the content below to update the dependencies.
Then run the command npm install in the root folder, after that run the command npm install gulp.
Running the gulp for the first time
Now, if you just run the command gulp in the root folder, you should see an output like this:
Creating the config.json files
We need to create our config.json files.
They are 3 files:
config.json: the baseline file, our common configuration should be defined here and will be used for the DEV environment.
config.TEST.json: the file that the define specific configuration values for the TEST environment
config.PROD.json: the file that the define specific configuration values for the PROD environment
If you’re familiar with Web.config File Transformations or appsettings.json files transformation, the philosophy used here is the same: the baseline file (config.json) contains all the common configuration values, and the specific environment files, like config.TEST.json and config.PROD.json, need to define only the values that are different for that environment
Create the 3 files inside the subfolder src.
Here is the content of each one:
Running the gulp for the second time
Run the command gulp in the root folder, you should see an output like this:
There is a new subfolder dist created. Load it on Chrome Extensions page:
The plugin should work ok.
Remember to remove the plugin previously loaded on Chrome and add it again from the dist folder.
Creating the hello.js
Create a new file called hello.js inside the subfolder scripts.
We will use this file to change the H1 tag inside the hello.html
Loading scripts on hello.html
Change the content of hello.html file to the content bellow:
This will load the .js and add an id attribute to our H1 tag.
Reading the configuration inside the scripts
The first thing we need to do is change our manifest.json file to allow the content of scripts/config.js and scripts/hello.js been read by the extension .js.
Open the manifest.json and change it to the content below:
The line "/scripts/config.js" is what we need to access the configuration values.
Creating the manifest.json files
We need to create our manifest.json files, in the same way, we created our config.json files.
They are 3 files:
manifest.json: the baseline file, our common manifest definition, and used by DEV environment (already created).
manifest.TEST.json: the file that the define specific manifest configuration values for the TEST environment
manifest.PROD.json: the file that the define specific manifest configuration values for the PROD environment
Create the 2 files inside the subfolder src.
Here is the content of each one:
Running the gulp for each environment
Run the command gulp in the root folder.
This will use DEV configuration from config.js and manifest.json
Is the same if you run gulp --config DEV
Now, try to run gulp --config TEST.
In the Chrome Extensions page you should see something like this:
Your extension is using the TEST environment values.
When you click on the extension icon on the Chrome toolbar, you should see something like this:
You can try to run gulp --config PROD. To see the PROD environment values on the extension.
Running gulp --watch
To have a fast and streamline workflow, we need that every time we change something on our src folder, the dist folder automatically updates and we can see the changes right on Chrome.
Run the command gulp --watch. It’ll monitor your src folder and update the dist.
You can use the --config option combine, like gulp --watch --config TEST.
In this .zip are all files mentioned in this tutorial, you just need to set up your gulp environment and call the npm install and npm install gulp before starting to use it.
Conclusion
In this tutorial, we learned how to create a development workflow for a Chrome extension, with different configurations and manifest.json for each environment, like DEV, TEST, and PROD.
]]>unitytips&colon; Focused Inspector2020-09-08T00:00:00-03:002020-09-08T00:00:00-03:00http://diegogiacomelli.com.br/unitytips-focused-inspectorStarting in Unity 2020.1, you can add a dedicated inspector window for a specific GameObject, Component, or Asset.
It always displays the properties of the item you opened it for, even if you select something else in the editor.
To activate a Focused Inspector, select an item (GameObject, Component, or Asset) and in the context menu hit the Properties... menu item.
The Unity 2020.1 was official release on July 23, 2020 with a lot of fixes, API changes, changes, improvements and features.
You can find the new features directly on the Unity manual accessing this search: newin20201.
To read all items, access the complete release notes.
Stats
Fixes: 805
API Changes: 79
Changes: 70
Improvements: 215
Features: 74
My feature highlights
Below are the features that most caught my attention and that I believe can positively impact my development workflow.
Focused Inspector
Editor: Add focused Inspector, a property editor to inspect single object.
This is something I have been looking for for a while, an inspector editor for a specific item in the hierarchy.
Unity went further, allowing an editor focused on a component too.
For GameObjects and Project Assets
Right-click a GameObject in the Hierarchy view, or an Asset in the Project view.
From the context menu, select Properties.
Alternatively, select the GameObject or Asset and do one of the following:
From the main menu, select Assets > Properties.
Use the Alt + P / Option + Shift + P shortcut.
For components
Inspect the GameObject and locate the component you want to open a focused Inspector for.
From the component’s More items (⋮) menu, select Properties.
Editor: Introduced PreviewSceneStage. Implement custom stages by inheriting from this class.
I found this interesting but did not found any good documentation on how to use it.
Switch between debug and release code optimizations
Editor: Support to switch between debug and release code optimizations without restarting the Unity Editor improving Unity Editor performance when compiling in release.
Lighting settings as an asset
GI: Added all lighting settings as an asset. This will allow the user to share them between scenes or switch them out in an easy way.
This can be quite useful when we need different lighting setups for different target platforms.
Graphics: GetPixelData API was added
Graphics: GetPixelData API was added to Texture2D, Texture3D, Texture2DArray, Cubemap and CubemapArray classes. It allows getting a pointer to the data of a particular mip level/array element in a Texture for reading/writing, and without creating any memory allocations (similar to Texture2D.GetRawTextureData).
Input System is now verified
Input: The Input System has moved out of preview.
Save and restore Particle System state data
Particles: Abiltiy to save and restore Particle System state data, making it possible to save a snapshot of an entire Particle System at a point in time. A use case for this is for efficient rewind support, by saving periodic keyframes of the particle state, to avoid full resimulations.
Physics: Add a new component ArticulationBody that helps to create articulations. An articulation is a set of bodies, some of which have their relative motion constrained. All bodies are organized in a logical tree, where parent-child relation expresses the constrained motion. Unlike regular Rigidbodies with Joints, articulations are solved with a different solver (Featherstone) in reduced coordinates which guarantees there will never be any stretch of locked degrees of freedom. Typical examples of articulations include robotic arms, ragdolls, etc.
These were the features that brought my attention to Unity 2020.1.
What were the features that caught your attention?
]]>Unity Distribution Portal (UDP) Journey&colon; Tips & Tricks2020-09-01T00:00:00-03:002020-09-01T00:00:00-03:00http://diegogiacomelli.com.br/unity-distribution-portal-udp-journey-tips-and-tricksIn this post, I will list some tips and tricks that I learned in my journey using the Unity Distribution Portal (UDP) to publish my game Puzzimals to 4 new stores, reaching millions of new users, with a single build.
Introduction
Unity has recently launch to everyone the Unity Distribution Portal (UDP) a platform that enable Unity developers to distribute Android games beyond Google Play, into stores like Samsung Galaxy Store, ONE Store, Mi GetApps, HUAWEI AppGallery, QooApp Game Store, SHAREit Game Store, TPAY MOBILE Stores, APPTUTTI, and VIVEPORT.
The Unity Distribution Portal was created to help make publishing mobile games on alternative app stores faster and easier for developers. When you submit your game, UDP automatically creates specific builds with all required SDKs in the background, saving you a substantial amount of time when publishing to multiple stores.
Unity Distribution Portal (UDP) lets you distribute your games to multiple app stores through a single hub. UDP repacks your Android build with each store’s dedicated In-App Purchase SDK. You can manage all your store submissions from the UDP console.
This post is focused on games that have IAP and use Google Play Services, like leaderboards and achievements.
If your game does not have any of these features, publish to UDP is quite a more straightforward process and probably these tips here won’t be useful for you.
Available Stores
As I write this post Unity is working to add even more stores to UDP.
From the 9 stores supported, 7 are fully integrated with UDP. What this meaning? You just need to create your account on each store, via UDP (in some cases fill some forms and send some ID and bank docs), and UDP will perform all the steps need to make your game available on the store.
Getting started
Is not the intent of this post cover everything about how to publish your game using UDP, I guess this quite well documented on UDP package documentation.
The idea of this post is to point out some tips and tricks that can help you, as helped me, to understand how to use UDP.
Read the docs
Please, if you did not read the official documentation yet, go and read it, then come back here. You’ll better understand this post and the whole UDP solution after educated yourself about it.
1. Implement
What docs says: Set up and configure UDP in the Unity Editor, implement UDP in your game project, and populate your IAP Catalog with your in-app purchase products (if any).
1.1 Create a new game on UDP
Go to the UDP dashboard and just create a new game.
At this moment just set the game title.
1.2 IAP and Target UDP
There is two way to use UDP on your project: using the UDP package or using the Unity IAP.
In my case, I was using IAP already in the project.
This tip is in the official documentation, but would like to reinforce it:
In the Unity Editor, to choose UDP as the Android build target, select Window > Unity IAP > Android > Target Unity Distribution Portal (UDP).
You’ll need this when you build to UDP and remember to use the Target Google Play when you build to Google Play.
2. Build & deploy
What docs says: Build your UDP Android package (apk), test it in the UDP Sandbox environment, and deploy it to the UDP console where you’ll begin preparing your game for submission to the stores.
2.1 Sandbox environment test
In the Sandbox Testing section of your game page on UDP, you will find some instructions on how to test your game on the UDP sandbox.
You will need to do this before repacking your game for the stores.
Just build your .apk on Unity and open it on emulator (like BlueStacks) or directly on your Android device.
If you setup UDP right, you should see a screen like below when the game starts.
To login in this screen, use the accounts in the setup on Sandbox Test Account. Remember those e-mails don’t need to exist, they are just test accounts to validate UDP setup
Perform the login on the UDP sandbox and test your IAP.
After this, you can refresh your game page on UDP and you should see the result below on Sandbox Testing section:
If you did not setup the UDP on your project, you should see a message like this on UDP dashboard notifications apk analytics failed, caused by: analyse apk failed, caused by:Failed to find GameSettings.prop, please import udp sdk and generate GameSettings.
2.2 Package name extensions and Google Play Services
When UDP repacks your game with store-specific SDK it will, most of the time, change the name of the package, adding a store-specific extension, like:
.gs to Samsung Galaxy Store
.unity.migc to Mi GetApps
.qooapp QooApp to Game Store
Because of this extension, we will need to configure a new OAuth credential to each extension on Google API Console.
In my case on the App Signature section of the game info, a used the recommend option Export and upload your own key and certificate. This is the same certificate used by Google Play Services and APIs.
Go to Google API Console, select your game project on the dropdown, then go to Credentials section, then on the OAuth 2.0 Client IDs section select the item with the name of your game, then copy the value of the field SHA-1 certificate fingertip.
Now, go back to the Credentials section and click on the button Create credentials, then OAuth client ID.
In the new page, select Android on the Application type dropdown.
In the Name field you can write anything you want, but maybe use your game name following with the extension store can help to find it later.
In the Package name field you should add the exact package name for the specific store on UDP. For example, in my case for Mi GetApps store, the package name was br.com.diegogiacomelli.puzzimals.unity.migc.
If you have doubted what is the exact package name for your game on a specific store on UDP, you can click on Advanced link of that store on the Publish tab of UDP
Now in the field SHA-1 certificate fingertip you should paste the value you copy before from the original OAuth 2.0 Client IDs configuration.
Then click on the button Create.
You will need to repeat those steps for each store that change your package name.
3. Game Info
What docs says: On the UDP console, provide app store listing information and resources for your game, such as multi-language descriptions, multi-currency price points, screenshots, video trailers, and create releases for distribution.
3.1 Import from Google Play
As you follow the UDP documentation you will reach the point will need to create your game on the UDP dashboard.
If you already have the game published on Google Play, as was my case with Puzzimals, you can use the right-top button IMPORT FROM GOOGLE PLAY in the game page.
After the import, you can edit the information as well.
You can add the argument hl to your Google Play url to import a specific translation, like https://play.google.com/store/apps/details?id=br.com.diegogiacomelli.puzzimals&hl=pt to import Portuguese translation
4. Submission
What docs says: Sign up with the stores using your UnityID, and register your game with the app stores directly from inside the UDP console.
Go to the Publish tab, select a store and click on Sign up to....
Follow the needed steps for each store you would like to publish.
5. Publish
What docs says: Select the stores you want to submit your game to. UDP automatically repacks your game into store-specific builds and submits them to the stores along with the relevant game descriptions.
5.1 Upload
Now that you have a valid UDP .apk and game info filled, you can upload it on the UDP dashboard, inside the Binary section.
5.2 Testing your repack .apk
Now the specific store should show a Repack game dropdown on the UDP dashboard.
Select Repack game and UDP should generate a new .apk of your game with the store SDK. This .apk will be available to download on the Advanced link. Download it from the Download APK Certificate.
For each store, you need to test your repack .apk to certificate that everything in your game is running ok.
Open the repack .apk on an emulator or an Android device.
Test your IAP and Google Play Services, they are working as expected?
For each store, you will see different screens. For example, for QooApp you will see something like this:
5.3 Send it to review
Now you can select Submit to Store in the dropdown, then select the checkbox store on Publish page and click on the Publish button.
UDP will send the game to store review and you can monitor the progress on the dashboard.
UDP will send to you an e-mail when the game is approved.
6. Performance
What docs says: When your game is published, monitor its performance across the different stores from the UDP reporting dashboard.
Wait the game been published on the store and will see the Reporting Dashboard been populated with stats about the game.
Conclusion
With these tips and tricks that I learned while using UDP I hope I helped you to the UDP Journey:
Implement UDP in your Unity project
Build and deploy your game to UDP
Edit your game information
Prepare your game for submission
Publish to stores
Track game performance
]]>Kenney Jam 2020 entry&colon; Curseings2020-08-26T00:00:00-03:002020-08-26T00:00:00-03:00http://diegogiacomelli.com.br/keeney-jam-2020-entry-curseingsLast weekend I participated in Kenney Jam 2020 (my first game jam).
The experience was really good, when you have so strong boundaries to make a game, in this case, 48 hours and just use assets from Kenney, you need to turn your way of think and expectations to a very specific and clear objective: release a fun and playable game the target just the core mechanics.
The theme
The theme for this game jam was “Cursed”.
I took some time thinking about what game I would like to play and develop with such a theme, then I remembered how much I loved to play Lemmings and how those little ones were cursed to live in the small world where some of them should sacrifice for the others.
With this in mind, I started developing the game and things happened very well and I delivered my entry right on time. I had the finished version some hours before, but I took some time to review it.
The final result is a simple game that takes the Lemmings core mechanic and adds some twist: in Curseings, there are two kinds of walkers: the human and the cursed and you need to take each kind to different portals. If a cursed touch a human, that human becomes a cursed one too. The gamer will need to use this new mechanic to overcome some levels, sometimes the player will need to avoid they touch each other, sometimes don’t.
]]>Drawing a Maurer Rose With Unity2020-08-21T00:00:00-03:002020-08-21T00:00:00-03:00http://diegogiacomelli.com.br/drawing-a-maurer-rose-with-unityIn this tutorial we will learn how to draw a Maurer Rose with a LineRenderer in Unity.
Introduction
Recently, I was watching a video by Daniel Shiffman about Maurer Rose that inspired me to try it out at Unity.
Now you must be thinking “What the hell is a Maurer Rose?”, Well, I didn’t know it until I watched that video.
Let’s see what Wikipedia says about:
A Maurer rose of the rose r = sin(nθ) consists of the 360 lines successively connecting the above 361 points. Thus a Maurer rose is a polygonal curve with vertices on a rose.
The following gif shows the evolution of a Maurer Rose (n = 2, d = 29°) from 1 point to 361 points.
Definition
A Maurer Rose is always defined by two input parameters: n and d.
The n represents the number of petals. The rose has n petals if n is odd, and 2n petals if n is even (look to the gif above, n = 2, then 4 petals).
The d represents the angle in degrees for each line.
Let r = sin(nθ) be a rose in the polar coordinate system, where n is a positive integer.
We then take 361 points on the rose:
(sin(nk), k) (k = 0, d, 2d, 3d, …, 360d),
where d is a positive integer and the angles are in degrees, not radians.
This definition talks about polar coordinate system. The more important thing to know about it is this: each point on a plane is determined by a distance from a reference point and an angle from a reference direction. So, if you want to draw a line from a point, we need to take that point, an angle, and distance to calculate the second point.
The formula
The basic formula is: r = sin(nθ) and we need to apply it to 361 points, where:
r = sin(n * (d * point))
In C# the code is something like this:
We calculate the angle for each point, then we get the r and find the x and y for the second point on the polar coordinate system.
The Mathf.PI / 180f is to convert from degrees to radians to work properly with the Mathf functions.
MaurerRoseLineRenderer
Now the complete code for a MonoBehaviour that takes the formula we saw in the previous section and combine it with a LineRenderer to draw the Maurer Rose.
To use it, just create a new GameObject and add the MaurerRoseLineRenderer component to it.
If you just hit play button, you will see something like this:
Go to the LineRenderer component and change the line width to 0.03, then hit play button again.
Testing new inputs
If you change the values of N and D of the component in the inspector, you will see a new Maurer Rose been drawing.
The image below shows the result of 6 different inputs (the same inputs used on Wikipedia):
Going beyond
Now that you understand what is a Maurer Rose and how to code it inside Unity you can try to do some crazy things with it, like animate the input values or the number of points, or still using it to build a particle system.
Below I show my realtime try on this matter:
Conclusion
In this tutorial, we learned how to draw a Maurer Rose with a LineRenderer.
This simple formula show how math can be used to explore creativity and beauty.
Don’t let the cute look or super fun animations fool you, Puzzimals is a cube-matching game challenging you to match identical tiles in 100 levels of thought-provoking puzzles in a world map.
Packed with features and creative puzzles you can combine cubes of ice, wild cards, bombs and so much more!
Each level unlocks and increases in difficulty and offers an almost infinite number of combos.
Fans of casual puzzle games will enjoy the crisp, colorful graphics featuring cute animals and the compelling music offers great relaxation.
]]>unitytips&colon; SettingsProvider2020-07-21T00:00:00-03:002020-07-21T00:00:00-03:00http://diegogiacomelli.com.br/unitytips-settings-providerYou can add a custom section to Project Settings window that allows you to configure some global settings for your project using a SettingsProvider
]]>unitytips&colon; HelpBox Attribute (with docs button)2020-07-14T00:00:00-03:002020-07-14T00:00:00-03:00http://diegogiacomelli.com.br/unitytips-helpbox-attributeYou can create a PropertyAttribute to display a help box on inspector showing a few lines of information, like EditorGUI.HelpBox, but with a docs button to the documentation page.
]]>unitytips&colon; Social Share2020-07-07T00:00:00-03:002020-07-07T00:00:00-03:00http://diegogiacomelli.com.br/unitytips-social-shareUsing Süleyman Yasir KULAUnity Native Share Plugin you can easily add native share to your Android/iOS games.
I made the gist below that uses the plugin to add a social share component to any game object.
]]>unitytips&colon; Dynamic Log2020-06-30T00:00:00-03:002020-06-30T00:00:00-03:00http://diegogiacomelli.com.br/unitytips-dynamic-logYou can create a simple logging component to record logs from any UnityEvent and configure them directly in the editor:
]]>unitytips&colon; Using ScriptableObject and EditorApplication.isPlaying to refresh the game view2020-04-28T00:00:00-03:002020-04-28T00:00:00-03:00http://diegogiacomelli.com.br/unitytips-using-scriptableobject-and-editorapplication-isplaying-to-refresh-the-game-viewYou can use EditorApplication.isPlaying in your custom editor to update the game view when a ScriptableObject is updated and you need to restart the scene or do something more complex to see the result of ScriptableObject changed during the game’s playing in the editor.
]]>unitytips&colon; TimeSpan Box Drawer2020-04-21T00:00:00-03:002020-04-21T00:00:00-03:00http://diegogiacomelli.com.br/unitytips-timespan-box-drawerYou can create a PropertyDrawer to display a help box on inspector showing the time information in seconds fields using TimeSpan format strings:
]]>Google Play Games Plugin for Unity&colon; Tips & Tricks2020-04-18T00:00:00-03:002020-04-18T00:00:00-03:00http://diegogiacomelli.com.br/google-play-games-plugin-for-unity-tips-and-tricksIn this post I will list some tips and tricks that I learned while using the Google Play Games Plugin for Unity.
Introduction
The Unity3D has a code interface for questions regarding social features in games, these interfaces are called Social API.
It provides a unified interface to different social back-ends, such as GameCenter, and is meant to be used primarily by programmers on the game project.
When you use it on a real platform, you will need to use some plugin that implement those interfaces, in the case of Android this job is done by the Google Play Games Plugin for Unity.
Configuring the game on Google Play Console
First of all you need to create the game on Google Play Console as any other game and make an app release (an Internal test track already works).
Then go to the Services & APIS menu, after enter on the Google Play game services.
Fill only the required information for test, then go to menu Linked apps and link it to your game on with the app on Google Play Console.
Creating some achievements for test
In the Game services section open the Achievements menu and add some achievements.
I found empirically that test achievements that did not have an icon set on the Google Play Console did not show the standard Google Play Games UI when unlocked and were automatically locked again about 1 hour after they were unlocked.
Installing the plugin
To install the Google Play Games Plugin for Unity, you should follow the steps in Plugin Installation and Android Setup sections.
OAuth and Upload Certificate
One thing can be a little confusing is about the certificate fingerprints.
Go to Google Play Console on App Signingsection and use the option App Signing by Google Play
Now you need to copy your SHA-1 fingerprint of your Upload certificate from App signing section.
In the Google API console, select your game on the top dropdown, then go to Credentials menu and edit the OAuth 2.0 Client IDs. Paste the fingertip on the field SHA-1 certificate fingertip and save it.
remember to remove the SHA-1 prefix, if you copied it together.
Testing on Android
Now we have the basic setup done, we need to write some code to test it on an Android device:
Add the script above to a game object in the scene, build and run the game on a Android device.
If everything was done correctly, you should see a screen like this:
Conclusion
With this basic setup you can start to use the other features from Google Play Games Plugin for Unity plugin, as:
The plugin code come without any assembly definition, so to use in our code you will need to create two assembly definitions to the plugin:
Go to the Assets/GooglePlayGames folder and create a new Assembly Definition called GooglePlayGames.
Go to the Assets/GooglePlayGames/Editor folder and create a new Assembly Definition called GooglePlayGames.Editor.
Now, go to your game assembly definition and add a reference to the GooglePlayGames.
After this, if you receive some compilation error about BasicApi.Nearby namespace, just close and open Unity again.
Exception class not found com.google.android.gms.games.Games
If you see the the log message above on the adb logcat, you need to check on Unity Player Settings / Publishing Settings if the minify settings are set up correctly as describe here: Play Games Services Proguard configuration
]]>Azure Pipelines - Generating DB Script with SqlPackage.exe2019-12-17T00:00:00-03:002019-12-17T00:00:00-03:00http://diegogiacomelli.com.br/azure-pipelines-generating-db-scriptRecently I needed to automate the generation of a database script deploy from a SQL Server Database Project on our Azure Pipelines continuous integration. Below I will describe the steps to achieve such thing.
Building the solution
A SQL Server Database Project has a solution (.sln) as any other kind of Visual Studio projects and we need to build it to generate our DACPAC.
A data-tier application (DAC) is a logical database management entity that defines all of the SQL Server objects - like tables, views, and instance objects, including logins - associated with a user’s database. A DAC is a self-contained unit of SQL Server database deployment that enables data-tier developers and database administrators to package SQL Server objects into a portable artifact called a DAC package, also known as a DACPAC
The variables used in the script portions are described in the Complete azure-pipelines.yml in the end of this post
Generating the .sql script
With our .dacpac file built, now we need to generate our .sql database script. To perform this operation we need the sqlpackage.exe, this command-line is available in some Azure Pipelines images, as vs2017-win2016, so you need to use it on your azure-pipelines.yml file:
Add the CmdLine task below to generate the .sql database script:
Publishing the .sql script
Now we need to publish the .sql file to the build artifacts:
Complete azure-pipelines.yml
Extra points
In the approach described above the .sql files is not automatically applied to the database, so someone need to download, check and apply the file manually against the target database. If you want to apply the database script automatically you can change CmdLine task that generate the .sql file to update the target database using the action:publish option of sqlpackage.exe.
]]>WinForms sample for HarSharp2019-10-29T00:00:00-03:002019-10-29T00:00:00-03:00http://diegogiacomelli.com.br/winforms-sample-for-harsharpAjay Tandon sent me a WinForms sample that he made using HarSharp.
The HTTP Archive (HAR) format as defined in the W3C Specification is an archival format for HTTP transactions that can be used by a web browser to export detailed performance data about web pages it loads.
HarSharp is a small and easy-to-use library to parse HAR files to .NET objects that I created some years ago for .NET Framework, today I released the version 2.0.0 with support to .NET Core / .NET Standard.
Har File Analyzer with a HAR file loaded
Files
If you want to use the the Har File Analyzer or want to know how to create a Win Forms app with HarSharp, you can download to full solution here: HarSharp_wingui.zip
]]>HarSharp 2.0.0. - .NET Core2019-09-30T00:00:00-03:002019-09-30T00:00:00-03:00http://diegogiacomelli.com.br/harsharp-2.0.0-dotnet-coreThe HTTP Archive (HAR) format as defined in the W3C Specification is an archival format for HTTP transactions that can be used by a web browser to export detailed performance data about web pages it loads.
HarSharp is a small and easy-to-use library to parse HAR files to .NET objects that I created some years ago for .NET Framework, today I released the version 2.0.0 with support to .NET Core / .NET Standard.
]]>Creating dotnet new templates with samples2019-09-04T00:00:00-03:002019-09-04T00:00:00-03:00http://diegogiacomelli.com.br/creating-dotnet-new-templates-with-samplesIn this post I will show the needed steps and samples to create dotnet new templates.
Introduction
Recently a friend asked me about the steps I follow to create dotnet new templates, while I was describing the steps to him I realized that information could be usefull to someone else or even to my future self.
Sometime ago I created some dotnet new templates for GeneticSharp: dotnet new templates for GeneticSharp and I will use that template as samples for the steps below.
Nuget pack / dotnet pack
Nowadays there are two main ways to build a dotnet new template: creating a .nuspec file or defining the package properties directly inside your .csproj.
To GeneticSharp templates I used a .nuspec.
Steps and samples
When I was trying to create the first templates I used this Microsoft documentation to learn about it: Custom templates for dotnet new.
Define the templates in the .csproj or create a .nuspec: sample
Create a content folder inside the Templates folder: sample
Create a subfolder inside content for each template and put your template project source code there: sample
For each template folder, create a subfolder template.config then create a template.json file: sample
In this .json you should define things like template name (shortName) and what it’s root namespace that will be replaced when a new project use this template (sourceName)
Building and testing
Now you can create the .nupkg with the dotnet pack or nuget pack
You can test your templates locally installing them directly from the .nupkg file: dotnet new -i your_templates_file.nupkg
Install the template: dotnet new template_shortname -n new_project_namespace -o output_folder
If everything is right you can publish your .nupkg on http://nuget.org or to your private NuGet feed: sample
Conclusion
That’s it, with just 9 steps you can create your own dotnet new template and jumpstart your next project setup.
]]>unitytips&colon; String interpolation2019-09-03T00:00:00-03:002019-09-03T00:00:00-03:00http://diegogiacomelli.com.br/unitytips-string-interpolationSince C# 6.0 you can use String interpolation to make code more readable:
The sample lines will result in the same string
The $ special character identifies a string literal as an interpolated string.
String interpolation provides a more readable and convenient syntax to create formatted strings than a string composite formatting feature.
]]>unitytips&colon; Expression body definition2019-08-27T00:00:00-03:002019-08-27T00:00:00-03:00http://diegogiacomelli.com.br/unitytips-expression-body-definitionWhen you have a single line method, you can use expression body definition do simplify and reduce the lines of code:
Expression body definitions for methods and read-only properties are supported starting with C# 6. Expression body definitions for constructors, finalizers, property accessors, and indexers are supported starting with C# 7.0.
So you can use the expression body definition for other members, like properties:
]]>Dapper and the NVARCHAR(4000) arguments2019-08-14T00:00:00-03:002019-08-14T00:00:00-03:00http://diegogiacomelli.com.br/dapper-and-the-nvarchar-4000-argumentsPerforming a profiler in the queries sended to the database you can see that in some cases Dapper is sending the string arguments as NVARCHAR (4000).
Introduction
This happen because Dapper cannot infer what is the exactly type and length of the table column on database.
The downside of the NVARCHAR (4000) in arguments is that the database can choose a bad execution plan for the query.
Solution
To avoid this you can pass the type of the argument to Dapper:
To make this solution easier to use I made two extension methods ToVarChar and ToNVarChar:
Extension methods
]]>Can I send batch messages larger than 256 KB to Azure Service Bus?2019-08-13T00:00:00-03:002019-08-13T00:00:00-03:00http://diegogiacomelli.com.br/can-i-send-batch-messages-larger-than-256-kb-to-azure-service-busThe short answer
A simple solution to overcome this limitation is split the messages in blocks lower or equal to 256 KB size.
Below is a simplified version of the code that I used for Standard tier case:
]]>Deploying a T4 Template with dotnet pack2019-08-08T00:00:00-03:002019-08-08T00:00:00-03:00http://diegogiacomelli.com.br/deploying-a-t4-template-with-dotnet-packIn this post I will show how to deploy a T4 Template to a target project using a NuGet package built with dotnet CLI pack command.
Introduction
Recently I had to distribute a T4 template inside a NuGet package, so developers who installed the NuGet package would get, in addition to the library assemblies, a T4 template to help generate some scaffold code.
Nowadays there are two main ways to build a NuGet package: creating a .nuspec file or defining the package properties directly inside your .csproj.
The project that I want to distributed via NuGet is a .NET Standard library, so I decided to use the the dotnet core way: define the package properties inside the .csproj file.
Creating the NuGet project
We will create a sample project to use during the post. Open a command-line/terminal and type:
Let’s say that the T4 Template that we want to distribute is located inside a folder called Templates and the file is named Scaffold.tt.
Now open the SampleNugetProject.csproj in the Visual Studio and add a T4 Template:
Add new item…
Our Solution Explorer should look like this:
Creating a .targets
We need to create a .targets file, it will be used to copy the T4 Template from the NuGet package folder to the target project in the build process:
Create a file with the same name of your NuGet package project, but with the extensions .targets.
For our sample the file will be SampleNugetProject.targets:
Changing the .csproj
In the project .csproj just add this ItemGroup:
Building the NuGet package
Inside the folder where are our .csproj and .targets files, type:
This will create a file bin\Debug\SampleNugetProject.1.0.0.nupkg.
Testing the NuGet package
Create a new .NET Core project to test the package:
Now, add the NuGet package to the target project.
To test our NuGet package without publish it to a NuGet source, just use the --source option and point it to the SampleNugetProject.1.0.0.nupkg folder.
If we look to our TargetTestProject there is no Scaffold.tt file yet, this is because it will copied from NuGet package folder to the project structure during the build process.
Just build the target project and the Scaffold.tt will be copied.
Conclusion
That’s it, now we have created a NuGet package that copy a T4 Template to target project’s structure.
You can expand this solution to copy other kind of files to the target project.
]]>Unity and Game Development links (Aug 5th 2019)2019-08-05T00:00:00-03:002019-08-05T00:00:00-03:00http://diegogiacomelli.com.br/unity-and-gamedev-links-aug-5th-2019
Screen.cutouts for iOS/Android, Burst Compiler updates, TypeCache API in Editor code, PhysX Cloth Solver update, DSPGraph audio mixing/rendering engine, Intel® VTune™ Amplifier support, IDE support moving to packages, .NET 4.x is now default and Incremental Garbage Collection.
With the release of Unity Editor 2019.1, the Shader Graph package officially came out of preview! Now, in 2019.2, we’re bringing even more features and functionality to Shader Graph.
Kenney has an incredible collection of free game assets that any game developer can use (Kenney Assets).
License: (CC0 1.0 Universal) You’re free to use these game assets in any project, personal or commercial. There’s no need to ask permission before using these. Giving attribution is not required, but is greatly appreciated!
In conclusion then, based on the above tests, if you are going to crunch through work without the Burst Compiler, maybe look at using something like Tasks first before opting for Jobs. If you are going to use the Burst Compiler, use the Job System.
In our first 2D Pixel Perfect guide for retro games, we showed you how to set up the 2D Pixel Perfect tool and how 8-bit graphics were made back in the day. In this post, we fast-forward to the 16-bit era. With the help of Mega Cat Studios, you’ll learn how to create authentic art for Sega Genesis (or Mega Drive) and Super NES-style games using Unity settings, graphics structures, and color palettes
Generative Adversarial Imitation Learning, pre-training for the PPO trainer, training generalized reinforcement learning agents, options for Nature and ResNet CNN architectures.
]]>Developing Web APIs - Good Practices2019-08-02T00:00:00-03:002019-08-02T00:00:00-03:00http://diegogiacomelli.com.br/developing-web-apis-good-practicesSome days ago a coworker asked me what I thought about wich status code a web api should return and if there are some good pratices to follow. When he asked this, I remembered that I’ve followed some good pratices, most of them based on my emperical knowledge of years of development and consuming web apis. For this reason I wrote this post as a way to organize and document what are those good pratices that I follow. Maybe it can be useful to someone.
Introduction
The list below is not intended to be right and definitive, there is no silver bullet, but just things that I learned and tested in more of a decade working with web apis. Things that worked for me and my projects can easily not work for you and your projects, because context is other and challenges too.
Besides, if you disagree with some of this points, please let a comment in the end of the post, we could learn more with it!
REST or not RESTful?
First of all, build a software that really attend the requisites, that has good code quality and has good performance is more important than follow someone’s guidance, with this said I always try to implement REST web apis, but exceptions exists and we need to work with them, so don’t try to force some operation than will don’t fit well on REST way.
Remember, REST is a style architecture and as every architecture, you can (and most of time should) adapt it for your project needs and capacities.
Verbs and URLs
Probably the most important rule about web api is to respect the meaning of verbs, this will really make the life easer for those whom are consuming your web api.
GET: to retrieve something.
POST: to create something.
PUT: to complete update something.
PATCH: to partially update something.
DELETE: to delete something
Then, combining with URLs, you get a really clear way to work:
GET
/resource : returns all resources.
/resource/1: returns the resource with id 1.
POST
/resource: creates a new resource.
/resource/1: Not used.
PUT
/resource: complete updates a bunch of resources (rarelly used).
/resource/1: complete updates the resource with id 1.
PATCH
/resource: partial updates a bunch of resources (rarelly used).
/resource/1: partial updates the resource with id 1.
DELETE
/resource: deletes all resources (rarelly used, mostly never).
/resource/1: delete the resource with id 1.
Status code
I try to keep the range of returned status code small, the smallest one has only 3 status:
200: succesful request.
400: a client error.
500 : a server error.
Of course, you can extend this one, like use 201 (created) to return status for POST verbs, and 401 to unauthorized requests, but try to keep this list small, so it will be easy to who consume your API take decisions about what to do with different status code.
Another good pratice is return an error code and an error message in the json of requests that result in 400 status code (client error), this way the client can react or display different informations to the end user.
In most cases, 400 status code are about some business logic rule that need to be respect to result in a sucessful request, so provide some information to client can help it to understand what is wrong in the request.
Versioning
I see a lot of developers using v1 inside the code to “versioning” their web apis, I really dislike this method, I can understand it is easy to deploy a new web api version to the same virtual application using this technique, but we need to agree that we do versioning using some SCM, like Git, SVN and Mercurial with everything else that correspond to our code, why should we do versioning inside the code in the case of web api?
In most of case your web api will have only one version, especially when you are developing a SPA app and it is the only client of your web api.
Versioning of APIs is a controversial topic—you will find a lot of contradictory guidance on the internet.
The pattern that is most commonly practiced is probably the one with a version identifier in a path
segment of URLs. Since there is little consensus on versioning, simply offering our opinions on the topic may not be very helpful, but we offer two thoughts:
Doing nothing at all for API versioning is an intelligent approach that is getting more attention
Links and version identifiers in URLs make awkward bedfellows
In this case, the approach that I use is create a new site/virtual application every time that I need to publish a major version of my web api, so, in the code of the routes there is no v1, v2 and so on.
Let say I have a web api publish on http://diegogiacomelli.com.br/sample-api/v1, than I made some breaking changes to the public interface of the web api and need to publish another version in a separated url to avoid any impact to the users that still use the old v1. I will just create the new v2 virtual application, and the urls will be:
http://diegogiacomelli.com.br/sample-api/v1
http://diegogiacomelli.com.br/sample-api/v2
In a moment in future you will want to remove the support to the v1 version, in that moment you could configure your virtual application to redirect (status code 301 or 302) to the next/latest version.
Of course, it’s a good pratice too have some public changelog about your web api versions releases to notify the clients developers.
Describing
In the field of how to describe a web api REST I can cite Swagger. It is not a attempt to create a WSDL like to web api REST, but it is a good attempt to create an open standard for describing web apis REST.
Swagger is a specification and complete framework implementation for describing, producing, consuming, and visualizing RESTful web services.
I use Swagger a lot and really love it, mainly because Swagger UI that allow you generate a nice live console and documentation for your web api.
There are many implementations of Swagger for most of languages: C#, Java, Python, Ruby, etc.
If you are using ASP .NET Web API, there a some projects to auto generate the Swagger specification, like Swashbuckle.AspNetCore.
Swagger is very popular nowadays, but if you never see it in action, take a look on Marvel API that use Swagger and Swagger UI.
Other conventions and good pratices
To keep our lifes as developers easier is good to define some conventions of how our web api REST will behave, the best effort I know in this field are the very good Apigee e-books. The e-books are not an attempt to create a bible or a mantra about how to design your api, but rather a collection of conventions observed in large web REST apis, like Twitter, Facebook, Linkedin, Google, etc.
Most of the good pratices that I used, tested and mentioned in this post I learned from my experience and Apigee books.
Conclusion
I probably forgot some learnings that I still use in my web apis developing, maybe because it’s so common to perform it that I even do not notice them, but the ones cited above I think are the most remarkable.
Further readings
I really recommend you to read the books bellow, they have detailed a lot of good practices about how do develop good web apis and can help you to design yours.
]]>Unity Toasty Notification2019-07-30T00:00:00-03:002019-07-30T00:00:00-03:00http://diegogiacomelli.com.br/unity-toasty-notificationLast saturday I created the ToastyNotification package, a fun editor log interceptor that play Mortal Kombat’s Toasty easter-egg every time an error is logged.
Setup
Just install the ToastyNotification.package from the repository release page.
Now every time your game raise an error on Unity’s editor console log, the Toasty Notifcation will warning you 😉!
]]>Unity and Game Development links (July 29th 2019)2019-07-29T00:00:00-03:002019-07-29T00:00:00-03:00http://diegogiacomelli.com.br/unity-and-gamedev-links-july-29th-2019
SIGGRAPH 2019 is taking place in Los Angeles, between July 28 and August 1. Unity has made a page where you can see the Unity’s presentations calendar (Unity at SIGGRAPH 2019).
Kin is a currency for the digital world that just now caught my attention. There is an SDK for Unity. They are posing a challenge for Unity developers, the deadline is December 30, 2019 (Kin Gaming Challenge).
Kin enables the free and instant transfer of value between users, no matter how small the amount. This lets users give something more meaningful than a like, making your app even more fun and engaging.
Tyler Hurd presented to the world a tool that him have been working: Actuator leverages real-time physics and tracked VR devices for rigging, animating and puppeteering. (Actuator)).
]]>Publishing a .NET Core project to SonarCloud with Cake2019-07-25T00:00:00-03:002019-07-25T00:00:00-03:00http://diegogiacomelli.com.br/publishing-a-dotnet-core-project-to-sonarcloud-with-cakeIn this post I will show how to use Cake to build and test a .NET Core project and then publish the results to SonarCloud.
Introduction
Cake (C# Make) is a cross-platform build automation system with a C# DSL for tasks such as compiling code, copying files and folders, running unit tests, compressing files and building NuGet packages.
SonarCloud is a cloud service offered by SonarSource and based on SonarQube. SonarQube is a widely adopted open source platform to inspect continuously the quality of source code and detect bugs, vulnerabilities and code smells.
Prerequisites
Cake: install the Cake on your .NET Core project before start this tutorial. Follow this Setting Up A New Project.
branch: if you are using git, then the GitBranchCurrent(".").FriendlyName will pass the right branch name to SonarCloud, otherwise you can set it manually.
If you are using AppVeyor you can use line bellow to allow discover the branch name locally and in the AppVeyor:
Build task
The first task definitions will build our .NET Core project:
Test task
Now we will define the task to run our tests:
This task use Coverlet to collect the code coverage. Install it on your test project using the Coverlet NuGet package:
install-package coverlet.msbuild
Sonar tasks
The lasts tasks to define are responsible to scan the project and send the build and tests results to SonarCloud:
Where:
Key: is your project key on SonarCloud. You can get it throw these steps on SonarCloud:
Select your project.
Open the menu Administration / Update Key
Organization: is the name of your organization on SonarCloud. If your projects page is https://sonarcloud.io/organizations/YOUR-ORGANIZATION/projects, then your Organization value is YOUR-ORGANIZATION.
Exclusions: here you can define the wildcards to excluse some files fron Sonar scan, like sample, docs and test files.
Defining the tasks order
The last part of the build.cake file define the order that tasks will run:
Running the build.cake
Now, every time you want to build, test and publish the results to SonarCloud you need to type this command on your project root folder:
MacOS:
./build.sh
Windows:
Open a powershell terminal:
.\build.ps1
When the build finish, you should see something like this:
That’s it, now your project is ready to using cake to publish results to SonarCloud.
Complete build.cake
Extras
If you are using git, you can add this lines to your .gitignore file:
tools/**
!tools/packages.config
]]>unitytips&colon; Scene Preview Window2019-07-23T00:00:00-03:002019-07-23T00:00:00-03:00http://diegogiacomelli.com.br/unitytips-scene-preview-windowI created this window that extends the Unity 3D editor so you can preview the scenes by selecting them in the project window.
Usage
As can be seen from the video above the extension can be used in two ways after adding the Scene Preview window to the editor (via the Window / Scene Preview menu):
Selects Scene and clicking the Capture screenshot button in both edit mode and play mode.
Running Scene in play mode and if there is still no preview screenshot for the scene, a screenshot will be taken automatically after 10 seconds.
Setup
Below you can see only the code of ScenePreviewEditor.cs. There are 3 more files for this extension.
Download the full gist or use the Gist Importer to import the complete Scene Preview Window for your project.
Remember that you need to save the above .cs files inside any Editor folder
]]>Unity and Game Development links (July 22th 2019)2019-07-22T00:00:00-03:002019-07-22T00:00:00-03:00http://diegogiacomelli.com.br/unity-and-gamedev-links-july-22th-2019
Stephen Palmer presented the preview of Addressables, the Unity new system for editor and runtime asset management. (Addressable Asset System).
What we found when talking to developers about their experience using Asset Bundles was that almost everyone doing so successfully were more or less writing the same high level systems a thousand slightly different ways. Addressables was born out of this obvious need for a framework to solve a set of common problems related to addressing, building, and loading assets.
Cyan made a blog post about Voronoi noise, a type of noise based on cells, and shaders (Voronoi).
We’ve produced three kits: A puzzle game, an FPS and an RPG. Get a brief introduction to each game genre and learn the basics of Unity without writing code. The kits offer beginners a good way to create your own game in under an hour before embarking on something with a broader scope like the Game Kits.
How do a businessman and a software developer working at an improvised kitchen table in St. Petersburg, Russia go on to produce sophisticated social games and mobile RPGs with some of the best graphics in the industry? Meet Sasha Pavlov and Oleg Sysoev, who started Playkot Games in 2009. Since then, they’ve grown their team to 150+ by carefully combining the right people, adopting Unity, and implementing the right strategies to capture significant market share around the world.
Anna Lee wrote a blog post on the series Faces of Unity, now presenting Dave Hunt, Lead Technical Artist in Copenhagen (Faces of Unity – Dave Hunt)).
Learn more about Dave as he shares about his career journey and work-life balance as a parent here at Unity!
]]>GeneticSharp in the Wild&colon; Design of a Warehouse Order Picking Policy2019-07-18T00:00:00-03:002019-07-18T00:00:00-03:00http://diegogiacomelli.com.br/geneticsharp-in-the-wild-design-of-a-warehouse-order-picking-policyI started a series of posts about some outstanding scientific papers and projects using GeneticSharp.
For this fourth post the chosen one is the Design of a Warehouse Order Picking Policy - Using Genetic Algorithm.
Introduction
The main motivation of the author about this paper was:
improving order-picking process is considered which is an essential
operation critically impacting warehouse and supply chain performance.
The study is composed of two phases: In the first phase, the
shortest path between each pair of items is determined in a pick list leading to the
second phase of determining the sequence of all items to be picked. A
mathematical model is utilized to find the shortest path between each item pair in
a pick list.
Usage
A genetic algorithm based approach is developed to decide the picking
sequence of all items in an order list, given the shortest distance between each pair
of items. The performance of the proposed algorithms is compared to popular
heuristics used for multi-block warehouses, namely: S-Shape and Largest Gap.
Ahmet Can Saner, the paper author made great contributions to GeneticSharp, that him developed during his master degree, like: Displacement Mutation, Insertion Mutation and Partial Shuffle Mutation (PSM).
Results
For 25-item pick lists, all of the proposed
GA algorithms are superior to S-Shape and Largest Gap heuristics, in terms of travelled
distance. GA with order crossover operator, inversion mutation operator provides the best
results in terms of average travelled distance
For 50-item pick lists, all of the proposed GA
algorithms are superior to S-Shape, in terms of travelled distance. But when compared to
Largest Gap heuristic, only GA algorithms with inversion mutation operator performs
better than Largest Gap, in terms of travelled distance.
For 100-
item pick lists, only GA algorithms with inversion mutation operator performs better than
both S-Shape and Largest Gap heuristics, in terms of travelled distance. GA with order
crossover operator, inversion mutation operator setting performs the best in terms of
average travelled distance for pick lists of size 100.
Author
Ahmet Can Saner, with Dr. Zehra
Düzgi supervision, wrote the paper for his master degree at Istanbul Bilgi University.
]]>unitytips&colon; Hierarchy Window GameObject Icon2019-07-16T00:00:00-03:002019-07-16T00:00:00-03:00http://diegogiacomelli.com.br/unitytips-hierarchy-window-gameobject-iconYou can show the game objects icons in hierarchy window using EditorGUIUtility.ObjectContent
The icons used in the video are Font Awesome icons and I used fa2png.io to convert them to .png.
Remember that you need to save the above .cs inside any Editor folder
]]>Unity and Game Development links (July 15th 2019)2019-07-15T00:00:00-03:002019-07-15T00:00:00-03:00http://diegogiacomelli.com.br/unity-and-gamedev-links-july-15th-2019
Alexander Ameye made a tutorial about edge detection shaders with Shader Graph and how to use some Lightweight Rendering Pipeline customization to generate DepthNormals (Edge Detection Shader).
Cyan made a blog post about Render Textures and how to read them in a C# script (Render Textures).
Render Textures are stored and handled on the GPU, which means we can’t access the data from them in a C# script which runs on the CPU – and you shouldn’t really need to for most effects. However, I wanted my player to be able to interact with water which was based on a Render Texture and only spawn particles if the player was in the water, along with some other effects.
What happens when you put 700+ people from Unity and our ecosystem in a secluded location once a year and tell them to solve hard tech, coding, and process problems? Their instructions? Unleash your creativity, collaborate like crazy, and embrace diverse perspectives.
A number of judges evaluated all of the impressive submissions to pick the winners of the latest Asset Store challenge: Use Substance Painter to texture stunning assets that expand the futuristic world of Buried Memories: Yggdrasil.
Ray tracing hardware acceleration (RTX) is a newly available feature that allows graphics developers to increase their image quality. While solving complex problems, properly integrating this new set of APIs (DXR and Vulkan ray tracing) in a game engine is tricky, especially so when the engine supports anything from mobile to virtual production.
]]>GeneticSharp 2.6.0 - Blazor template2019-07-11T00:00:00-03:002019-07-11T00:00:00-03:00http://diegogiacomelli.com.br/geneticsharp-2.6.0-blazor-templateThe GeneticSharp 2.6.0 is out.
Blazor template
Now we have 4 dotnet new templates, besides the GeneticSharpConsoleApp, GeneticSharpTspConsoleApp and GeneticSharpTspUnity3d already existent, a new template for a Blazor client app was added: GeneticSharpTspBlazorApp:
dotnet new -i GeneticSharp.Templates
dotnet new GeneticSharpTspBlazorApp -o TspBlazorApp
cd TspBlazorApp
dotnet run
If you want to know more about how to use GeneticSharp with Blazor, take a look in this tutorial TSP with GeneticSharp and Blazor.
New papers and projects using GeneticSharp
Four papers and one project were added to the list:
GeneticSharp and extensions (TSP, AutoConfig, Bitmap equality, Equality equation, Equation solver, Function builder, etc):
install-package GeneticSharp.Extensions
Unity3D
You should use the UnityNuGet to install GeneticSharp directly from NuGet.
Or you can use the latest GeneticSharp.unitypackage available on our release page.
Let’s evolve!
]]>TSP with GeneticSharp and Blazor2019-07-10T00:00:00-03:002019-07-10T00:00:00-03:00http://diegogiacomelli.com.br/tsp-with-geneticsharp-and-blazorIn this post I will show how to use GeneticSharp and Blazor to solve the TSP (Travelling salesman problem).
Introduction
According to Wikipedia The travelling salesman problem (TSP) asks the following question:“Given a list of cities and the distances between each pair of cities, what is the shortest possible route that visits each city and returns to the origin city?”
TSP is a classic sample to test some optimization techniques, as well it’s fairly used to demonstrate how to implement a genetic algorithm. For these reasons I will use it to show you how to implement a basic genetic algorithm in Blazor using GeneticSharp.
This post is a like a mirror of the TSP with GeneticSharp an Unity3D. It’s using the same format to teach TSP and GeneticSharp, but instead of Unity3D, this one is about Blazor.
Note that the performance presented on this demo is not the performance that GeneticSharp presents in other apps kinds, like a ASP .NET Core backend app, a console app or in a Unity 3D game. As WebAssembly do not support create a new thread, we get limited to use a Timer to made this sample interactive. More details about this in next sections of the post.
Prerequisites
To better understand this tutorial, you need to have some experiences/knowledges in:
Blazor (beginner)
Genetic algorithms (beginner).
We will perform a very basic use of Blazor and everything you need to complete this tutorial will be explained or provided by the code samples, but if you want to find out better what’s happening under the hood, take a look on Blazor Get Started page.
dotnet new -i Microsoft.AspNetCore.Blazor.Templates::3.0.0-preview6.19307.2
This will install the latest Blazor templates for .NET Core.
This tutorial is based on Blazor preview6. If you are doing this tutorial using a newer Blazor version and have encountered some problem, leave a comment at the end of the post or contact me on Twitter.
Now we’ll create a scaffold Blazor app using the blazor template:
dotnet new blazor -o TspWithGeneticSharp
cd TspWithGeneticSharp
dotnet watch run
Wait for the message Application started. Press Ctrl+C to shut down show up in terminal, then open the url http://localhost:5000 on your browser, you should see something like this:
I recommend to you use Visual Studio Code to open the project. There are some cool VS Code extensions to work with Blazor.
In the same terminal where you added the GeneticSharp package, type:
code .
This will open the Blazor project with VS Code.
In the root folder of your Blazor project create a new subfolder called Tsp. We’ll add all our C# classes inside this folder.
Defining the TSP chromosome
The chromosome represents a solution of the problem we are trying to solve. In our case the TSP chromosome should represent “the shortest possible route that visits each city and returns to the origin city”.
To represent the cities route each gene of our chromosome will represent an index of a city in the route.
Create a file called TspChromosome.cs:
Representing a city
The next step is define our genetic algorithm fitness function, but first we need to create a simple class to represent a city on a 2D space.
Create a file called TspCity.cs:
The fitness function
Now we need to evaluate the TspChromosome.
Our fitness function will evaluate the chromosome fitness based on the total distance to reach all cities in the route represented by the chromosome. The shorter the distance, the better the chromosome.
Create a file called TspFitness.cs:
Configuring the Genetic Algorithm
In this step we need to configure our genetic algorithm using the TspChromosome, TspFitness and some classic GA operators already built in GeneticSharp.
Create a file called TspGA.cs:
Why use Timer?
GeneticSharp can be used as single threading or multithreading to evaluate chromosomes with the fitness function, but WebAssembly (and Blazor) can use just the UI thread, in this scenario when we call GeneticAlgorithm.Start method it freezes the UI until the GA finish.
To avoid this behavior, the solution is: run each generation of the GA inside a step in a System.Threading.Timer as you can see in the TspGA.Run method.
Inside the folder Pages create a file called Tsp.razor:
As we need to interop with JavaScript to manipulate DOM, we will use some helper JS functions. Add the file canvas-helper.js inside the folder wwwroot/js:
Open the file index.html and add the tag below inside the tag head:
Why use IJSRuntime do access DOM?
It’s awesome we can now use C# in the browser with Blazor. But unfortunately we can’t do everything with it, yet. Currently, WebAssembly isn’t able to directly access the DOM API, which means that Blazor isn’t able to either.
(https://chrissainty.com/blazor-bites-javascript-interop/)
Check your terminal window where the command dotnet watch run is running, if there is no error in that window you can access the url http://localhost:5000/tsp.
Hit the Run button and take a look on the browser console window, you will see the distance to reach all cities getting smaller as the generations ran.
This is not a tutorial about Blazor good pratices, so everything here is done in the simplest possible way to introduce how to use GenticSharp with Blazor. I do not talk about things you should use when working with Blazor, such as separate logic from UI and use Blazor components.
Drawing the cities
Now our GA is running inside the browser, but it needs to display the cities route better.
We need to create a visual representation to the cities.
In the Tsp.razor add the method DrawCitiesAsync:
Then call it from OnAfterRenderAsync method, after the clearCanvas call:
In the previous step we drawn the cities and we have the visual of the problem: the cities.
Now we need to draw the solution: the route represented by the best chromosome of each generation.
Add the following method to the Tsp.razor:
Then call it from OnAfterRenderAsync method, after the DrawCitiesAsync call:
Reload the url http://localhost:5000/tsp again, and hit the Run button, now you should see the route been optimizing as the generations are ran:
Conclusion
With only 4 C# classes, 1 JS file and 1 Blazor page we built a pretty nice sample of genetic algorithms using Blazor with GeneticSharp. Now you can improve it with your own ideas or use some of mine ;):
Maybe let user change the genetic algorithm operators (crossover, mutation, selection, etc)?
Move the DrawCitiesAsync and DrawRouteAsync to Blazor components responsible to only draw them?
]]>unitytips&colon; Hierarchy Window Layer Info2019-07-09T00:00:00-03:002019-07-09T00:00:00-03:00http://diegogiacomelli.com.br/unitytips-hierarchy-window-layer-infoYou can create a visual layer info to any component on your hierarchy window using EditorApplication.hierarchyWindowItemOnGUI:
]]>Unity and Game Development links (July 8th 2019)2019-07-08T00:00:00-03:002019-07-08T00:00:00-03:00http://diegogiacomelli.com.br/unity-and-gamedev-links-july-8th-2019
Based on a set of guiding principles focused on delivering value to teams with diverse skill sets, we are designing a brand new experience for Collaborate.
The Animal-AI Olympics is an AI competition with tests inspired by animal cognition. Participants are given a small environment with just seven different classes of objects that can be placed inside. In each test, the agent needs to retrieve the food in the environment, but to do so there are obstacles to overcome, ramps to climb, boxes to push, and areas that must be avoided.
Unity published the IAP Playbook: 12 strategies to help you monetize your game (The IAP playbook).
In-app purchases are an important part of your monetization strategy, but implementing them correctly can be challenging. Understanding how to create, surface, and optimize them without disrupting the game experience takes hard work.
It is important not to forget that one advantage of using Unity in architectural visualization is that you can get different types of output from the same scene. For example, it is possible to make a video in cinematic mode, as well as in virtual reality mode.
Alexandre Mutel released the the first preview version of UnityNuGet providing a service to install NuGet packages into an Unity project via the Unity Package Manager (UnityNuGet).
]]>GeneticSharp in the Wild&colon; Frixel2019-07-04T00:00:00-03:002019-07-04T00:00:00-03:00http://diegogiacomelli.com.br/geneticsharp-in-the-wild-frixelI started a series of posts about some outstanding scientific papers and projects using GeneticSharp.
For this third post the chosen one is the Frixel: 2D framing / pixel structural optimization.
Introduction
Frixel is a plugin for Rhinoceros 6, a 3D computer graphics and computer-aided design (CAD) application.
A finite element analysis program that’s so easy a 5 year old could use it.
Provided only a closed curve representing a building massing and location for core, Frixel generates a 2 dimensional grid and runs structural analysis on it.
You can tweak grid size, gravitation magnitude and lateral wind force to see how your design perfoms under different conditions. Additionally, it can run structural topology optimization to improve its mechanical performance by adding bracing in appropriate places.
]]>unitytips Museum2019-07-02T00:00:00-03:002019-07-02T00:00:00-03:00http://diegogiacomelli.com.br/unitytips-museumI recently started studying Blazor and last weekend I created this simple app that I called: #unitytips Museum, a collection of best #unitytips.
Fork it on GitHub, add the #unitytips to the wwwroot/data/tips.json file and create a pull-request.
About Blazor
Blazor can run your client-side C# code directly in the browser, using WebAssembly. Because it’s real .NET running on WebAssembly, you can re-use code and libraries from server-side parts of your application.
In a future post I will discuss what I learned about Blazor while developing the #unitytips Museum, but I can give a spoiler: I really liked it!
]]>Unity and Game Development links (July 1st 2019)2019-07-01T00:00:00-03:002019-07-01T00:00:00-03:00http://diegogiacomelli.com.br/unity-and-gamedev-links-july-1st-2019
Felipe Lira created a GitHub repository with a bare bones Scriptable Render Pipeline. (HelloSRP).
Bare Bones Scriptable Render Pipeline. Use it as a base to create your own.
Sebastian Lague made some updates to his path creation tool (Bézier Path Creator).
An intuitive and lightweight editor for quickly creating smooth paths in the editor.
You can easily make objects move along these paths, or use them as a guide for spawning objects and generating meshes.
Unity, started its annual survey asking for community feedback (survey).
We’ve heard your requests for more advanced and in-depth content, and resources for specific industries like automotive, architecture, or media and entertainment. And we’ve also heard that you want access to experts who can give you immediate guidance and feedback on specific challenges or questions
Eduardo Oriz and Alitt Khaliq made a post showing the behind the scenes and dive further into the creative process behind Buried Memories Volume 2: Serekh (The creative process behind Serekh).
Developing a strong game, large or small, depends on having a dedicated team of skilled and specialized people who share a vision and care deeply about what they are making. The development of Serekh was a combined effort by Edvige Faini, the Concept Artist, and the Unity Icon Collective. Some of the most significant challenges on this project were conceptual rather than technical.
]]>Starting an Unity3D project with GeneticSharp using dotnet new2019-06-27T00:00:00-03:002019-06-27T00:00:00-03:00http://diegogiacomelli.com.br/starting-an-unity3d-project-with-geneticsharp-using-dotnet-newIn this post I will show how to use dotnet new command to start an Unity3D project with GeneticSharp.
Introduction
Sometime ago I created a NuGet package called GeneticSharp.Templates, this package allows developers to install GeneticSharp templates using the dotnet new command.
Among the availables templates in GeneticSharp.Templates, there is one specific to create an Unity3D project with GeneticSharp. Besides this, the project has a sample of Travelling Salesman Problem (TSP) using GeneticSharp and can be used as a scaffold to starting use genetic algorithms in your games.
Usage
Create an Unity3D project using dotnet new is fast and simple, depending of your machine performance, you’ll have the sample running in less than a minute.
Open a terminal/prompt and type:
dotnet new -i GeneticSharp.Templates
dotnet new GeneticSharpTspUnity3d -o GeneticSharpSample
The argument -o is the the output folder of the Unity3D project
Now you can open the GeneticSharpSample in Unity3D editor.
Open the MainScene scene and hit the play button, you should see something like this:
Conclusion
Thats it, now you can use this sample to understand how to use GeneticSharp in your game.
If you want more details about the code and the sample itself, please, take a look on this tutorial TSP with GeneticSharp and Unity3D.
]]>unitytips&colon; Gist Importer2019-06-25T00:00:00-03:002019-06-25T00:00:00-03:00http://diegogiacomelli.com.br/unitytips-gist-importerUsing the Gist below you can easily import other Gists to your Unity project just copying the URL from browser:
Code
All Gists are imported to folder Assets/Gists
]]>Unity and Game Development links (June 24th 2019)2019-06-24T00:00:00-03:002019-06-24T00:00:00-03:00http://diegogiacomelli.com.br/unity-and-gamedev-links-june-24th-2019
Unity 2019.3 will add support for using Unity as a library controlled by native Android/Java and iOS/Objective C apps so you can easily insert AR and other Unity features.
Egor Bogatov created a GitHub repository with a sample Xamarin app using Unity as a library (XamarinWithUnityApp).
You can now easily add a Unity scene (e.g. ARCore scene) to any native or Xamarin app via .aar file.
In anticipation for Cannes this year, we surveyed 1000 creatives within advertising and marketing to gauge a better understanding on their comfort level, technical competency, and enthusiasm towards AR, including what it means for the future of storytelling. And what we found was very telling
Real-time 3D is changing everything, in much deeper ways than most people realize. Forged in gaming, this technology continues to transform the way games are created, operated and monetized. Its impact now also extends to industries of all kinds, from film to automotive.
What do System Shock 3, Oddworld: Soulstorm and Harold Halibut have in common? Well, all of these incredible-looking upcoming titles are built on Unity, and more specifically will utilise Unity’s upcoming High Definition Render Pipeline or HDRP for short.
Verified Solutions Partners represent a collection of 3rd-party SDKs, plugins, editor applications, cloud services, and more that enable the success of your project while ensuring deeper technical alignment with partners’ products and services to ensure 0% developer downtime. Partners accepted into the program go through a verification process to ensure their SDK or software is optimized for the latest version of Unity.
]]>GeneticSharp in the Wild&colon; Context-Sensitive Code Completion2019-06-21T00:00:00-03:002019-06-21T00:00:00-03:00http://diegogiacomelli.com.br/geneticsharp-in-the-wild-context-sensitive-code-completionI decided to start a series of posts about some outstanding scientific papers and projects using GeneticSharp.
For this second post the chosen one is the Context-Sensitive Code
Completion: Improving Predictions with Genetic Algorithms.
Introduction
The main motivation of the author about this paper was:
Current methods of training code completion systems can possibly be improved in order
to reduce prediction errors. This requires that the amount of information considered in a
pattern is optimized. The question raised is then: how should the training of predictive
models be focused in order to increase prediction quality?
This thesis will aim to answer the question: to what extent is it possible to improve predictions
of existing state-of-the-art code completion systems with a genetic algorithm?
Usage
GeneticSharp is an open-source Genetic Algorithm library for C#, released under the MIT
license (Giacomelli). It has an extensible interface that allows for most, if not all, functionality
to be implemented from scratch via interfaces or leveraged by extending base classes. Classes
and interfaces also use the same terminology that has already been established, which makes
the translation from theory to implementation much more clear.
Results
As a result of the new training scheme, the quality of predictions can be increased without
losing generalizability. Application of the new training scheme could possibly be applied
to any code completion systems that trains a predictive model, making it a candidate for
improving existing systems as well as in future research.
results comparison between GCC and GeneCSCC (developed using GeneticSharp)
Author
Marcus Ording wrote the paper for his degree project in Computer Engineering at KTH Royal Institute of Technology from Stockholm, Sweden.
Further reading
You can access the full paper directly on DiVA Portal.
]]>unitytips&colon; Changing the style of the Hierarchy Window Group Header2019-06-20T00:00:00-03:002019-06-20T00:00:00-03:00http://diegogiacomelli.com.br/unitytips-changing-the-style-of-the-hierarchy-window-group-headerIn my last #unitytips I demonstrated how you could create a visual header to any group of components on your hierarchy window using EditorApplication.hierarchyWindowItemOnGUI. Now I’m improving it allowing you to customize its style.
To change the style, you just need to edit the values of the HierarchyWindowGroupHeaderSettings in the inspector
Remember that you need to save the above .cs inside any Editor folder
It’s a good practice add the tag EditorOnly to your group header game objects
]]>unitytips&colon; Hierarchy Window Group Header2019-06-18T00:00:00-03:002019-06-18T00:00:00-03:00http://diegogiacomelli.com.br/unitytips-hierarchy-window-group-headerYou can create a visual header to any group of components on your hierarchy window using EditorApplication.hierarchyWindowItemOnGUI:
Any GameObject with name that starts with “—” will be considered a group header
You can set tag of the headers game objects as EditorOnly to avoid them on runtime
]]>Unity and Game Development links (June 17th 2019)2019-06-17T00:00:00-03:002019-06-17T00:00:00-03:00http://diegogiacomelli.com.br/unity-and-gamedev-links-june-17th-2019
Created by the Emmy-winning team that brought you Baymax Dreams, Sherman is a new real time Unity short that delivers the most advanced real time fur ever!
As many of you know, we put UNet into maintenance mode because we believe there is a better way forward with our new connected games stack
War Robots case study shows how Pixonic used Unity to lift up their revenue from War Robots without negatively impacting user experience (Pixonic - War Robots case study).
How do you find new revenue opportunities in a free-to-play game that’s been going strong for over five years? Moscow-based Pixonic, a Top 100-grossing game developer in the CIS, has driven War Robots’ monthly players’ spending to over $5M.
Keijiro Takahashi, an Unity evangelist, released the first version of MidiAnimationTrack that imports .mid files into Unity Timeline. It allows creating musically synchronized animation (MIDI Animation Track).
Is a custom timeline/playables package that provides functionality to control object properties based on sequence data contained in a standard MIDI file
Brackeys released a video about new 2D renderer in Unity (2D Lights in Unity!).
]]>Using Tesseract 4 with C#2019-06-13T00:00:00-03:002019-06-13T00:00:00-03:00http://diegogiacomelli.com.br/using-tesseract4-with-csharpRecently I built a small tool to read the text of thousands of images.
Introduction
A common technique to extract text from images is know as OCR (Optical character recognition) and the best implementation, that I Know, is called Tesseract.
Although the wrapper worked very well, I was curious about if there was a way to get better peformance results. With a little search I noticed that the .NET wrapper still use Tesseract 3, but there was a version 4 available with a lot of performance improvements:
If you are running Tesseract 4, you can use the “fast” integer models.
Tesseract 4 also uses up to four CPU threads while processing a page, so it will be faster than Tesseract 3
So, I decided to try Tesseract 4 to see how could it impact in the performance of my tool. As at the time there was no .NET wrapper for it, I removed the old wrapper and called Tesseract 4 directly as a process.
The use of Tesseract 4 cut off the time to read the images in almost half
TesseractService
I ended up developing the class below to call the Tesseract 4 command-line (tesseract.exe) directly from the C# code.
Setup
Just download the gist above and add it to your .NET project.
You will get this result after call the TesseractService.GetText method:
The (quick) [brown] {fox} jumps!
Over the $43,456.78 <lazy> #90 dog
& duck/goose, as 12.5% of E-mail
from aspammer@website.com is spam.
Der ,.schnelle" braune Fuchs springt
iiber den faulen Hund. Le renard brun
«rapide» saute par-dessus le chien
paresseux. La volpe marrone rapida
salta sopra il cane pigro. El zorro
marron rapido salta sobre el perro
perezoso. A raposa marrom rapida
salta sobre o céo preguicoso.
]]>unitytips&colon; MenuItem “CONTEXT/component”2019-06-11T00:00:00-03:002019-06-11T00:00:00-03:00http://diegogiacomelli.com.br/unitytips-menuitem-context-componentYou can create a context menu for any component using the "CONTEXT/<component>/<menu name>" on a MenuItem attribute:
]]>Unity and Game Development links (June 10th 2019)2019-06-10T00:00:00-03:002019-06-10T00:00:00-03:00http://diegogiacomelli.com.br/unity-and-gamedev-links-june-10th-2019
Toulouse de Margerie wrote a post about how Unity natively maintains frame rates an how to make Unity follow a precise frame rate (Precise frame rates in Unity).
Normally, out of the box, a Unity project will attempt to run your project as fast as possible. Frames will be rendered as quickly as they can while generally being limited by your display device’s refresh rate.
Jean-Christophe Cimetiere, Sr. Technical Product Manager for Mobile Plaftorms at Unity, made a forum post about the first preview of the new Project Tiny that uses C# as the programming language (Project Tiny C# Preview available).
We’ve been hard at work changing most of the underlying technology powering Project Tiny in response to your feedback, and in order to bring it closer to the Unity ecosystem. This preview is fully integrated with Unity’s Data-Oriented Tech Stack (DOTS) and sets up a foundation for bringing advanced features for both tiny and big use cases.
For 2019.2 we optimized and extended the native cache and exposed it as a public UnityEditor.TypeCache API. It can extract information very quickly, allowing iteration over the smaller number of types we are interested in (10–100). That significantly reduces the time required to fetch types by Editor tooling.
While I experimented with different VFX concepts, I noticed that I was using a bunch of common shader techniques to create new shaders again and again, and I thought to myself: “Why not have one shader to rule them all?”
William Todd Stinson wrote a blog post about how to access ARKit 3 functionality with AR foundation 2.2 and Unity 2019.1 (AR Foundation support for ARKit 3).
Unity has been working closely with Apple throughout the development of ARKit 3, and we are excited to bring these new features to Unity developers.
The Unity Icon Collective strives to democratize high-end asset production. With Buried Memories, starting with Volume 1: Yggdrasil, we hope to inspire creators to extend their own universe but especially to guide aspiring artists and others to observe, analyze and learn from the techniques of industry veterans.
]]>Easing2Curve&colon; An editor window to create animation curve from easing functions2019-06-07T00:00:00-03:002019-06-07T00:00:00-03:00http://diegogiacomelli.com.br/easing-2-curve-an-editor-window-to-create-animation-curve-from-easing-functionsI’ve coded an EditorWindow to create an AnimationCurve using easing functions that define how much a value changes over time.
$# Introduction
There are many classic easing functions, such as: InQuad, OutElastic, InOutSin, and InOutBounce. All of these are functions that have a time input parameter and a return value between 0 and 1.
For example, the easing function OutCirc is coded like:
You can open the window through the context menu on any AnimationCurve property on Inspector.
In the video below you can see how to use the Easing2Curve:
]]>Evolution (or from prototype to game)2019-06-06T00:00:00-03:002019-06-06T00:00:00-03:00http://diegogiacomelli.com.br/evolution-or-from-prototype-to-gameThe importance of game prototype
Several famous books and game designers cite how the prototyping phase of a new game project is an important time to lay out the foundations that will guide the whole game structure during its development project and, as well, to experiment with concepts and ideas of quick and unassuming way.
The prototyping phase, although important, often takes a small percentage in the development time of a game project or in some cases is not part of the project itself, but rather a point prior to that, where we are seeking the idea or concept that will give birth to the new project.
Transposing the fog
I always find it interesting to compare when an idea is born, or has its first steps, with its final result, because when we are at the beginning of any project or journey, the path may seem hazy and maybe it will become clear only when we manage to transpose the fog which separates the persevering from those who prefer to fear it.
For this reason I present the screenshots to compare Ships N ‘Battles in its prototype phase, which, incidentally, at that stage did not have a name, only its project name “iBattleships”;) , with the final result of its HD version for iOS devices with armv7 and retina display, that is, after letting the fog of this project back.
Prototype x final product
So we have below the screenshots of the main menu, deploy ships, aim and view the player’s ships, for the first functional prototype version running on Windows and the HD edition version running on an iPad 2:
There are only two mistakes one can make along the road to truth; not going all the way, and not starting. (Buddha)
This is an old post that I made years ago on Skahal’s blog, as the subject still relevant, I reposted it here.
]]>GeneticSharp in the Wild&colon; AeroVision - Aircraft Trajectories Optimization and Visualization2019-06-05T00:00:00-03:002019-06-05T00:00:00-03:00http://diegogiacomelli.com.br/geneticsharp-in-the-wild-aerovision-aircraft-trajectories-optimization-and-visualizationI decided to start a series of posts about some outstanding scientific papers and projects using GeneticSharp.
For this first post the chosen one is the AeroVision - Aircraft Trajectories Optimization and Visualization.
Introduction
The main motivation of the authors about the AeroVision was:
build program that represents an innovative and efficient way to
minimize and visualize aircraft noise along simulated and real flight routes. There are no existing programs that offer both optimization and visualization of aircraft noise.
Usage
To optimize aircraft trajectories using a genetic algorithm, AeroVision uses the GeneticSharp library, which is a fast, extensible, multi-platform and multithreading C# Genetic Algorithm library that simplifies the development of applications using Genetic Algorithms.
The library supports a number of selection methods, of which the most basic option (elite selection) is recommended. The mutation method used by AeroVision is crossover, which is a commonly used setting. The stop criteria can be a fixed number of generations, which can be specified by the user.
Additionally, the user is free to define the number of chromosomes that are part of one population. The default population size is 70 chromosomes, each representing a possible trajectory in our case.
Elvan Kula and Hans Schouten wrote the paper as requirements for their degree of Bachelor of Science in Computer Science. The Dr. Ir. N. Dintzner (TU Delft, supervisor), Dr. ir. S. Hartjes (Client) and Dr. ir. M. Larson (Bachelor Project Coordinator) are the thesis committee.
]]>Using a Sprite Mask to create a flashlight effect2019-06-04T00:00:00-03:002019-06-04T00:00:00-03:00http://diegogiacomelli.com.br/using-a-sprite-mask-to-create-a-flashlight-effectWhen I was reading about the Sprite Mask on Unity Manual, I questioned my self "How long does it take to create a flashlight effect using the Sprite Mask?".
The answer is: less than 2 minutes.
You can check this by watching the video tutorial that I made showing how to add the a flashlight effect to the Unity 2D Roguelike sample project:
]]>Unity and Game Development links (June 3th 2019)2019-06-03T00:00:00-03:002019-06-03T00:00:00-03:00http://diegogiacomelli.com.br/unity-and-gamedev-links-june-3th-2019
Nick Davis wrote a post about how Unity recently teamed up with Autodesk and Texel Logic to create a mixed-reality experience to illustrate and understand the complex nature of airflow passing over and around an IndyCar (Simulating high-speed IndyCars in AR).
This package contains over 15 new sculpting tools, as well as a utility toolbox to streamline terrain workflow.
The Making of The Heretic: Digital Humans and VFX Characters is available through a Google Docs presentation.
Now the HD Render Pipeline and Post Processing are quite solid, and we were able to put much more effort into building on top of that foundation. Among other things, we put some effort into human faces and vfx-heavy characters.
The evangelist Keijiro Takahashi released a GitHub repository with an example that shows how to connect RealSense depth camera to Unity VFX Graph (Rsvfx).
]]>Using an AssetPostprocessor + EditorWindow to keep assets organized on Unity projects2019-05-31T00:00:00-03:002019-05-31T00:00:00-03:00http://diegogiacomelli.com.br/using-an-assetpostprocessor-editorwindow-to-keep-assets-organized-on-unity-projectsI created an AssetPostProcessor and an EditorWindow to validate if assets are in the right folder and help the Unity projects to keep organized.
Introduction
There are many ways to structure folders in a Unity project, but most common ones are cited by the Unity Learn tutorial: Large Project Organisation:
To keep the project easy to navigate, avoid placing files in the root Assets folder. Use subfolders. How you organize those subfolders is generally decided by your projects but the two main ways to do it are:
A folder for each type of asset and subfolders in them per objects, zones (For example Assets/Materials, Assets/Prefabs, with subfolders Assets/Material/Level1 or Assets/Prefabs/Enemies)
A folder per objects or zones (Such as Assets/Level1/Enemies/Archer, Assets/Shared/UI, Assets/Forest/Trees) with all assets related to those in the folders (Assets/Forest/Trees/BigTree.fbx, Assets/Forest/Trees/Tree.mat, Assets/Forest/Trees/Tree_Bark.jpg).
With big teams or even with the small ones is easy that some assets will be placed in wrong folders. To help to identify and keep those projects folders organized I coded a couple of editor scripts that I called Folder organizer.
You can open the window through the menu Window / Folder organizer.
Just configure the folders to ignore, if should run the validation every time an asset is imported and defined a regular expression to find the assets and what is the expected folder.
In the video below you can see in more details how to use the Folder organizer to validate if your assets are in the right folders:
]]>Coding an EditorWindow to create default animations from sprites2019-05-30T00:00:00-03:002019-05-30T00:00:00-03:00http://diegogiacomelli.com.br/coding-an-editorwindow-to-create-default-animations-from-spritesIn this tutorial, we will learn how to coding an EditorWindow that creates Animation Clips and Animator Override Controller from Sprites.
Introduction
Create animation clips from sprites is quite a simple operation to perform on Unity:
But in many cases, you need to repeat this operation over and over again to create other animations to the same character, like clips for idle, walk up, walk down and walk horizontal animations.
When you need to this for only one character, there is no problem, but imagine you need to create the same 4 animation clip for dozens (maybe hundreds) of characters. Besides being a boring operation, you probably will make some mistake and creating some wrong clip. In cases like that, could be a good option to create your own EditorWindow to automate those operations.
EditorWindow
To start, let’s see what Unity Manual says about EditorWindow:
You can create any number of custom windows in your app. These behave just like the Inspector, Scene or any other built-in ones. This is a great way to add a user interface to a sub-system for your game.
Making a custom Editor Window involves the following simple steps:
Create a script that derives from EditorWindow.
Use code to trigger the window to display itself.
Implement the GUI code for your tool.
During this tutorial we will create a class called DefaultAnimationsEditorWindow that derives from EditorWindow, we will add a menu item to Unity Editor to allow call our EditorWindow and we will implement the GUI for the window.
Furthermore, we will implement the code that allows us to create Animation Clips and Animation Override Controller from sprites.
The idea behind DefaultAnimationsEditorWindow is that when you have a bunch o characters using the same kind of animations, they used the same structure of sprite sheets, so you can create the animations based on the sprites indexes on sprite sheet texture.
similar sprites sheets from Phantasy Star IV (Alys, Chaz and Demi). Sprites ripped by Ultimecia from The Spriters Resource
Starting with sprite to walk down and ending with the last sprite of walk horizontal, we have 9 sprites and in all sprite sheets the sprites indexes are the same:
Open the folder default-animations-editor-window-starter on Unity.
This starter project has an initial setup and assets to allow us to focus on the learning about how to code the EditorWindow.
Open the scene _Tutorial/Scenes/TutorialScene.
Hit the Play button. You should see a screen like this:
The editor window code organization
We will organize our DefaultAnimationsEditorWindow in 3 main classes:
DefaultAnimationsEditorWindow: where is the menu and GUI for our editor window.
DefaultAnimationsSettings: this is our ScriptableObject to save our settings defined on DefaultAnimationsEditorWindow.
DefaultAnimationsUtility: here we will implement the code used by our DefaultAnimationsEditorWindow to perform an operation. Put the operation code in a separated class not bounded by the GUI allow us to use these operations in any other script. This way to work is similar to what Unity itself use in some editor operations, like: AnimationUtility, PrefabUtility and SpriteUtility.
Besides the above classes, there are some other extension method classes on the folder Extensions that are self-explanatory and I won’t talk in details, but you can check them and read their code documentation to a better understanding.
DefaultAnimationsEditorWindow
In the code bellow, we define the menu for the window through the method ShowWindow and the attribute MenuItem.
Default Animations menu item
At the OnEnable we read the settings from our ScriptableObject DefaultAnimationsSettings.
The next 3 methods just draw the components to the editor window GUI.
There are few things to talk about this class because it is just an ordinary ScriptableObject with a couple of properties that will be serialized and used by the DefaultAnimationsUtility class, a singleton to make easier to access the settings, two methods to load/create the asset and a subclass to sprite mappings.
The most important code of this class is the property SpriteIndexes that figure out what are the sprite indexes from the sprite sheet that ClipToOverride is using.
SpriteIndexes will be used by DefaultAnimationsUtility.CreateAnimationClips to know what sprites should be used to create the new animations based on the DefaultAnimationsSettings.AnimationsMapping.
In this class is where the heart of our editor window resides.
There are 2 important methods here: CreateAnimationClips and CreateAnimatorOverride.
CreateAnimationClips
It iterates through the AnimationsMappings defined in the editor window (saved on DefaultAnimationsSettings.AnimationsMapping), for each mapping it will call the method CreateAnimationClip.
The CreateAnimationClip creates a new AnimationClip (or load if already exists one with the same name), copying the frame rate and wrap mode from the ClipToOverride defined in the mapping. After, if wrap mode is a loop, it uses the AnimationUtility to set the loop time to the clip settings (through the extension methods).
Now is the most tricky part of this class, we need to create an EditorCurveBinding for the sprite and get the ObjectReferenceKeyframe from the ClipToOverride and create new ObjectReferenceKeyframe to our new keyframes (AnimationClipExtensions).
CreateAnimatorOverride
In this method we create AnimatorOverrideController that will override each clip from the DefaultAnimationsSettings.AnimatorController by the ClipToOverride of each mapping defined on DefaultAnimationsSettings.AnimationsMapping (AnimatorOverrideControllerExtensions).
this folder is available on your local clone of the repository inside the folder default-animations-editor-window-complete/Assets/_Tutorial
Delete the DefaultAnimationsSettings scriptable object instance.
Open the editor window on menu Windows / Default Animations and configure it as showing in the video below:
Creating and using the default animations
Drag all the sprite sheets (textures) from folder Assets/_Tutorial/Sprites to the Spritesheets field and click on Create animations button:
Challenge
Try to change de editor window to allow more the one set of default animations. One way to this is by creating another ScriptableObject to save the current selected DefaultAnimationsSettings asset.
If you have any doubt how to implement any part of this challenge, feel free to ask on this post comments or send me a message.
default-animations-editor-window-starter: the one you used to make this tutorial.
default-animations-editor-window-complete: the whole solution with all scripts and assets implemented. Use this one, in case you get stuck in any item on the challenge.
Conclusion
In this tutorial, we learned how to coding a custom editor window to create a set of default animation clips and animator override controller.
]]>Publishing WebJobs with Azure Pipelines2019-05-29T00:00:00-03:002019-05-29T00:00:00-03:00http://diegogiacomelli.com.br/publishing-webjobs-with-azure-pipelinesAzure WebJobs are a great way to execute background process.
Scenario
In last days I’ve created a Azure Pipelines that publish WebJobs, but in our specific case our WebJobs were not being published to /site/wwwroot/App_Data/jobs/Continuous/<webjobs name>, because “reasons” our root web app is using ‘/site/www’ as folder. So, you should expect that the new folder to deploy WebJobs is /site/www/App_Data/jobs/Continuous/<webjobs name>, but NO, the new folder is /site/jobs/Continuous/<webjobs name>.
The big problem with the above behaviour is that WebDeploy via VS or AzureRmWebAppDeployment task via Azure Pipeline will still try to deploy the webjobs to the folder inside /site/www/
The AzureRmWebAppDeployment just check the physical path configured on Azure when we defined a VirtualApplicatoin parameter, but in our case it is not a virtual application, but it is a different folder than /site/wwwroot/.
in Kudu wiki there is some explanation about the webjobs folders.
Solution
I used the FtpUpload task to publish the WebJobs binaries to the /site/jobs/Continuous/<webjobs name> and two instances of AzureAppServiceManage task to stop and start the jobs:
you’ll need to replace the values between <..> in the variables section to specific values of your project
I omitted some tasks from the original azure-pipelines.yml for simplicity. The original has a lot of others taks, as unit tests and web api publishing
Extra points (graceful shutdown)
Now that you’ve automate your WebJobs publishing, is a good idea improve your jobs to check if Azure has requested a shutdown. You can do this taks through the CancellationToken parameter passed to the job.
A function can accept a CancellationToken parameter, which enables the operating system to notify your code when the function is about to be terminated. You can use this notification to make sure the function doesn’t terminate unexpectedly in a way that leaves data in an inconsistent state.
]]>A Sorting Layer Debugger for Unity2019-05-28T00:00:00-03:002019-05-28T00:00:00-03:00http://diegogiacomelli.com.br/a-sorting-layer-debugger-for-unityWhile I was reading about 2D Sorting and Sorting Layers on Unity Manual I came up with the idea of creating a custom editor window to see which sorting layer the sprites on the scene are using.
In the video above you can see the Sorting Layer Debugger been used in the Unity 2D Platformer sample project
Setup
Just download the gist bellow to your Unity3D project and add it inside a Editor folder.
You can open the debugger window through the menu Window / Sorting Layer Debugger.
The debugger can be enabled in the edit or the play mode and it will list the Sorting Layers and the number of game objects using each layer. You can hide/show the game objects of each layer by clicking on its check box.
The name of Sorting Layer been used is showing in the top of each game object in the scene view.
Scene view with Sorting Layer Debugger enabled
]]>Unity and Game Development links (May 24th 2019)2019-05-24T00:00:00-03:002019-05-24T00:00:00-03:00http://diegogiacomelli.com.br/unity-and-gamedev-links-may-24th-2019
Set up procedural motion on animated skeletons at runtime. You can use a set of predefined animation constraints to manually build a control rig hierarchy for a character or develop your own custom constraints in C#.
Have you ever wondered how your brain would react if you bend the space around you in VR? Or change the field of view and do a vertigo? Well I did, so I started writing a series of shaders which deformed the space around me, using matrices and ended up with an Inception looking effect.
Have you ever needed to compare the difference in performance between two versions of your project? See the impact of an asset or code change, optimization work, settings change or Unity version upgrade?
Unity 2019.2 beta released an experimental 2D Renderer in LWRP with 2D lights, Lit and Unlit Sprite Masternode in Shader Graph, and Pixel Perfect Camera.
Julien Blais wrote a post about new feature Signals added to Timeline in Unity 2019.1.
We’ve built Signals to establish a communication channel between Timeline and outside systems. But what does that mean? Why did we decide on this approach?
]]>Unity Avatar Mask and Animation Layers2019-05-21T00:00:00-03:002019-05-21T00:00:00-03:00http://diegogiacomelli.com.br/unity-avatar-mask-and-animation-layersIn this tutorial we will learn how to use Avatar Mask and Animation Layers to combine multiple animations.
Introduction
Imagine we imported an animated 3D model from Asset Store, in our sample, we will use the incredible robot from the free package Sci Fi Warrior PBR HP by Dungeon Mason.
In this package, there are 10 animation clips:
animation clips available on Sci Fi Warrior PBR HP
All those clips are animations for full body. So, when you play them:
Idle_GunMiddle
the robot stands idle with the gun in the middle of his body
These are great animations, although if we want to make the robot stands idle, but instead of keeping the gun in the middle of his body, he aims the gun or shoot?
Or if we want that robot walk forward but holding the gun in the middle of his body?
Of course, we can ask to the artist to create all those animation combinations, but there is a smarter approach for this case…
Avatar Masks and Animation Layers goes to the rescue
To start, lets see what Unity Manual says about Avatar Masks and Animation Layers:
Masking allows you to discard some of the animation data within a clip, allowing the clip to animate only parts of the object or character rather than the entire thing. For example, if you had a character with a throwing animation. If you wanted to be able to use the throwing animation in conjunction with various other body movements such as running, crouching and jumping, you could create a mask for the throwing animation limiting it to just the right arm, upper body and head. This portion of the animation can then be played in a layer over the top of the base running or jumping animations.
Unity uses Animation Layers for managing complex state machines for different body parts. An example of this is if you have a lower-body layer for walking-jumping, and an upper-body layer for throwing objects / shooting.
By reading those two sections is quite clear that we need to use avatar masks and animation layers together to combine our animations of different body parts. So, in the next sections, I will demonstrate how to combine three animations (Idle_GunMiddle, WalkForward_Shoot, and Shoot_single) to make the robot shoot while stands idle and walk forward with a gun in middle body. After that, I will propose you a challenge for the other animations available.
This starter project has an initial setup and assets to allow us to focus in the learning about Avatar Masks and Animations Layers.
Open the scene _Tutorial/Scenes/TutorialScene.
If you see a popup called TMP importer, hit the Import TPM Essentials button to import the TextMesh Pro’s assets.
Hit the Play button. You should see a screen like this:
Starter project running: just HUD
Creating the Animation Controller
Create a new Animation Controller (menu Assets/Create/Animation Controller) and open it:
Animator window showing the animation controller created
All animation layers, nodes and transitions for this tutorial will be created inside this animation controller.
In the hierarchy, select the SciFiWarriorHP and in the Animator component set the Controller property to our Animation Controller.
Making the robot walk forward
To get something running right now, we will make the robot walk forward when the button WALK / FORWARD became checked.
In the Animator opening with our Animation Controller drag the animation clip Idle_GunMiddle from folder SciFiWarrior/Animations. Do the same with the clip WalkForward_Shoot.
Create a transition (right click on the node and Make transition) from Any state to WalkForward_Shoot and create another transition from WalkForward_Shoot to Idle_GunMiddle.
Now we need to tell to the animation controller when it should activate the two transitions, for this we will create a bool animation parameter called WalkForward.
WalkForward parameter created
We want to activate the transition from Any state to WalkForward_Shoot when WalkForward is true, so select this transition (click on the arrow connecting the state Any State to WalkForward_Shoot) and in the Conditions list on inspector add the WalkForward equals true:
WalkForward condition defined
Click the reset to auto fit the exit and transition time:
reseting the transition settings
Repeat the same steps as above for the transition from WalkForward_Shoot to Idle_GunMiddle, but use false as the value for WalkForward.
animation base layer
Hit the Play button to test the animation states. When you click on WALK / FORWARD the robot starts to walk, when you click it again the robot stops to walk.
Creating the upper body avatar mask
The animation for walk forward works pretty well, the robot walks forward while it’s aiming the gun. This is the whole movement animated inside the WalkForward_Shoot clip.
Now we want that robot walk forward without aiming the gun, instead of this, we want it keeps the gun in the middle as it does when Idle_GunMiddle is active. To get this done, first, we need to create an avatar mask to the upper body.
Create a new Avatar Mask (Assets/Create/Avatar Mask) called UpperBody. In the inspector, uncheck all lower body parties, as the image below:
only upper body
Creating a upper body animation layer
With the UpperBody Avatar Mask created, we will need to create a new animation layer that will use the mask. Go to the animator window and create a new layer using the + button:
the new layer created with the mask
Change the Weight property to 1 and set the Mask to the UpperBody Avatar Mask. Keep the Blending as override.
Drag the animation clip Idle_GunMiddle from folder SciFiWarrior/Animations to the UpperBody layer.
upper body animation layer
Testing the animations
Hit the Play button to test the animation states. When you click on WALK / FORWARD the robot starts to walk, but now it’s not aiming the gun, instead it keeps the gun in the middle.
Why does this happen?
So, this is done by the UpperBody Animation Layer that we added to our animation controller, as it’s mask was defined with our UpperBody Avatar Mask that only consider upper body parts of the humanoid, Unity overrides the base layer animation with the upper body part of the Idle_GunMiddle.
Making the robot shoot
We will make the robot shoot when the button SHOOT / SINGLE became checked, this will help us to better understand how the Avatar Mask and Animation Layer works to override the animations from the base layer with the animations from UpperBody layer.
In the Animator Window with our Animation Controller opened, select the UpperBody layer and drag the animation clip Shoot_single from folder SciFiWarrior/Animations.
Create a transition (right click on node and Make transition) from Any state to Shoot_single and create another transition from Shoot_single to Idle_GunMiddle.
Now we need to tell to the animation controller when it should activate the two transitions, for this we will create a bool animation parameter called ShootSingle.
ShootSingle parameter created
We want to activate the transition from Any state to Shoot_single when ShootSingle is true, so select this transition (click on the arrow connecting the state Any State to Shoot_single) and in the Conditions list on inspector add the ShootSingle equals true.
Click the reset to auto fit the exit and transition time.
Repeat the same steps as above for the transition from ShootSingle to Idle_GunMiddle, but use false as the value for ShootSingle.
Hit the Play button to test the animation states. When you click on SHOOT / SINGLE the robot shoot.
Now you can combine the two buttons WALK / FORWARD and SHOOT / SINGLE and see how the animations combine.
Challenge
Do something is better to learn than just reading and following someone instructions because this I will challenge you to try to implement other actions:
the remaining actions to the challenge
To implement these actions you need to do almost the same thing we did in this tutorial so far, just using another animation clips, transitions and parameters.
The challenger items are the legs because you will need to create new Avatar Masks with the Transform option of the avatar configuration to get the right animation. New Animation Layers will be needed as well.
If you have any doubt how to implement any part of this challenge, feel free to ask on this post comments or send me a message.
avatar-mask-starter: the one you used to make this tutorial.
avatar-mask-complete: the whole solution with all actions implemented. Use this one, in case you get stuck in any item on the challenge.
The video below shows the complete solution running:
Conclusion
In this tutorial, we learn how to use Avatar Masks and Animation Layers to animate a robot with different masks and layers.
These techniques allowing us to use already existent animations and combine them.
]]>dotnet new templates for GeneticSharp2019-02-03T00:00:00-02:002019-02-03T00:00:00-02:00http://diegogiacomelli.com.br/dotnet-new-templates-for-GeneticSharpNow GeneticSharp has a NuGet package called GeneticSharp.Templates, this package allows you to install GeneticSharp templates using the dotnet new command.
Installing the GeneticSharp.Templates
Before you can use the dotnet new command to create the GeneticSharp projects from templates, you need to install it on your machine:
dotnet new -i GeneticSharp.Templates
After this, if you run the command:
dotnet new GeneticSharp --list
The GeneticSharp templates will be listed:
Creating a new GeneticSharp project from templates
Console Application
Create a new console application template with GeneticSharp where you just need to implement the chromosome and fitness function.
dotnet new GeneticSharpConsoleApp -n MyNamespace -o MyOutoputFolder
TSP Console application
Create a new console application template with GeneticSharp ready to run a Travelling Salesman Problem (TSP).
dotnet new GeneticSharpTspConsoleApp -n MyNamespace -o MyOutoputFolder
TSP Unity3D
Create an Unity3D template with GeneticSharp ready to run a Travelling Salesman Problem (TSP).
dotnet new GeneticSharpTspUnity3d -n MyNamespace -o MyOutoputFolder
Let’s evolve!
]]>GeneticSharp v2.4.0 - New crossovers and TPL implementations2019-01-19T00:00:00-02:002019-01-19T00:00:00-02:00http://diegogiacomelli.com.br/GeneticSharp-v2.4.0-New-Crossovers-and-TPL-implementationsThe GeneticSharp v2.4.0 is out.
The additions of this version are the two new crossovers implementations and a new option of ITaskExecutor that use TPL.
Crossovers
Alternating-position (AP)
The alternating position crossover operator (Larrañaga et al. 1996a) simply creates an offspring by selecting alternately the next element of the first parent and the next element of the second parent, omitting the elements already present in the offspring.
Voting Recombination Crossover (VR)
It can be seen as a P-sexual crossover operator, where p (parents number) is a natural number greater than, or equal to, 2.
It starts by defining a threshold, which is a natural number smaller than, or equal to p.
Next, for every; i E {l, 2, . . .N} the set of ith elements of all the parents is considered. If in this set an element occurs at least the threshold number of times, it is copied into the offspring.
TPL
Three new classes were implemented to run some key points of genetic algorithm using TPL.
Those new classes can be used alone, but normally you will use all them together. You can see a sample usage at unit test Start_TplManyGenerations_Optimization.
TplTaskExecutor:
An ITaskExecutor’s implementation that executes the tasks in a parallel fashion using Task Parallel Library (TPL).
TplPopulation
Represents a population of candidate solutions (chromosomes) using TPL to create them.
TplOperatorsStrategy
A new interface called IOperatorsStrategy was added to GeneticAlgorithm as an option. Two options of operators strategy were created, the default one, called DefaultOperatorsStrategy and the new one called TplOperatosStrategy.
]]>jogosdaqui - um pouco de história, open source e colaboração (pt-BR)2018-11-21T00:00:00-02:002018-11-21T00:00:00-02:00http://diegogiacomelli.com.br/jogosdaqui-um-pouco-de-historia-open-source-e-colaboracaoMuitos não sabem, mas além de programar, sempre gostei de ajudar a divulgar a indústria brasileira de desenvolvimento de jogos.
Criação do jogosdaqui
Em 2005, junto com mais 3 amigos, foi fundado o site jogosdaqui, que era um site especializado em falar sobre os games desenvolvidos por empresas brasileiras.
Esse site produziu muitos artigos, catalogando diversos games, desde o Aeroporto 83, considerado o primeiro game brazuca.
Essa produção de artigos se manteve bastante ativa entre entre 2005 e 2007, mas em 2008 “fechamos as portas”, pois não conseguíamos mais atualizá-lo como merecia.
Conta no Twitter
Em 2010, no meio da produção do game Ships N’ Battles da minha gamedev indie Skahal Studios, criei uma conta de Twitter para o jogosdaqui, para pelo menos conseguir ajudar um pouco na divulgação dos games nacionais.
A conta ganhou alguma notoriedade quando fiz uma pergunta sobre o posicionamento dos candidatos a presidente em relação a indústria brasileira de jogos e o José Serra respondeu:
Blog no UOL Jogos
Tempos depois fui convidado pelo Théo Azevedo do UOL Jogos para criar um blog do jogosdaqui no UOL.
Esse blog durou entre o final de 2010 e o final de 2014.
Durante esse tempo também produzi algumas entrevistas para a revista EGW, com a mesma finalidade do jogosdaqui, falar sobre gamedevs brasileiras:
Site WordPress
No final de 2014, comecei a migrar o jogosdaqui para um site próprio em WordPress e durante todo ano de 2015 foram produzidos diversas matérias, mas devido a demandas pessoais o site ficou no ar apenas até 2016.
Open source e colaborativo
E essa história nos leva a esse momento, pois acredito que o material que o jogosdaqui produziu sobre os games nacionais, alguns deles que podem ser encontrados somente no jogosdaqui, não devem ser esquecidos ou perdidos.
Então no início desse mês comecei a conversão de todos os artigos, oriundos de 3 modelos diferentes (site PHP, blog UOL e WordPress) para uma única plataforma open source, baseada no GitHub Pages (Jekyll) e que permitirá que esse material não seja perdido, possa ainda ser melhorado e novos posts possam ser publicados por qualquer pessoa interessada em divulgar a indústria brasileira de desenvolvimento de jogos.
]]>GeneticSharp v2.2.0 - Sudoku sample2018-11-03T00:00:00-03:002018-11-03T00:00:00-03:00http://diegogiacomelli.com.br/GeneticSharp-v2.2.0-Sudoku%20sampleThe GeneticSharp v2.2.0 is out.
The additions of this version are the new whole sample and extensions showing how to use GeneticSharp to solve a Sudoku.
The GeneticSharp.Extensions project receive those new features:
Multiple
MultipleChromosome
Compound chromosome to artificially increase genetics diversity by evolving a list of chromosomes instead of just one.
Sub-genes are inlined into a single compound list of genes.
MultipleFitness
Fitness class that can evaluate a compound chromosome by summing over the evaluation of its sub-chromosomes.
Sudoku
ISudokuChromosome:
Represents each type of chromosome for solving a sudoku is simply required to output a list of candidate sudokus.
SudokuBoard
A class that represents a Sudoku, fully or partially completed.
Holds a list of 81 int for cells, with 0 for empty cells.
Can parse strings and files from most common formats and displays the sudoku in an easy to read format.
SudokuCellsChromosome
This simple chromosome simply represents each cell by a gene with a value between 1 and 9, accounting for the target mask if given.
SudokuFitness
Evaluates a sudoku chromosome for completion by counting duplicates in rows, columns, boxes, and differences from the target mask.
SudokuPermutationsChromosome
This more elaborated chromosome manipulates rows instead of cells, and each of its 9 gene holds an integer for the index of the row’s permutation amongst all that respect the target mask.
Permutations are computed once when a new Sudoku is encountered, and stored in a static dictionary for further reference.
SudokuRandomPermutationsChromosome
This chromosome aims at increasing genetic diversity of SudokuPermutationsChromosome, which exhibits only 9 permutation genes.
Here, instead, an arbitrary number of Sudokus are generated where for each row, a random gene is picked amongst an arbitrary number of corresponding permutation genes.
]]>GeneticSharp v2.1.02018-10-30T00:00:00-03:002018-10-30T00:00:00-03:00http://diegogiacomelli.com.br/GeneticSharp-v2.1.0The GeneticSharp v2.1.0 is out.
Features
Add constructor with values to FloatingPointChromosome #33
As it is now whenever you create an instance of FloatingPointChromosome, it will randomly create gene values.
I have a case where I need to stop optimization at some time, save results to DB and resume it later. For this, I need to be able to give gene values to FloatingPointChromosome.
I just discovered that when running the optimizer within a Task/Tread/TPL Dataflow block with TaskExecutor set to ParallelTaskExecutor when instantiating GeneticAlgorithm, it blocks all other outside operations during the lifetime of the optimizer run. This does not happen when not setting the TaskExecutor option.
Thanks to
I would like to thanks to @MattWolf74 and @mersadk for contributing to the open issues and pull-request
If you want to use this new version on your project, just get the 2.1.0 version from NuGet:
update-package GeneticSharp
Let’s evolve!
]]>GeneticSharp Unity3d Samples released on Google Play2018-09-22T00:00:00-03:002018-09-22T00:00:00-03:00http://diegogiacomelli.com.br/GeneticSharp-Unity3d-Samples-released-on-Google-PlayI published on Google Play the GeneticSharp Unity3d Samples.
In this app you can see GeneticSharp running on Unity3d in three different samples:
Car2D
Based on famous BoxCar2D, this sample uses a genetic algorithm to create car designs to overcome road challenges, like gaps, hills, and obstacles.
TSP
The classic TSP sample, but in this, we can change the cities positions while the genetic algorithm is running and see how it finds the best route.
]]>GeneticSharp Car2D2018-06-01T00:00:00-03:002018-06-01T00:00:00-03:00http://diegogiacomelli.com.br/GeneticSharp-Car2DI made an Unity3D sample for GeneticSharp inspired by amazing BoxCar2D where a genetic algorithm tries to design 2D cars to overcome roads challenges.
Introduction
I was always amazed by the 2D cars designed by BoxCar2D and see how genetic algorithm make new and (probably) better cars each new generation and I always wanted make a sample inspired by it using GeneticSharp.
The sample that I will talk about is available on the GeneticSharp repository at GeneticSharp.Runner.UnityApp. You can fork GeneticSharp and open it on Unity3D editor, then run the MenuScene.
If you need some introduction to genetic algorithms or GeneticSharp:
The roads and cars can be configured using the scriptable object CarSampleConfig. The GeneticSharp Car2D allows create any number of different roads and car configs, but for this post, I will show 3 roads configurations with the same car configuration mentioned above.
If you want to add new roads, just create a new CarSampleConfig in “Assets / Create / GeneticSharp / Car / CarSampleConfig”. The new road will automatically appear on Car2D menu when you run the sample.
A road is defined by its points quantity and distance, height, rotation, gaps, and obstacles. The gravity and everything about physics is automatically simulated by Unity3d itself.
The fitness function
The fitness of each car (chromosome) to the road will be the sum of the max distance reach by it plus the average velocity at that moment.
Genetic algorithm and the simulation
The genetic algorithm to evaluate the simulation is configured with this operators:
Population: 16 chromosomes per generation
Crossover: Uniform
Mutation: Flip Bit
Selection: Elite
Termination: Time evolving
Besides that, the chromosomes are evaluated in parallel using the GeneticSharp’s ParallelTaskExecutor and you can see all them in 4x4 grid:
If you are running the sample inside Unity3D editor you can change the size of the simulation grid in the SampleController game object from CarScene.
Designing the cars
Now that we have our Car2D and roads defining, we can put the genetic algorithm to run and see how it design the cars for each road.
Besides the roads that are different, the car setup is the same. This way we can compare how genetic algorithm will reach different car designs to different challenges (roads).
Gap road
The first is a road with gaps that getting greater.
The next video resumes how GeneticSharp designs the car for the gap road.
All videos are recording running the GeneticSharp Car2D on my Android. I used the DU Recorder to record them. Amazing app BTW.
About 100 generations, GeneticSharp generate a car that has a front wheel suspend in the air that allows it to reach the other side of the gap without fall on it.
Hill road
This road has some hills that increase as the car travels.
For hill road, the genetic algorithm creates a car with enough length to touch the two sides of the downhills at the same time, this allows the car to keep the velocity needed to overcome the hill part. The middle wheel is what allows the car to pass the hill part of the road.
Obstacle road
Some fixed obstacles are placed on the road and force the cars to pass over them
This is probably the most curious design because the genetic algorithm found out that to overcome the obstacle, the car needed to reach it at high velocity and needs to have a back support to avoid car rollover.
Conclusion
A think two things are quite clear after I build this sample:
Incremental challenges
All the challenges in the roads are incremental, the gaps start small and get bigger by the extension of the road. The same was did to the hills and the obstacle.
Why do the challenges need to be incremental?
During first tests with the gap road I realized if I just put an 8 meters gap in front of first-generation cars, the genetic algorithm cannot choose better designs, because most of them just fall in the first gap. The challenge was too much for the initial generations, but if I just increased the size of the gaps from small size until it gets to 8 meters, the genetic algorithm could choose better and better designs each generation.
It’s how we learn
The same happens on how we learn many things, like math: first basic operations, then simple equations and in some years we are calculating integrals (or trying at least).
It’s easy to spot this behavior on evolution itself, where the genetic algorithms are based. In the book “Guns, Germs and Steel” Jared Diamond says:
“The near-simultaneous disappearance of so many large species raises an
obvious question: what caused it? An obvious possible answer is that they
were killed off or else eliminated indirectly by the first arriving humans.
Recall that Australian / New Guinean animals had evolved for millions of
years in the absence of human hunters. We know that Galapagos and Antarctic
birds and mammals, which similarly evolved in the absence of
humans and did not see humans until modern times, are still incurably
tame today.”
The Australian / New Guinean animals got a challenge that was too much to them in that time, different of the other animals from other continents that evolved together with humans (or proto-humans) and learn to survive this predator.
Different design
Different challenges lead to different car designs.
It’s quite clear that the best cars design to each of the 3 roads are different between them and only works in its specific road.
Now, it’s up to you, fork GeneticSharp and run the GeneticSharp Car2D on your Unity3D editor. Let me know what roads and results you created.
Let’s evolve!
]]>GeneticSharp - Unity3d sample2018-05-31T00:00:00-03:002018-05-31T00:00:00-03:00http://diegogiacomelli.com.br/GeneticSharp-Unity3d-sampleI just pushed to GeneticSharp master branch the GeneticSharp.Runners.UnityApp.
In this Unity3d project there are 3 samples:
Car2D
Based on famous BoxCar2D, this sample uses a genetic algorithm to create car designs to overcome road challenges, like gaps, hills, and obstacles.
A post explaining this sample in detail will be published tomorrow.
TSP
The classic TSP sample, but in this, we can change the cities positions while the genetic algorithm is running and see how it finds the best route.
This sample tries to build a higher wall using random initial bricks positions.
Experimental components
In the folder _runner/Commons there are the BitStringChromosome class and some phenotype implementations. At the moment they are experimental, but I will wait for the community feedback to see if they can be promoted to GeneticSharp library code.
Let’s evolve!
]]>TSP with GeneticSharp and Unity3D2018-05-16T00:00:00-03:002018-05-16T00:00:00-03:00http://diegogiacomelli.com.br/tsp-with-GeneticSharp-and-Unity3d
div.gist-meta { display:none; }
In this post I will show how to use GeneticSharp and Unity3D to solve the TSP (Travelling salesman problem).
Introduction
According to Wikipedia “The travelling salesman problem (TSP) asks the following question: “Given a list of cities and the distances between each pair of cities, what is the shortest possible route that visits each city and returns to the origin city?”
TSP is a classic sample to test some optimization techniques, as well it’s fairly used to demonstrate how to implement a genetic algorithm. For these reasons I will use it to show you how to implement a basic genetic algorithm in Unity3D using GeneticSharp.
Prerequisites
To better understand this tutorial, you need to have some experiences/knowledges in:
Using Unity 2018.1+, create a new project called TspSample.
Using .NET Standard 2.0
Go to “Player settings” / “Other settings” / “Configuration”, select “.NET 4.x Equivalent” on “Scripting Runtime Version”. Unity will ask to restart, you can confirm.
After restart, go back to “Player settings”, select “.NET Standard 2.0” on “Api Compability Level”.
The chromosome represents a solution of the problem we are trying to solve. In our case the TSP chromosome should represent “the shortest possible route that visits each city and returns to the origin city”.
To represent the cities route each gene of our chromosome will represent an index of a city in the route.
Create a C# script called “TspChromosome.cs”:
Representing a city
The next step is define our genetic algorithm fitness function, but first we need to create a simple class to represent a city on a 2D space.
Create a C# script called “City.cs”:
The fitness function
Now we need to evaluate the TspChromosome.
Our fitness function will evaluate the TspChromosome fitness based on the total distance to reach all cities in the route represented by the chromosome. The shorter the distance, the better the chromosome.
Create a C# script called “TspFitness.cs”:
Running the Genetic Algorithm
In this step we need to configure our genetic algorithm using the TspChromosome, TspFitness and some classic GA operators already built in GeneticSharp.
Create a C# script called “GAController.cs”:
Create a GameObject called “GAController” in the scene and add the GAController.cs to it.
Save the scene.
Run the scene on editor and take a look on the console window, you will see the distance to reach all cities getting smaller as the generations ran.
Drawing the cities
Now our GA is running inside Unity3D, but it need to display the cities route better.
We need to create a visual representation to the cities.
City prefab
We will create a prefab based on a sprite of a pin. You can use an icon as this one from www.flaticon.com.
Download it to inside your Unity3D project.
Maybe you will need to change the ‘Pixels Per Unit’ to 1000 to get a good pin size on screen.
Drag it to the hierarchy panel, rename the new GameObject to CityPrefab and drag it back to your Assets folder on Project panel. Now our CityPrefab is created.
Delete the CityPrefab game object from the current scene.
Instantiating the cities prefabs
Add the following field to the GAController.cs
Then, create the method DrawCities:
And then call it from Start method:
Now, select the GAController game object on hierarchy and set the CityPrefab property.
Try to run the scene, you should see something like this:
Drawing the route
In the previous step we drawn the cities and we have the visual of the problem: the cities.
Now we need to draw the solution: the route represented by the best chromosome of each generation.
One of the simplest ways to draw some lines in Unity3D is using the LineRenderer component.
Add the following code to the GAController.cs:
Create the method DrawRoute:
Then call it from Update method:
Before run the scene, we need to add a LineRenderer component to our GAController game object.
Change the width property of the LineRenderer from 1 to 0.1.
Run the scene again, now you should see the route been optimizing as the generations are ran:
Changing the cities positions
Our sample could be considered done, but would it be nice if we you could change the cities positions while the genetic algorithm are running and see how it manages these cities positions changes.
CityController
Create a C# script called “CityController.cs”:
I won’t getting in details about how this is script works, but it’s allow the user to drag the cities’ pin using the mouse or the finger touch if build it to mobile.
Add the CityController.cs to the CityPrefab.
Change the GAController.cs script adding the line below to the end of the for loop of DrawCities method:
Finally, our sample is really done and you should be capable to change the cities positions, by dragging the pins around, and genetic algorithm will try to figure out the best route in real time.
Conclusion
With only 5 C# scripts and 1 prefab we built a pretty nice sample of genetic algorithms using in Unity3D with GeneticSharp. Now you can improve it with your own ideas or use some of mine ;):
How about make it 3D and using a Vector3 instead of Vector2 on City.Position?
Maybe let user change the number of cities or change the genetic algorithm operators?
Move the DrawCities and DrawRoutes methods to a script responsible to only draw the GA.
]]>GeneticSharp v2.0.0 - .NET Core2018-05-12T00:00:00-03:002018-05-12T00:00:00-03:00http://diegogiacomelli.com.br/GeneticSharp-v2.0.0-dotnet-coreThe GeneticSharp v2.0.0 is out with support to .NET Standard 2.0 and .NET Framework 4.6.2.
Introduction
In march GenetichSharp start to support .NET Standard 2.0 in the 2.0.0-rc version. Two months have pass and in the meanwhile the community have time to test that release candidate version and now Unity3D has an official .NET Standard 2.0 profile.
So, it’s time to release the GeneticSharp v2.0.0.
Installing
Only GeneticSharp:
install-package GeneticSharp
GeneticSharp and extensions (TSP, AutoConfig, Bitmap equality, Equality equation, Equation solver, Function builder, etc):
install-package GeneticSharp.Extensions
If you’re still in a .NET Framework version lower than 4.6.2 project use the 1.2.0 version.
install-package GeneticSharp -Version 1.2.0
Breaking changes
I’ve already talk about these breaking changes on the post about the release candidate version, but I guess is good to point them again:
The GeneticSharp NuGet package was split into two packages:
GeneticSharp: only GeneticSharp.Domain.dll and GeneticSharp.Infrastructure.Framework.dll
GeneticSharp.Extensions: depends on GenetiSharp.Package and add the GeneticSharp.Extensions.dll.
SmartThreadPoolTaskExecutor does not exists anymore. You should use ParallelTaskExecutor class (not disposable).
]]>DocsByReflection v1.0.13 - .NET Standard 2.02018-04-05T00:00:00-03:002018-04-05T00:00:00-03:00http://diegogiacomelli.com.br/DocsByRelection-v1.0.13-netstandard2.0The DocsByReflection v1.0.13 is out.
I would like to thanks Erik O’Leary to perform the whole migration of DocsByReflection to .NET Standard 2.0.
]]>Porting GeneticSharp to .NET Core2018-03-28T00:00:00-03:002018-03-28T00:00:00-03:00http://diegogiacomelli.com.br/porting-GeneticSharp-to-dotnet-coreThe GeneticSharp v2.0.0-rc1 is out.
In this version GeneticSharp starts to support .NET Standard 2.0 and .NET Framework 4.6.2.
Although GeneticSharp born as a multi-platform library that ran in any OS supported by .NET Framework and Mono, convert it to .NET Core was a desired thing, because .NET Core is where .NET ecosystem is targeting.
Release candidate
This 2.0.0-rc1 was already published to nuget.org, but it’s marked as a pre-realease package. I will kept it as a RC until get sure that there is no issue with the porting and until the Unity3d remove the “experimental” status to its support to .NET Standard 2.0.
If you are in .NET Core or in .NET Framework 4.6.2+ project, please try the the 2.0.0-rc1 version.
Only GeneticSharp:
install-package GeneticSharp -Version 2.0.0-rc1
GeneticSharp and extensions (TSP, AutoConfig, Bitmap equality, Equality equation, Equation solver, Function builder, etc):
Based on those reads, I decided to support the .NET Standard 2.0 (netstandard2.0) and the .NET Framework 4.6.2 (net462). This meaning that GeneticSharp can be used in .NET Standard and .NET Framework projects, with no differences.
Another thing that I considered was the Unity3d support, so based on this post Unity 2018.1 - .NET Standard 2.0 and .NET 4.6 support Unity is already using a experimental support to netstandard2.0 and net462 libraries.
Domain
The domain part of the library, the GeneticSharp.Domain library was the easy part to port, if I cleary remember there was no change it all, besides the changes on .csproj.
Extensions
The extensions from GeneticSharp.Extensions project needed some more work, because the System.Drawing do not exists directly in .NET Standard 2.0. That was resolved using the System.Drawing.Common NuGet package.
The NCalc library used on FunctionBuilderFitness was updated to use the NCalc.NetCore version.
Threading
One of the most tricky porting was the GeneticSharp.Infrastructure.Threading, because it used the external library SmartThreadPool and that one was not supporting .NET Core at that time. I decided to implement the parallel task executor using the .NET built-in ThreadPool class, this implementation was done on ParallelTaskExecutor and its use can be tested on ParallelTaskExecutorTest.
GtkApp
GeneticSharp sample app (GeneticSharp.Runner.GtkApp) was built using Gtk# 2, but only version 3 was ported to .NET Core, and there are huge breaking changes between these two Gtk# versions, so for a while I’ll keeping the sample app still running only on .NET Framework/Mono.
I hope in a near future we can built a cross-platform sample app, maybe using Xamarin Forms for iOS, Android, macOS and UWP. This would be great, but perform this task during the to .NET Core supporting is far from the scope right now.
The links below are some readings that I did while looking for some GTK# alternatives:
Unit tests projects were using the Rhino Mocks as the mocking library, but Rhino Mocks was not supporting (maybe never) .NET Core, so it was replaced by the amazing NSubstitute.
Code Coverage
As the time I wrote this, there was no unanimity about what is the best cross-platform tool to collect code-coverage in .NET Core.
There are some tools, but each one has some pros and cons:
VS 2017 Code Coverage
Can be easily used on Windows platform directly on VS 2017 or in command line:
dotnet test--collect:"Code Coverage"
altcover
Instrumenting coverage tool for .net/.net core and Mono, emitting NCover or OpenCover format output.
MiniCover
Minimalist Code Coverage Tool for .NET Core.
coverlet
Cross platform code coverage library for .NET Core.
I guess the most promising tool is the coverlet, but I’ll waiting until the end of GeneticSharp 2.0.0 release candidate period to choose one.
Problems, readings, tricks and hacks
Of course that a porting always come with some problems that will you need to figure out by doing some research and solve them, most of time, using some trick and hacks. These one was some of I’ve done:
.NET SDK 2.0 projects targeting .NET 4.x on Mono
As GeneticSharp need to support .NET Framework 4.6.2, but the msbuild does not know where to looking for the framework assemblies in macOS and Linux, so I found thi .NET SDK issue comment issue comment:
When compiling .NET SDK 2.0 projects targeting .NET 4.x on Mono using ‘dotnet build’ you have to teach MSBuild where the Mono copy of the reference asssemblies is.
Now I’m planning to create a GeneticSharp’s sample using Unity3d’s new beta features, like the new ECS (Entity Component System), C# Job System and the Burst compiler.
]]>GeneticSharp v1.2.0 - Sequence mutations2018-01-26T00:00:00-02:002018-01-26T00:00:00-02:00http://diegogiacomelli.com.br/GeneticSharp-v1.2.0-sequence-mutationsThe GeneticSharp v1.2.0 is out.
The additions of this version are the new sequence mutation operators: Displacement, InsertionMutation and Partial Shuffle (PSM).
Displacement Mutation: a substring is randomly selected from chromosome, is removed, then replaced at a randomly selected position.
Insertion Mutation: a gene is randomly selected from chromosome, is removed, then replaced at a randomly selected position.
Partial Shuffle Mutation (PSM): we take a sequence S limited by two positions i and j randomly chosen. The gene order in this sequence will be shuffled. Sequence will be shuffled until it becomes different than the starting order.
I would like to thanks to Ahmet Can Saner (@cansaner) for contribute with those great new mutations that him developed during his master degree.
If you want to use the new mutations in your project, just get the new GeneticSharp version from Nuget.
]]>Unity3D ScenePreview inspector2017-11-26T00:00:00-02:002017-11-26T00:00:00-02:00http://diegogiacomelli.com.br/unity3d-scenepreview-inspectorI’m working in a new game prototype and in this process I was creating some experimental levels to test the mechanics, but by the name of scene I was having dificult to remember which mechanic the level was about and I had to open each level to discover that one was looking for, so I thought: it will be cool have an image preview of the scene when we select the file in hierarchy.
Introduction
I google and didn’t find any project or asset in Asset Store that already did something like this (please, let me know if you know a similar tool) and, well, I prefer code something, than google something, then I coded a little inspector, that I named as ScenePreview:
UPDATED: I created a new Scene Preview solution, now using its own window editor: Scene Preview Window.
Setup
Just download the gist bellow to your Unity3D project and add it inside a “Editor” folder.
// Change this to a folder in your project. // Maybe the folder where your scenes are located. Remember to create a subfolder called "Resources" inside of it.conststringPreviewFolders="_scenes";
Usage
If you select any scene in the hierarchy you will see a message like this:
“There is no image preview for scene ‘’ at ‘’. Please play the scene on editor and image preview will be captured automatically.”
So, play the scene on editor and the image preview will be taken, when you select the scene file again you see the preview.
That’s it! I hope this inspector can be useful to you too.
]]>Function optimization with GeneticSharp2017-06-13T00:00:00-03:002017-06-13T00:00:00-03:00http://diegogiacomelli.com.br/function-optimization-with-geneticsharpIn this tutorial we will learn how to use GeneticSharp to optimize the inputs of math function and more about genetic algorithms meanwhile.
Introduction
I created GeneticSharp a long time ago because three main reasons:
I needed a fast, extensible, multi-platform and multithreading C# genetic algorithm library to use in my GA experiments;
I wanted to study and understand GA better;
and Genetic algorithm are pretty fun to implement and use!
As far as I know GeneticSharp has been used in a lot of different projects, since card games deck optimization, self managing distributed file system, context-sensitive code completion, even in airplanes trajectories optimization. These are pretty cool and exciting topics, but this tutorial is not about this advanced topics. Here I want to take a very simple sample and show how easy and fast you can add genetic algorithms on your project using GeneticSharp. So, let’s evolve!
The problem
In our sample we will optimize the input of a mathematical function, this function will be used as our fitness evaluation function. For this sample we will use a function that everyone saw in school time, the famous Euclidean distance or commonly know as distance of two points function:
We will consider our chromosome fitness as the result of this function. The higher the result, the better is the chromosome fitness.
Our chromosome will be the Euclidean distance function arguments, the X1, Y1, X2 and Y2.
What our genetic algorithm is looking for?
The goal of our genetic algortim is find the input values of Euclidean distance function: X1, Y1 and X2, Y2 that result in the greatest distance in a rectangular area.
What? You can think: “this is a stupid goal”, because everyone knows that the longest distance between two points in a rectangular area are their diagonals. Yeah, you are right, but this is one of the best things about genetic algorithm, our GA code does not know anything about this, it just know that some X1, Y1 and X2, Y2 inputs generate a fitness value and greatest fitness are better. The other justification to use this so simple GA objective is that everyone can understand what is happening and we can focus to learn genetic algorithm.
We can easly create a brute force solution with four nested loops that will find the solution of our problem, but as I mencioned before this ‘problem’ is just for the tutorial purpose, because in normal applications genetic algoritm find solutions to problems that the solution is not so obvious or in some cases the solutions are even unknow.
Creating the project
Open your IDE (Visual Studio/Xamarin Studio) and create a new console project.
Install the GeneticSharp package:
install-package GeneticSharp
Using GeneticSharp
GeneticSharp implements all the classic components of a genetic algorithm, like gene, chromosome, population, fitness, selection, crossover, mutation, reinsetion and termination. When you use it to build your genetic algorithm code you just need to implement a few things, mostly you will need to code just your solution’s chromosome and fitness.
Creating an Euclidean distance chromosome
Chromosome is the representation of a possible solution in genetic algoritms.
In GeneticSharp a chromosome needs to implement the IChromosome interface, but in most of cases you just need to inherit the ChromosomeBase class and override the methods GenerateGene and CreateNew.
Besides IChromosome and ChromosomeBase also exist the classes: BinaryChromosomeBase, FloatingPointChromosome and IntegerChromosome that are chromosome classes that can be directly used when your solution chromosome can be represented as numbers or a string representation of 0 and 1.
In our case we need to create a chromosome that represent the input variables of the Euclidean distance function: X1, Y1 and X2, Y2.
The FloatingPointChromosome is a perfect fit for this kind of representation, because it allows represent more than one number inside of it.
Open the Program.cs file and inside the Main function enter the code below:
In the code above we create two variables to represent our rectangle area size: maxWidth and maxHeight, then we created a new instance of FloatingPointChromome, this will be the template to all chromsome in our solution.
The constructor receive four arrays, they are:
1) The minimum values of numbers inside the chromosome. Our rectangle area will start at 0 points, so the min value of X1, Y1, X2 and Y2 are 0 (zero).
2) The maximum values. We use our previous created variables.
3) The total bits used to represent each number. The maximum value is 998, so 10 bits is what we need.
GeneticSharp will warn you if you try to use a total bits that cannot hold a number inside your floating point chromosome.
4) The number of fraction (scale or decimal) part of the number. In our case we will not use any.
Creating the population
The population represents the possible solutions to our problem, so we need to create a population of our Euclidean distance chromosome.
In GeneticSharp a population is represented by the IPopulation interface, but in most cases you can directly use the Population class.
We created a population that will have a minimum number of 50 chromosomes and a maximum number of 100 and used our chromosome template as the “Adam chromosome” (yeah, you get the reference) of our GA.
Creating the fitness function
The fitness function is where the genetic algoritm will evaluate and give a value (fitness) to each chromosome generated inside it. A good fitness function can guide your GA to a fast and optimum solution.
In GeneticSharp we represent a fitness function through the IFitness interface. Almost always you wil have to code a class that implement this interface, but for our tutorial we can use the simple and lower friction class FuncFitness. This class allow us to build our fitness evalution as its constructor argument.
We receive a IChromosome in the variable “c”, then we cast it to FloatingPointChromosme.
To allow us to evaluate the chromosome we need to convert it from its genotype (FloatingPointChromosome) to its phenotype (x1, y1 and x2, y2), we do this calling the ToFloatingPoints method. This method return an array of numbers using that configuration we used when we created our Euclidean distance chromosome. Now we have our X1, Y1 and X2 and Y2 numbers we just need to pass it to the Euclidean distance function and return the value as the fitness value of the current chromosome.
Creating the selection
A selection is the genetic algorithm operator responsible for decing which chromosomes of current population will be selected as parent of the next population.
You can code your our selection through the ISelection interface or extending the SelectionBase class.
Elite selection is a good option, because it will select the chromosomes with the best fitness (greatest distance). You can try the others selection options too and see how they change the GA speed and results.
Creating the crossover
The chromosomes selected by the selection need to cross to generate new possible solutions of the next generation of the GA. The crossover operator is responsible for crossing these selected chromosomes.
Some of those classics crossovers, like OX1 and OX2, cannot be used in our tutorial because they need chromosomes with ordered genes and this is not the case of our chromosomes with 0101001100 genes. Do not worry, because GeneticSharp will warn you if you try to use an invalid chromosome in an ordered crossover
Uniform Crossover enables the parent chromosomes to contribute the gene level rather than the segment level, for example: if the mix probability is 0.5, the offspring has approximately half of the genes from first parent and the other half from second parent.
So, in our case Uniform crossover is a very good option, because using the 0.5f mix probability it will generate new chromosomes that are combination of X1, Y1 from one parent and X2, Y2 from another parent.
Creating the mutation
The biology definition of mutations is:
“In genetics, mutation may be small scale (affecting a gene) or large scale (involving a change in the chromosome). It may arise from faulty deletions, insertions, or exchanges of the genetic material. Such a change may result in the creation of a new character or trait.”
This biological process is one of the process responsible for I am able to write this tutorial and you be able read it. Without mutation, our species might have been found an local optima and perhaps we would never have evolved into what we are now.
The mutation operator has the same purpose in genetic algorithm, it avoid that our GA get stuck in optima local and end up never finding a better solution.
Flip-bit mutation is a mutation specific to chromosomes that implement IBinaryChromosome interface, as our FloatingPointChromosome does. It will randomly chose a gene and flip it bit, so a gene with value 0 will turn to 1 and vice-versa.
Creating the termination
A termination decide when a GA should be stopped. GeneticSharp use the generation number termination with just one generation as default termination. This mean that the genetic algoritm will run just one generation when you call the Start method, after this you can increment the expected generation number of the termination and call the method Resume how many times you want.
There are cases where you want to call the Start method in just wait until some condition be reached, this why termination exist.
In our tutorial we will use the fitness stagnation termination with a expected stagnant generations number of 100, this mean that if our GA generate the same best chromsome fitness in the last 100 generations then it will be terminated.
Running the GA
Now that everything is set up, we just need to instantiate and start our genetic algorithm and watch it run.
So the GA ran, but where is the result? You can always get the best chromosome from the GeneticAlgorithm.BestChromosome property.
Another and better way to monitor the current best chromosome is use the GeneticAlgorithm.GenerationRan event. This event is raised right after a generation finish to run. Using this event you can see in
realtime how the genetic algorithm is evolving.
Let’s replace our last “ga.Start();” line to the code below:
Now if your run the program you will see an output like that:
If we plot these generations the output image will be like this:
We can see that in the first generations (black lines) the genetic algorithm as some intermediate results and at the end (red line) it found the best possible solution: a diagonal.
Complete source code
When you finish the tutorial your source code will be this one:
Conclusion
In this tutorial we learn how genetic algoritm works and how to use GeneticSharp to solve a very simple sample. Now you can try it to solve more complex problems.
]]>GeneticSharp v1.1.0 - Binary chromosomes2017-06-11T00:00:00-03:002017-06-11T00:00:00-03:00http://diegogiacomelli.com.br/GeneticSharp-v1.1.0-binary-chromosomesThe GeneticSharp v1.1.0 is out. The greatest additions of this version are the binary chromosomes: FloatingPointChromosome and IntegerChromosome.
Binary chromosomes can be directly used when your solution chromosome can be represented as numbers or a string representation of 0 and 1.
A new sample has been added to the GeneticSharp.Runner.GtkApp, this sample called “Function optimization” show the FloatingPointChromsome in action:
Besides these new chromosomes, there is a new mutation: FlipBit, a special mutation to IBinaryChromosome that takes the chosen gene and inverts the bits.
If you want to use the new chromosomes in your project, just get the new GeneticSharp version from Nuget.
In the next days I will post a tutorial showing how to optimize a very simple function using GeneticSharp and the new FloatingPointChromosome.
]]>Buildron 2.0.02016-09-24T00:00:00-03:002016-09-24T00:00:00-03:00http://diegogiacomelli.com.br/buildron.2.0.0After some months to test the v2.0.0-RC1 we are releasing the final version of Buildron mods support with this 2.0.0 version.
Mods supports represents a great change in Buildron code structure, because we built a mods support that allow any developer add his own mods to Buildron.
Mods available
The classic visual and behavior that you already know at Buildron was moved to mods, you can see them at Buildron Classic Mods repository.
Right now we have 9 mods developed to Buildron:
ConsoleMod: adds a console window to Buildron and let you monitor his events.
SoundMod: the classic explosion sounds and allow change the sounds for each user.
UserMod: each user is represented by a robot and an avatar.
SlackBotMod: adds a bot to your Slack that acts as Buildron and your team can interact with it, like filter builds, sort builds, move camera, receive build status change notifications and taking screenshots.
ToastyMod: the Mortal Kombat “Toasty!” easter egg that can be configured to show on build success, running or failed.
Developing new mods
Do you want to develop your own mod to Buildron? Take a look on our wiki pages about mods and start to build your mod now:
]]>Buildron SlackBotMod2016-09-22T00:00:00-03:002016-09-22T00:00:00-03:00http://diegogiacomelli.com.br/buildron-slackbotmodBuildron is a build radiator to help software development teams to see the current status of their continous integration server and Slack is the omnipresent communication app for almost every developer in the world.
For these reasons, I made a mod called Buildron.SlackBotMod that let you interact with Buildron through the Slack.
Features
Currently Buildron SlackBotMod has the follow features:
Status changed notifications
Your team can be notified by Buildron about builds status changed. In the mod preferences you can choose what status you want to receive notifications (running|succes|failed).
Filter builds
Filter buils by status or text.
Reset filter
Reset previous builds filter (no filter).
Sort builds
Sort buils by status, text or date.
Move camera
Move the camera the amount of pixels define in the x,y,z coordinates.
]]>Sending a Slackbot message from Unity3d2016-09-17T00:00:00-03:002016-09-17T00:00:00-03:00http://diegogiacomelli.com.br/sending-a-slackbot-message-from-unity3dI was looking for a way to send a message to a Slack channel using the Slackbot API.
Introduction
This is a pretty easy task to perform in C#, because there are some great client libraries implementations to the Slack API, like: SlackApi, MargieBot and SlackConnector. However, in the Unity3d world the story is a little different, because Unity3d uses an older .NET version and those mentioned client libraries are implemented using newer .NET framework versions that are incompatible with Unity3d.
I could have tried to compile those client libraries projects using a older .NET version, what I really tried to do, but almost all are using things like Task and async, that are really not supported by Unity3d .NET version right now.
Then I decided to try a very raw solution using the Unity3d WWWForm and it worked well, very simple, but can be useful to someone. The result is the code bellow:
BotController
]]>Creating a ConsoleMod to Buildron2016-09-15T00:00:00-03:002016-09-15T00:00:00-03:00http://diegogiacomelli.com.br/creating-a-consolemod-to-buildronIn this post we’ll create a mod that adds a console window to Buildron and let you monitor its events. Our ConsoleMod will have 2 classes: ModController and Mod.
ModController class
ModController class will be a MonoBehaviour responsible to showing to the user a window where the Buildron events will be logged. It’s a very simple Unity3d MonoBehaviour that use some GUILayout stuffs to build its UI.
Mod class
Mod class is the basic class for every Buildron mod and it will be responsible to creating the ModController GameObject and attach to listen a lot of the Buildron events.
Download Buildron-Mod-Template
Go to Buildron release page and download Buildron-Mod-Template.zip
Create your mod solution
Unzip the Buildron-Mod-Template.zip.
Open a prompt/terminal and go to the folder of unzip Buildron-Mod-Template.
Type:
jumpstart.exe -n ConsoleMod
If you are using jumpstart in Mac/Linux, remember to call it with “mono “ prefix.
A folder called ConsoleMod should be created. Open the src/Code/ConsoleMod.sln.
Creating ModController class
Delete the sample file BoxController.cs
Create a new class called ModController and add the code below to it:
publicclassModController:MonoBehaviour{#regionFieldsprivatestringm_title;privateRectm_windowRect=newRect(10,10,400,300);privateList<string>m_msgs=newList<string>();#endregion#regionConstructorspublicModController(){m_title="Console mod (v.{0})".With(GetType().Assembly.GetName().Version);}#endregion#regionMethods/// <summary>/// Adds the message to the console window./// </summary>/// <param name="message">The message.</param>/// <param name="args">The arguments.</param>publicvoidAddMessage(stringmessage,paramsobject[]args){varformattedMessage=message.With(args);m_msgs.Insert(0,"[{0:HH:mm:ss}] {1}".With(DateTime.Now,formattedMessage));if(m_msgs.Count>10){m_msgs.RemoveAt(10);}}voidOnGUI(){GUILayout.Window(1,m_windowRect,HandleWindowFunction,m_title,GUILayout.MinWidth(100),GUILayout.MinHeight(100));}voidHandleWindowFunction(intid){GUILayout.BeginVertical();foreach(varmsginm_msgs){GUILayout.Label(msg);}GUILayout.EndVertical();}#endregion}
Creating the Mod class
Replace the content of Mod.cs with the code below:
usingBuildron.Domain.Mods;usingUnityEngine;namespaceConsoleMod{/// <summary>/// Responsible to create the ModController GameObject and attach to listen a lot of the Buildron events./// </summary>publicclassMod:IMod{/// <summary>/// Initialize the mod with the context./// </summary>/// <param name="context">The mod context.</param>publicvoidInitialize(IModContextcontext){varcontroller=CreateModController();ListenEvents(context,controller);}privatestaticModControllerCreateModController(){vargo=newGameObject("ConsoleController");returngo.AddComponent<ModController>();}privatestaticvoidListenEvents(IModContextcontext,ModControllercontroller){context.BuildFound+=(sender,e)=>{controller.AddMessage("Build found: {0}",e.Build);};context.BuildRemoved+=(sender,e)=>{controller.AddMessage("Build removed: {0}",e.Build);};context.BuildsRefreshed+=(sender,e)=>{controller.AddMessage("Build refreshed: {0} builds found, {1} builds removed, {2} builds status changed",e.BuildsFound.Count,e.BuildsRemoved.Count,e.BuildsStatusChanged.Count);};context.BuildStatusChanged+=(sender,e)=>{controller.AddMessage("Build status changed: {0}",e.Build);};context.BuildTriggeredByChanged+=(sender,e)=>{controller.AddMessage("Build triggered by changed: {0}/{1}",e.Build,e.Build.TriggeredBy);};context.BuildUpdated+=(sender,e)=>{controller.AddMessage("Build updated: {0}",e.Build);};context.CIServerStatusChanged+=(sender,e)=>{controller.AddMessage("CI server status changed: {0}",e.Server.Status);};context.RemoteControlChanged+=(sender,e)=>{controller.AddMessage("RC changed: {0}",e.RemoteControl);};context.UserAuthenticationCompleted+=(sender,e)=>{controller.AddMessage("User authentication completed: {0}:{1}",e.User,e.Success?"success":"failed");};context.UserFound+=(sender,e)=>{controller.AddMessage("User found: {0}",e.User);};context.UserRemoved+=(sender,e)=>{controller.AddMessage("User remoed: {0}",e.User);};context.UserTriggeredBuild+=(sender,e)=>{controller.AddMessage("User triggered build: {0}/{1}",e.User,e.Build);};context.UserUpdated+=(sender,e)=>{controller.AddMessage("User updated: {0}",e.User);};}}}
Compile the project.
Testing on mod simulator
Open the project src/Unity/ConsoleMod inside Unity3d editor.
Open SimulatorScene.
Hit the “Play” button.
You should see a scene like this:
In the menu “Buildron”, click on “Show Simulator”.
Click on “BuildFound”, “BuildStatusChanged” and “BuildRemoved” buttons, you should see these events been registered on ConsoledMod window.
Hit the “Play” button again to stop playing the scene.
There are two folders inside your Unity3d project called “Materials” and “Prefabs”. They are created from Buildron-Mod-Template, but ConsoleMod don’t need them. You can remove them.
Building the mod
ConsoleMod has no Unity3d assets, in this case you don’t need to use the menu “Buildron / BuildMod”, you just need to compile your project inside your IDE, as we did on section “Creating the Mod class” to get your mod inside Buildron.
Testing on Buildron
Go to folder ConsoleMod/build and open the Buildron of your platform.
Hit the play button on Buildron.
You should see the ConsoleMod window registering a lot of Buildron events.
Conclusion
That’s it! We created a Buildron mod that can help to debug what is happening in Buildron and mods in runtime.
So, why you don’t try to create your own Buildron mod now?
]]>jumpstart2016-09-12T00:00:00-03:002016-09-12T00:00:00-03:00http://diegogiacomelli.com.br/jumpstartI present to you my newest tool…
jumpstart is a command-line tool to create new C# projects from prebuilt/templates.
As an experienced developers it’s very common we have some kind of template solution when we start a new project. Maybe it’s the latest project we work on, maybe it’s a very good template we used every time to bootstrap a specific kind of project.
I created jumpstart to simplify the process of create the new project based on those templates or prebuilt solutions.
The idea of the tool was born a long time ago and became a little stronger every time that I had to create a new solution and all the projects by hand, but when I saw the message bellow in the http://xamarin.com/prebuilt page I decided to finally write the tool… and the name was very clear, almost.
The first name that I thought to the tool was prebuilt, but later, my friend Giusepe Casagrande convinced me that jumpstart was really better name… and he was right!
How does it work?
jumpstart is very simple, it get a folder with a template solution and copy it to a new folder replacing the root namespace of the template to the new project namespace.
The MyClass.cs, AssemblyInfo.cs, My.Amazing.NewProject.csproj and My.Amazing.NewProject.sln contents was updated by jumpstart to use the namespace My.Amazing.NewProject.
If you are using jumpstart in Mac/Linux, remember to call it with “mono “ prefix.
Basic (using conventions)
If your template folder is called “jumpstart-template” and its namespace is JumpStartTemplate, the only argument you need to pass to jumpstart is -n(namespace).
jumpstart -n My.Amazing.NewProject
The “jumpstart-template” folder should be in the same folder where you are calling jumpstart.
Advanced (specifying template folder and namespace)
For example, your template folder is “my-template” and your template namespace is “My.Template”, in this case you should call jumpstart in this way:
You can use a remote .zip file as your template folder. For example, if you want to start a new project with any of those prebuilt apps that Xamarin make available on http://xamarin.com/prebuilt, you can use the command bellow to jumpstart your new project using those templates:
]]>Starting a Buildron mod with a mod template2016-09-04T00:00:00-03:002016-09-04T00:00:00-03:00http://diegogiacomelli.com.br/starting-a-buildron-mod-with-a-mod-templateIn this post I will show how to start building a mod to Buildron using a mod template.
Download
Download the Buildron-Mod-Template.zip from releases page.
Unzip it in any folder.
Creating the solution
Open a prompt (win) or a terminal (linux/mac).
Go to the folder where you unzip Buildron-Mod-Template.zip.
Type:
jumpstart-exe -n <the name of your mod>
If you are in Linux/Mac andfix commands with “mono “.
For example, if your mod name is “MyAmazingMod”, you should type:
jumpstart.exe -n MyAmazingMod
jumpstart is a tool that I made to help create solutions from pre built templates. I will talk about of it in an future post.
After jumpstart is done you will see a new folder called MyAmazingMod, inside of it there are the following folders:
build: full Buildron executable with the classic mods to all platforms (linux, mac and win).
src
Code: the C# class library of your mod
Unity: the Unity3d project of your mod.
The C# project
Open the MyAmazingMod/src/Code/MyAmazingMod.sln.
Select the configuration of your platform.
Inside of it you can see the Mod.cs and ModController.cs.
Compile the whole solution.
The Unity3d project
Open the MyAmazingMod/src/Unity/MyAmazingMod on Unity3d.
Open the scene Assets/SimulatorScene and click on play button.
Click on the menu “Buildron/Show Simulator”.
In the simulator click on button “BuildStatusChanged”.
You will see a box falling down every time you hit the button. This behavior is made by Mod.cs and ModController.cs on C# project. If you are curious about it, take a look on the classes implementations.
Testing on Buildron
In the Unity3d editor click on menu “Buildron / Build mod”.
Select your platform: Mac, Linux or Windows.
Type your Buildron mods folder:
Linux: ../../../build/linux/Mods
Mac: ../../../build/mac/Buildron.app/Mods
Win: ../../../build/win/Mods
Click on “Build” button.
Go to folder MyAmazingMod/build and open the Buildron of your platform.
Hit the play button on Buildron.
You should see the same falling down box that you see on simulator falling down inside Buildron every time a build changed status.
Conclusion
With this post you learned how you can starting to create your own mod from mod template.
If you want to build more sofisticated mods, please take a look on our tutorial “Creating a mod”.
]]>Buildron 2.0.0-RC1 - Mods support2016-08-28T00:00:00-03:002016-08-28T00:00:00-03:00http://diegogiacomelli.com.br/buildron.2.0.0-rc1-mods-supportAfter some months of hard work I finally released the Buildron mods support.
This Buildron 2.0.0-RC1 represents a great change in Buildron code structure, because we built a mods support that allow any developer add his own mods to Buildron.
Hope to see you building some mods to Buildron. We’re curious about what crazy mods ideas you could have ;).
]]>Testing js-dos2016-08-04T00:00:00-03:002016-08-04T00:00:00-03:00http://diegogiacomelli.com.br/testing-js-dosRecenlty I discovered the project Emscripten:
Emscripten is an LLVM-to-JavaScript compiler. It takes LLVM bitcode - which can be generated from C/C++, using llvm-gcc (DragonEgg) or clang, or any other language that can be converted into LLVM - and compiles that into JavaScript, which can be run on the web (or anywhere else JavaScript can run).
A javascript version of dosbox that can run dos programs and games in browser.
js-dos provides javascript API to easily run DOS programs and games in browser. This API allows to run unmodified versions of DOS programs, in other words you can run DOS binary in browser.
js-dos use Emscripten and em-dosbox projects do built his easy-to-use api.
Below I made a test with it and put one of my first games, a Nibble clone wrote with 461 lines of C to run in browser.
This is all JS code to start js-dos in this sample:
vardosbox=newDosbox({id:"dosbox",onload:function (dosbox){dosbox.run("NIBBLE.zip","./NIBBLE.EXE");},onrun:function (dosbox,app){console.log("App '"+app+"' is runned");}});
]]>Buildron - Your builds, our world! …and now our open source code too2016-06-02T00:00:00-03:002016-06-02T00:00:00-03:00http://diegogiacomelli.com.br/buildron-your-builds-our-world-and-now-our-open-source-code-tooBuildron is a build radiator to continuous integration server like TeamCity, Jenkins and Hudson.
]]>Using a FxCop badge on your GitHub repository2015-10-26T00:00:00-02:002015-10-26T00:00:00-02:00http://diegogiacomelli.com.br/using-a-fxcop-badge-on-your-github-repositoryThe use of badges on GitHub repositories helps us to promote good pratices about our code. Some amazing services like the Shileds.io can generate almost all badges you can imagine, but what about those badges where there is no such online service to perform this job? One common case is when you program with C# and want some FxCop badge but there is no online service to run FxCop.
BadgesSharp
To fill this gap I created the BadgesSharp service: http://badgessharp.apphb.com. BadgesSharp is a free service to generate badges that need some kind of input and processing before you can display them on GitHub repositories.
In the case of FxCop, we need to run it against our .NET code and send the result report to BadgesSharp and then the service will generate the FxCop badge.
Here is a small tutorial on how to get the FxCop badge in your GitHub repo:</p>
Install FxCop
If you don’t have it yet, download and install FxCop.
]]>Auto tracking your time with ControlPlane + Toggl2015-09-20T00:00:00-03:002015-09-20T00:00:00-03:00http://diegogiacomelli.com.br/auto-tracking-your-time-with-controlplane-togglSo, do you want to track the time you spend in some tasks, but always forget to start the time tracking?
I love to used Toggl.com to time tracking and a few days ago I discovered another amazing app to OSX: ControlPlane.
ControlPlane, in few words, is an app that allow you change your desktop configuration (opened apps, notifications, etc) when some trigger happens.
In my specific case I would like to track the time I spend programming in the newest Skahal’s pet project, a Space Invaders Remake or as we like to call: SIR. Well, I wanted to start a “Programming” task on Toggl every time I open Unity3D editor and stop the same task when close the Unity3D.<
I followed steps bellow to get this done:
1) Create the startTogglTimeEntry.sh
We will create the follow shell script that uses Toggl api to starts a task:
As you can see we need to replace two things in this script:
API-TOKEN: this should be replaced by your Toggl api token, go to the bottom of your Toggl profile page and get it.
PROJECT-ID: this should be replaced by the id of the project where you want to create the “Programming” task. We need to discover de project id, go to Toggl.com, select your team, then your project, you’ll see an address like that in Safari “https://www.toggl.com/app/projects/<TEAM-ID>/edit/<PROJECT-ID>”. Use the value of “<PROJECT-ID>” in the script.
Now save the content on file startTogglTimeEntry.sh
The first thing, you must create the context, go to ControlPlane preferences:
Select tab “Contexts”, and add I new context, in my case a called it “Skahal”:
5) Configuring the evidence sources
Select the tab “Evidences sources”, the option “Running Application” should be checked:
6) Configuring the rules
Select the tab “Rules”, add a new rule to your context, the rule must be of type “Running Application” to Unity 3D:
7) Configuring the actions
Select the tab “Actions”, we’ll create 3 new actions: the first one is a task to open Safari in the Toggl timer task page, this is an optional action, but I like to see the task running (and I can stop/start it manually sometimes). Add a action of type “Open URL” with the address “https://www.toggl.com/app/timer”, select “On Arrival” and your context:
The second one is a action to start the task in the Toggl when the context starts. Add a action of type “Shell Script”, in the field “Parameter” type the path to your startTogglTimeEntry.sh script, select “On Arrival” and your context:
The third one is a action to stop the task in the Toggl when the context ends. Add a action of type “Shell Script”, in the field “Parameter” type the path to your stopTogglTimeEntry.sh script, select “On Arrival” and your context:
8) Test everything
Open Unity3D editor, in the almost same time your context must be activated and the Safari must open the Toggl url with “Programming” task started.
Now, close the Unity3D and the “Programming” task must be stopped on Toggl.com.
That’s it. ControlPlane is an amazing app and things we can automate with it is nearly infinite!
]]>Getting your code documentation at runtime2014-08-03T00:00:00-03:002014-08-03T00:00:00-03:00http://diegogiacomelli.com.br/getting-your-code-documentation-at-runtimeIn some situations, like generate a live console for a web api or generate code using T4 template we need a way to read the code documentation at runtime.
Some time ago I’ve faced that situation again and I thought: “Should be an easy way to read this code documentation!”.
After some googled I found a code from Jim Blackler that allowed developers read C# code documentation at runtime, but at that time the code was just a downloadable .zip in Jim’s blog. I asked him if I could put the source code on GitHub to allow better code improvements and community collaboration, he said: “Please go ahead with your plan”.
With DocsByReflection you can easy get your code documentation at runtime in many ways, like:
// From type.vartypeDoc=DocsService.GetXmlFromType(typeof(Stub));// From property.varpropertyInfo=typeof(Stub).GetProperty("PropertyWithDoc");varpropertyDoc=DocsService.GetXmlFromMember(propertyInfo);// From method.varmethodInfo=typeof(Stub).GetMethod("MethodWithGenericParameter");varmethodDoc=DocsService.GetXmlFromMember(methodInfo);// From assembly.varassemblyDoc=DocsService.GetXmlFromAssembly(typeof(Stub).Assembly);
If you want just use it, there is a NuGet package with latest binaries version:
Install-Package DocsByReflection
]]>Improving your debug with DebuggerDisplay2014-07-14T00:00:00-03:002014-07-14T00:00:00-03:00http://diegogiacomelli.com.br/improving-your-debug-with-debuggerdisplayThere is an amazing and easy to use custom attribute on .NET Framework stack that I rarely see in use. It helps and improve the way you can debug your code and you just need a line of code to use it: DebuggerDisplay.
Maybe you’ve used it a lot and already love it, in this case just spread the word ;), but if you are a beginner or an experienced .NET developer and don’t know DebuggerDisplay, this is the chance to you to improve your debug skills.
You are debugging a list of Tweets, let me say 200 tweets, and all tweets in the debugger view looks like the image below:
It’s clear that is not easy to know what tweets are inside that list. Of course you can use breakpoint conditions, trace, logs and many others resources to help the debug process, but DebuggerDisplay is an easier and very cheap solution.
In our scenario, the most important things about the Tweet class are the text, the username and the retweets count. We’ll add the DebuggerDisplay attribute to the class:
]]>Using sensitive data on your Travis CI build2014-07-13T21:00:00-03:002014-07-13T21:00:00-03:00http://diegogiacomelli.com.br/using-sensitive-data-on-your-travis-ci-buildYou have programmed an amazing functional tests to validate your infrastructure service that connect on Google Docs.
These functional tests run perfect well on your development machine and now you want to run them on Travis CI, but how to do this without reveal your Google’s username and password worldwide?
Travis CI Encription Keys goes to the rescue! With them you can encrypt your sensitive data and read them inside your tests running on Travis CI.
In this post I will show you a very simple and real sample of using encryption keys to read username and password from environment variables encripted on .travis.yml file
Step 1: Encrypting your environment variables
To perform the encryption using Travis CLI you will need to setup a Ruby environment on your dev machine. If you are using Windows and do not have a Ruby environment, the easiest way is use RubyInstaller (don’t be afraid, because it works very well…it’s a fully automatic installation).
After the RubyInstaller finish his job, open the “Start Command Prompt with Ruby” and type:
Now your functional tests should run on your dev machine (don’t forget to set the environment variables on it too) and on Travis CI as well.
]]>DDD by quotes2014-05-12T00:00:00-03:002014-05-12T00:00:00-03:00http://diegogiacomelli.com.br/ddd-by-quotesThe Eric Evans’ book “Domain-Driven Design - Tackling Complexity in the Heart of Software” is like a Bible for who intend to use DDD, so, I guess that some quotes of the book can help us to validate our DDD approach.
The list below is just a “check-point list”, because, to understand what each one really meaning you need to read book deeply, probably more than one time.
My tip is: read the book!
Quotes
“The objects had behavior and enforced rules. The model wasn’t just a data schema; it was integral solving a complex problem.” (page 13)
“The vital detail about the design is captured in the code.” (page 37)
“Running code doesn’t lie, as any other document might. The behavior of running code is unambiguous.” (page 38)
“When a model doesn’t seem to be practical for implementation, we must search for a new one. When a model doesn’t faithfully express the key concepts of the domain, we must search for a new one.” (page 49)
“Isolating the domain implementation is a prerequisite for domain-driven design.” (page 75)
“It is important to constrain relationship as much as possible.” (page 83)
“When we force an operation into an object that doesn’t fit the object’s definition, the object loses its conceptual clarity and becomes hard to understand or refactor” (page 104)
“When the users or domain experts use vocabulary that is nowhere in the design, that is a warning sign.” (page 207)
“The concept you need is not always floating on the surface, emerging in conversation or documents. You may have to dig and invent. The place to dig is the most awkward part of your design. The place where procedures are doing complicated things that are hard to explain. The place where every new requirement seems to add complexity.” (page 210)
“Constraints make up a particularly important category of model concepts. They often emerge implicitly, and expressing them explicitly can greatly improve a design.” (page 220)
“When the constraints are obscuring the object’s basic responsibility, or when the constraint is prominent in the domain yet not prominent in the model, you can factor it out into an explicit object or even model it as a set of objects and relationships.” (page 222)
“Create explicit predicate-like value objects for specialized purposes. A specification is a predicate that determines if an object does or does not satisfy some criteria.” (page 226)
“A pattern is not a cookbook. It lets you start from a base of experience to develop your solution, and it gives you some language to talk about what you are doing.” (page 227)
]]>Why we should avoid DateTime.UtcNow inside a Linq to Entities query?2014-05-12T00:00:00-03:002014-05-12T00:00:00-03:00http://diegogiacomelli.com.br/why-we-should-avoid-datetime-utcnow-inside-a-linq-to-entities-queryWhy we should avoid DateTime.UtcNow inside a Linq to Entities query?
Because we can get unexpected results!
After read this tip, will be expected results 😉
What is the diference between these two Linq queries?
Query 1
Query 2
SQL generated
The first one will generate a SQL with WHERE clause like this:
Where @p__linq__1 is the value of our filterDate variable.
The second one will generate this WHERE clause:
What is the problem?
Imagine that we’re using the second query inside some sync algorithm in our C# code, this algorithm is very sensitive about time, now imagine that the server where our C# code is running has a difference about seconds or minutes with the database server?
YES, UNEXPECTED RESULTS!
Conclusion
Linq to Entities is very smart and it is able to translate our DateTime.Now or DateTime.UtcNow to a matching command on database side.
The important here is: we should remember that it can do this and we should use features like these with parsimony.
]]>Nibble2014-05-11T00:00:00-03:002014-05-11T00:00:00-03:00http://diegogiacomelli.com.br/nibbleLooking in some backups I found one of my first games. I made it about 14 years ago: a Nibble in 461 lines of C.


 At that time we did not find any builtin or other solution to make this workflow easier and streamlined, so we decided to create our own solution using


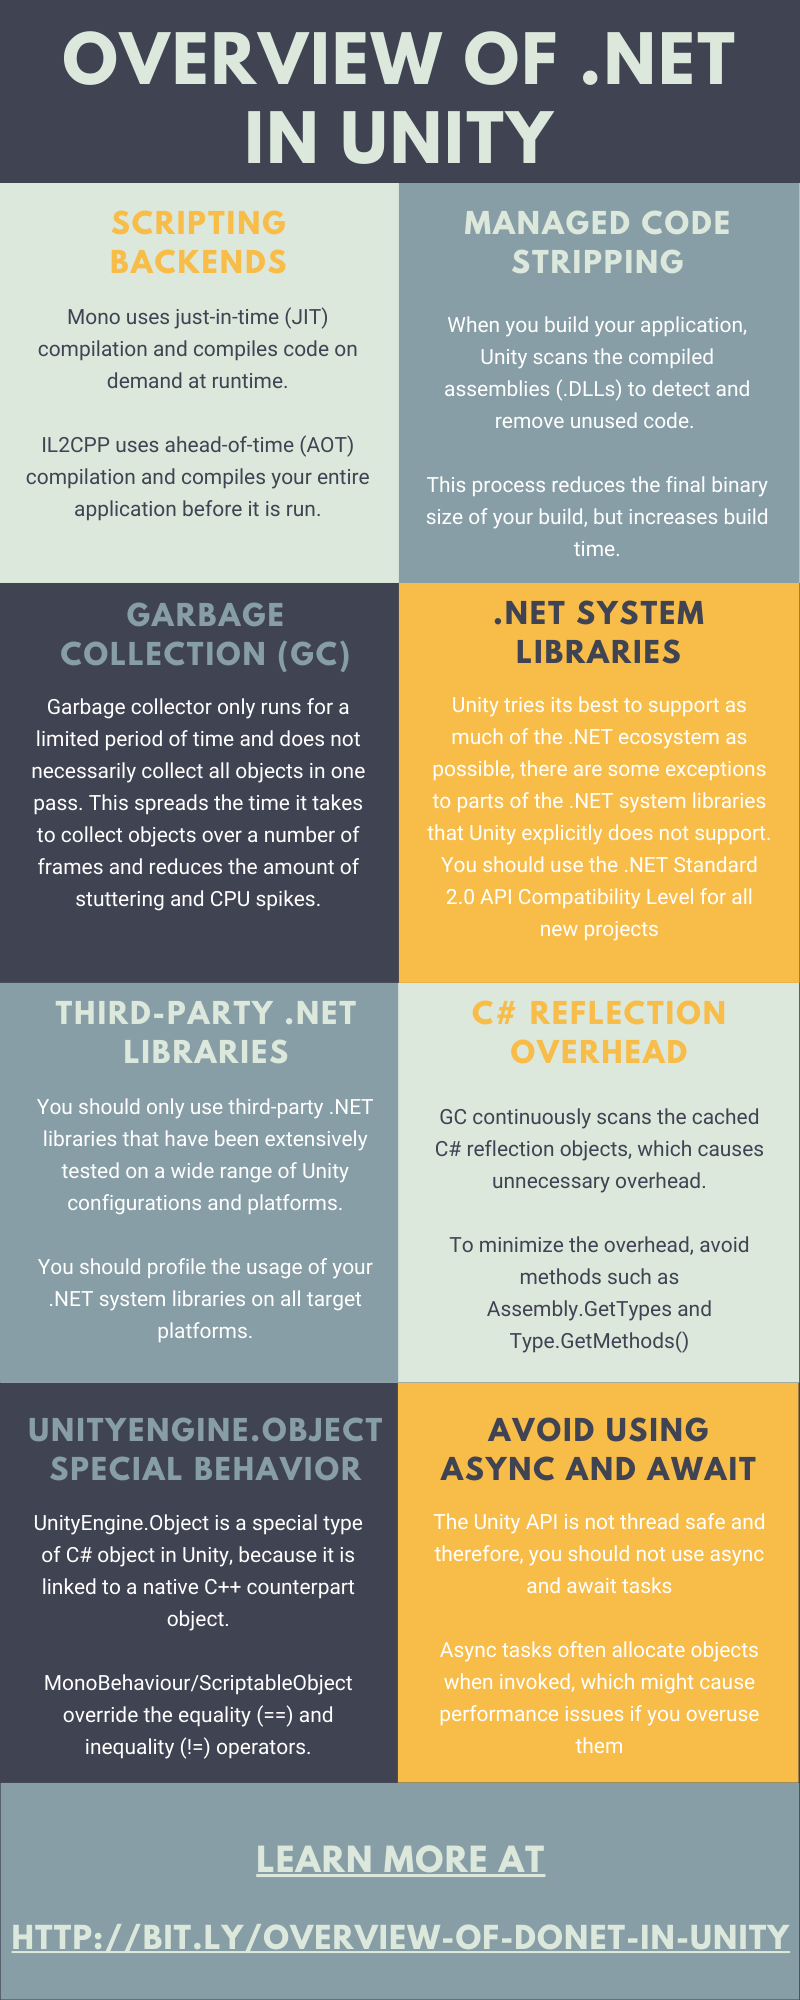