Unity Avatar Mask and Animation Layers
In this tutorial we will learn how to use Avatar Mask and Animation Layers to combine multiple animations.
Introduction
Imagine we imported an animated 3D model from Asset Store, in our sample, we will use the incredible robot from the free package Sci Fi Warrior PBR HP by Dungeon Mason. In this package, there are 10 animation clips:
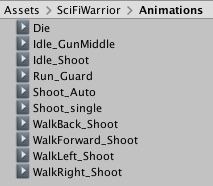
animation clips available on Sci Fi Warrior PBR HP
All those clips are animations for full body. So, when you play them:
Idle_GunMiddle
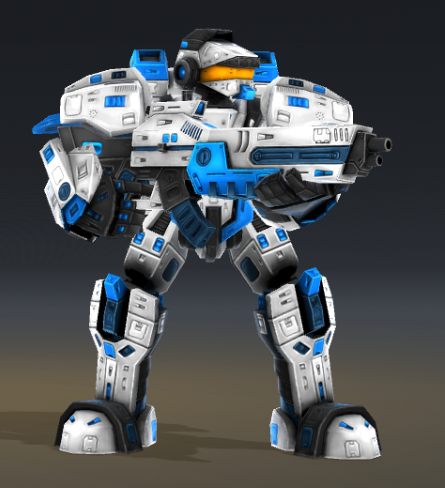
the robot stands idle with the gun in the middle of his body
WalkForward_Shoot
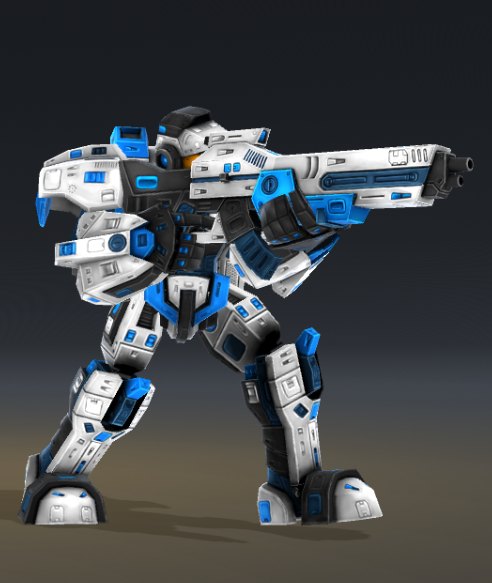
the robot walk forward and shoot
You can see all the animations available on the Sci Fi Warrior PBR HP package in this video https://www.youtube.com/watch?v=fNzBdYhm3Gk
These are great animations, although if we want to make the robot stands idle, but instead of keeping the gun in the middle of his body, he aims the gun or shoot?
Or if we want that robot walk forward but holding the gun in the middle of his body?
Of course, we can ask to the artist to create all those animation combinations, but there is a smarter approach for this case…
Avatar Masks and Animation Layers goes to the rescue
To start, lets see what Unity Manual says about Avatar Masks and Animation Layers:
Masking allows you to discard some of the animation data within a clip, allowing the clip to animate only parts of the object or character rather than the entire thing. For example, if you had a character with a throwing animation. If you wanted to be able to use the throwing animation in conjunction with various other body movements such as running, crouching and jumping, you could create a mask for the throwing animation limiting it to just the right arm, upper body and head. This portion of the animation can then be played in a layer over the top of the base running or jumping animations.
Unity uses Animation Layers for managing complex state machines for different body parts. An example of this is if you have a lower-body layer for walking-jumping, and an upper-body layer for throwing objects / shooting.
By reading those two sections is quite clear that we need to use avatar masks and animation layers together to combine our animations of different body parts. So, in the next sections, I will demonstrate how to combine three animations (Idle_GunMiddle, WalkForward_Shoot, and Shoot_single) to make the robot shoot while stands idle and walk forward with a gun in middle body. After that, I will propose you a challenge for the other animations available.
Starter project

All the source code and assets for this tutorial are available on this GitHub repository: https://github.com/giacomelli/unity-avatar-mask-and-animation-layers. To start this tutorial you need to fork, clone or download the repository.
git clone https://github.com/giacomelli/unity-avatar-mask-and-animation-layers.git
Open the folder avatar-mask-starter on Unity.
This starter project has an initial setup and assets to allow us to focus in the learning about Avatar Masks and Animations Layers.
Open the scene _Tutorial/Scenes/TutorialScene.
If you see a popup called TMP importer, hit the Import TPM Essentials button to import the TextMesh Pro’s assets.
Hit the Play button. You should see a screen like this:
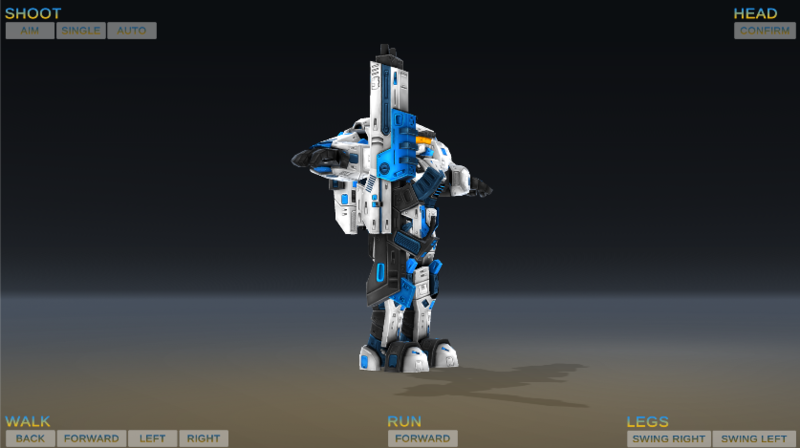
Starter project running: just HUD
Creating the Animation Controller
Create a new Animation Controller (menu Assets/Create/Animation Controller) and open it:
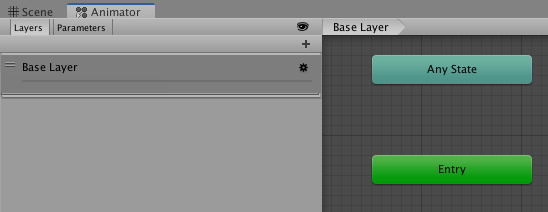
Animator window showing the animation controller created
All animation layers, nodes and transitions for this tutorial will be created inside this animation controller.
In the hierarchy, select the SciFiWarriorHP and in the Animator component set the Controller property to our Animation Controller.
Making the robot walk forward
To get something running right now, we will make the robot walk forward when the button WALK / FORWARD became checked.
In the Animator opening with our Animation Controller drag the animation clip Idle_GunMiddle from folder SciFiWarrior/Animations. Do the same with the clip WalkForward_Shoot.
Create a transition (right click on the node and Make transition) from Any state to WalkForward_Shoot and create another transition from WalkForward_Shoot to Idle_GunMiddle.
Now we need to tell to the animation controller when it should activate the two transitions, for this we will create a bool animation parameter called WalkForward.

WalkForward parameter created
We want to activate the transition from Any state to WalkForward_Shoot when WalkForward is true, so select this transition (click on the arrow connecting the state Any State to WalkForward_Shoot) and in the Conditions list on inspector add the WalkForward equals true:

WalkForward condition defined
Click the reset to auto fit the exit and transition time:

reseting the transition settings
Repeat the same steps as above for the transition from WalkForward_Shoot to Idle_GunMiddle, but use false as the value for WalkForward.

animation base layer
Hit the Play button to test the animation states. When you click on WALK / FORWARD the robot starts to walk, when you click it again the robot stops to walk.
Creating the upper body avatar mask
The animation for walk forward works pretty well, the robot walks forward while it’s aiming the gun. This is the whole movement animated inside the WalkForward_Shoot clip.
Now we want that robot walk forward without aiming the gun, instead of this, we want it keeps the gun in the middle as it does when Idle_GunMiddle is active. To get this done, first, we need to create an avatar mask to the upper body.
Create a new Avatar Mask (Assets/Create/Avatar Mask) called UpperBody. In the inspector, uncheck all lower body parties, as the image below:
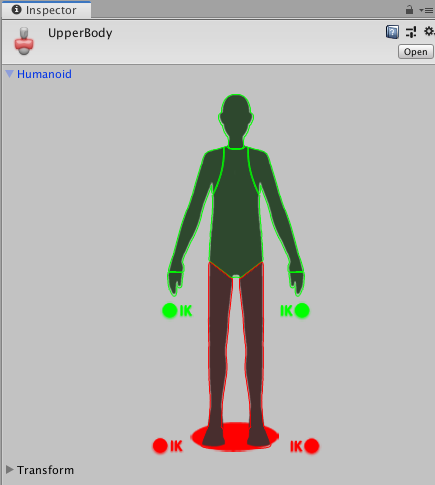
only upper body
Creating a upper body animation layer
With the UpperBody Avatar Mask created, we will need to create a new animation layer that will use the mask. Go to the animator window and create a new layer using the + button:

the new layer created with the mask
Change the Weight property to 1 and set the Mask to the UpperBody Avatar Mask. Keep the Blending as override.
Drag the animation clip Idle_GunMiddle from folder SciFiWarrior/Animations to the UpperBody layer.

upper body animation layer
Testing the animations
Hit the Play button to test the animation states. When you click on WALK / FORWARD the robot starts to walk, but now it’s not aiming the gun, instead it keeps the gun in the middle.
Why does this happen?
So, this is done by the UpperBody Animation Layer that we added to our animation controller, as it’s mask was defined with our UpperBody Avatar Mask that only consider upper body parts of the humanoid, Unity overrides the base layer animation with the upper body part of the Idle_GunMiddle.
Making the robot shoot
We will make the robot shoot when the button SHOOT / SINGLE became checked, this will help us to better understand how the Avatar Mask and Animation Layer works to override the animations from the base layer with the animations from UpperBody layer.
In the Animator Window with our Animation Controller opened, select the UpperBody layer and drag the animation clip Shoot_single from folder SciFiWarrior/Animations.
Create a transition (right click on node and Make transition) from Any state to Shoot_single and create another transition from Shoot_single to Idle_GunMiddle.
Now we need to tell to the animation controller when it should activate the two transitions, for this we will create a bool animation parameter called ShootSingle.

ShootSingle parameter created
We want to activate the transition from Any state to Shoot_single when ShootSingle is true, so select this transition (click on the arrow connecting the state Any State to Shoot_single) and in the Conditions list on inspector add the ShootSingle equals true.
Click the reset to auto fit the exit and transition time.
Repeat the same steps as above for the transition from ShootSingle to Idle_GunMiddle, but use false as the value for ShootSingle.
Hit the Play button to test the animation states. When you click on SHOOT / SINGLE the robot shoot.
Now you can combine the two buttons WALK / FORWARD and SHOOT / SINGLE and see how the animations combine.
Challenge
Do something is better to learn than just reading and following someone instructions because this I will challenge you to try to implement other actions:
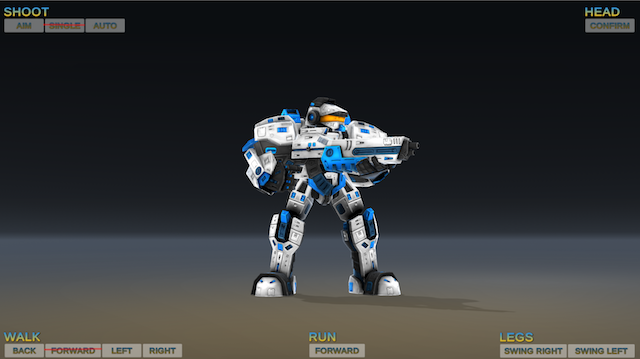
the remaining actions to the challenge
To implement these actions you need to do almost the same thing we did in this tutorial so far, just using another animation clips, transitions and parameters.
The challenger items are the legs because you will need to create new Avatar Masks with the Transform option of the avatar configuration to get the right animation. New Animation Layers will be needed as well.
If you have any doubt how to implement any part of this challenge, feel free to ask on this post comments or send me a message.
Solution
The whole source code and assets for this tutorial are available on: https://github.com/giacomelli/unity-avatar-mask-and-animation-layers
This repository has two main folders:
- avatar-mask-starter: the one you used to make this tutorial.
- avatar-mask-complete: the whole solution with all actions implemented. Use this one, in case you get stuck in any item on the challenge.
The video below shows the complete solution running:
Conclusion
In this tutorial, we learn how to use Avatar Masks and Animation Layers to animate a robot with different masks and layers. These techniques allowing us to use already existent animations and combine them.
Icons made by Freepik, Vignesh Oviyan and Eucalyp from www.flaticon.com is licensed by Creative Commons BY 3.0