ARC-8: devlog #1 - Core and code design
Some years ago I coded a CHIP-8 emulator in C# just for fun, that emulator was hibernating in a private repository that I never released. Some days ago I started to working on it again with the idea to release it running on Blazor and as a Unity asset where any game developer could drag its prefabs as easter eggs directly to their games.
In this post, I will talk about my premises for the ARC-8’s code design that guided me during its development.
You can read the other ARC-8’s devlog posts.
The source code is not yet published on GitHub, I will notify in this series of posts about ARC-8 devlog and on my Twitter too when this happens.
Introduction
I always wanted to develop a video game emulator. Anybody that tried or even google about it quickly realizes that it is not an easy or simple task. If you search a little further you will see developers talking about CHIP-8 as the best thing to emulate as your first emulator project. Why? Well, the CHIP-8 is quite a simple virtual machine that has only 35 opcodes, simple graphic, sound, and input systems too.
CHIP-8
According to Wikipedia:
CHIP-8 is an interpreted programming language, developed by Joseph Weisbecker. It was initially used on the COSMAC VIP and Telmac 1800 8-bit microcomputers in the mid-1970s. CHIP-8 programs are run on a CHIP-8 virtual machine. It was made to allow video games to be more easily programmed for these computers.
According to Mastering CHIP-8 by Matthew Mikolay (one of the best technical information source about CHIP-8):
CHIP-8 is an interpreted minimalist programming language that was designed by Joseph Weisbecker in the 1970s for use on the RCA COSMAC VIP computer. Due to its hexadecimal format, it was best suited to machines with a scarcity of memory, as minimal text processing had to be performed by the interpreter before a program could be executed. This property inevitably led to its implementation on a variety of hobbyist computers aside from the VIP, such as the COSMAC ELF, Telmac 1800, and ETI 660.
ARC-8

I won’t get into details about how to implement each of CHIP-8’s 35 opcodes, because there are plenty of tutorials and resources talking about this on the internet (look in the section ‘Further reading’ in the of this post). My focus here is to explain my code design decisions to allow built a CHIP-8 emulator core in .NET Standard that will allow us to develop a graphic, sound, and input systems for Blazor and Unity3D (and any other platform where C# / .NET is supported).
Why the name ARC-8? well, the choice of the name was quite chaotic as any of the name ideas brainstorm that I have had with my friend Giusepe Casagrande. The name’s meaning and the way of speaking are
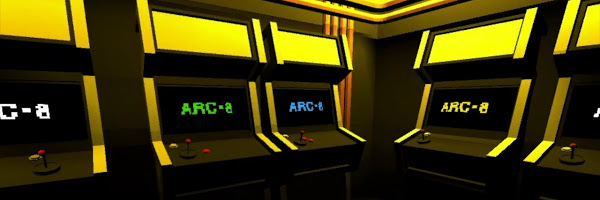
Arcadebecause we want to remember that old day when we are kids playing some classic games in an arcade or fliperama as we call it in Brazil.
Premises
First of all, before started do develop the code, I needed to sit down and defined some premises of the ARC-8’s code design, they are:
- Premise 1 - Cross-platform: the ARC-8 core solution should be cross-platform.
- Premise 2 - Testable: code must be testable.
- Premise 3 - 100% code coverage: Unit test code coverage for the core should be 100%.
- Premise 4 - Benchmark: benchmark the code to verify and compare solutions performance.
Premise 1 - Cross-platform

To make the ARC-8 core solution cross-platform, the first decision is to implement it as .NET Standard class library. The second one is to define the graphic, sound, input, and logging systems of the emulator as interfaces that will only be implemented on specific platforms, like Blazor and Unity3d.

Systems interfaces
Premise 2 - Testable

The main part of a CHIP-8 emulation development is on the opcodes.
The common solution for many emulators is to put all opcodes inside a giant switch statement (some use nested switch to group some opcodes).
There is no problem in this kind of solution, but besides the code readability that can easily suffer from too many cases in the switch statement, there is a problem with the idea of unit testing, because we cannot test each opcode isolated.
Sure, you can still unit testing an emulator with opcodes in a switch statement, but I decided to define an interface that an opcode needs to implement to be used on the emulator.
IOpcode interface
An IOpcode’s implementation

Premise 3 - 100% code coverage

With the decision of implement each opcode in a separate classes and the decision of use interfaces for each system, we can easly unit test them and achieve the 100% code coverage:
To validate the code coverage I used the coverlet.msbuild and ReportGenerator Nuget packages combined with Cake’s recipe to generate a code coverage report:

Premise 4 - Benchmark

I like to benchmark the code to compare some solutions in a fast and precise way. To create a benchmark in the .NET system the BenchmarkDotNet is the right choice. BenchmarkDotNet is quite easy to use and you can set up a project with it in less than 5 minutes.
When I used it on ARC-8 implementation I discover that I could improve the performance in 18x just removing a Linq code and using a cached solution to locate the opcodes.

Next step

In the next ARC-8 devlog I will talk about the ARC-8’s implementation on Blazor.
If you have any doubts about what I talk about above or any tip about the CHIP-8 emulator and you like to share it, please let me know in the comments section below.
Further reading

- Mastering CHIP-8 by Matthew Mikolay
- Octo: a high-level assembler for the CHIP-8
- CHIP-8 Emulation and Disassembler
- CHIP-8 test rom
- CHIP-8 Archive
- CHIP-8 roms
- Coverlet quick-start
- BenchmarkDotNet getting started
- Cake getting started
Icons made by Freepik, Vignesh Oviyan and Eucalyp from www.flaticon.com is licensed by Creative Commons BY 3.0