Unity Distribution Portal (UDP) Journey: Tips & Tricks

In this post, I will list some tips and tricks that I learned in my journey using the Unity Distribution Portal (UDP) to publish my game Puzzimals to 4 new stores, reaching millions of new users, with a single build.
Introduction
Unity has recently launch to everyone the Unity Distribution Portal (UDP) a platform that enable Unity developers to distribute Android games beyond Google Play, into stores like Samsung Galaxy Store, ONE Store, Mi GetApps, HUAWEI AppGallery, QooApp Game Store, SHAREit Game Store, TPAY MOBILE Stores, APPTUTTI, and VIVEPORT.
The Unity Distribution Portal was created to help make publishing mobile games on alternative app stores faster and easier for developers. When you submit your game, UDP automatically creates specific builds with all required SDKs in the background, saving you a substantial amount of time when publishing to multiple stores.
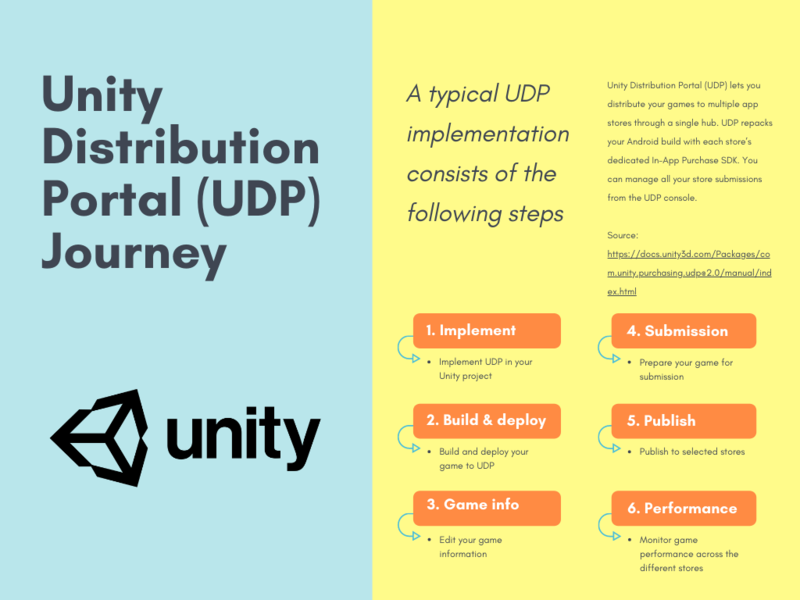
Unity Distribution Portal (UDP) lets you distribute your games to multiple app stores through a single hub. UDP repacks your Android build with each store’s dedicated In-App Purchase SDK. You can manage all your store submissions from the UDP console.
This post is focused on games that have IAP and use Google Play Services, like leaderboards and achievements. If your game does not have any of these features, publish to UDP is quite a more straightforward process and probably these tips here won’t be useful for you.
Available Stores
As I write this post Unity is working to add even more stores to UDP. From the 9 stores supported, 7 are fully integrated with UDP. What this meaning? You just need to create your account on each store, via UDP (in some cases fill some forms and send some ID and bank docs), and UDP will perform all the steps need to make your game available on the store.
Getting started
Is not the intent of this post cover everything about how to publish your game using UDP, I guess this quite well documented on UDP package documentation.
The idea of this post is to point out some tips and tricks that can help you, as helped me, to understand how to use UDP.
Read the docs
Please, if you did not read the official documentation yet, go and read it, then come back here. You’ll better understand this post and the whole UDP solution after educated yourself about it.
1. Implement
What docs says: Set up and configure UDP in the Unity Editor, implement UDP in your game project, and populate your IAP Catalog with your in-app purchase products (if any).
1.1 Create a new game on UDP
Go to the UDP dashboard and just create a new game. At this moment just set the game title.
1.2 IAP and Target UDP
There is two way to use UDP on your project: using the UDP package or using the Unity IAP. In my case, I was using IAP already in the project.
This tip is in the official documentation, but would like to reinforce it:
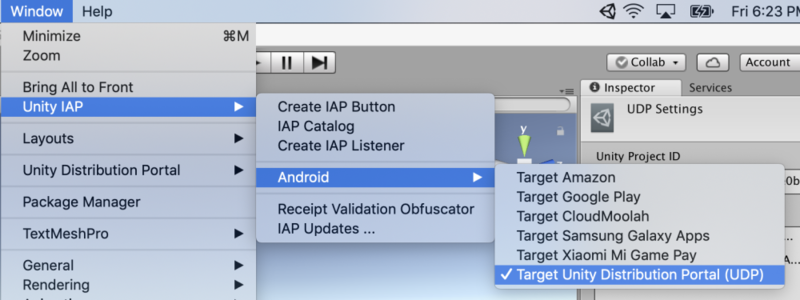
In the Unity Editor, to choose UDP as the Android build target, select Window > Unity IAP > Android > Target Unity Distribution Portal (UDP).
You’ll need this when you build to UDP and remember to use the Target Google Play when you build to Google Play.
2. Build & deploy
What docs says: Build your UDP Android package (apk), test it in the UDP Sandbox environment, and deploy it to the UDP console where you’ll begin preparing your game for submission to the stores.
2.1 Sandbox environment test
In the Sandbox Testing section of your game page on UDP, you will find some instructions on how to test your game on the UDP sandbox.
You will need to do this before repacking your game for the stores.
Just build your .apk on Unity and open it on emulator (like BlueStacks) or directly on your Android device.
If you setup UDP right, you should see a screen like below when the game starts.
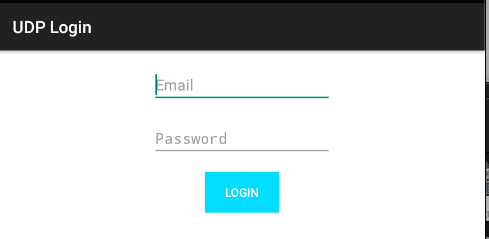
To login in this screen, use the accounts in the setup on Sandbox Test Account. Remember those e-mails don’t need to exist, they are just test accounts to validate UDP setup
Perform the login on the UDP sandbox and test your IAP.
After this, you can refresh your game page on UDP and you should see the result below on Sandbox Testing section:

If you did not setup the UDP on your project, you should see a message like this on UDP dashboard notifications apk analytics failed, caused by: analyse apk failed, caused by:Failed to find GameSettings.prop, please import udp sdk and generate GameSettings.
2.2 Package name extensions and Google Play Services
When UDP repacks your game with store-specific SDK it will, most of the time, change the name of the package, adding a store-specific extension, like:
.gsto Samsung Galaxy Store.unity.migcto Mi GetApps.qooappQooApp to Game Store
Because of this extension, we will need to configure a new OAuth credential to each extension on Google API Console.
In my case on the App Signature section of the game info, a used the recommend option Export and upload your own key and certificate. This is the same certificate used by Google Play Services and APIs.

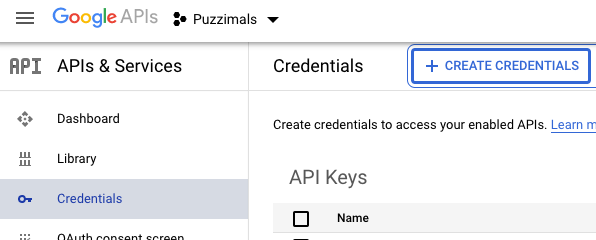
Go to Google API Console, select your game project on the dropdown, then go to Credentials section, then on the OAuth 2.0 Client IDs section select the item with the name of your game, then copy the value of the field SHA-1 certificate fingertip.
Now, go back to the Credentials section and click on the button Create credentials, then OAuth client ID.
In the new page, select Android on the Application type dropdown.
In the Name field you can write anything you want, but maybe use your game name following with the extension store can help to find it later.
In the Package name field you should add the exact package name for the specific store on UDP. For example, in my case for Mi GetApps store, the package name was br.com.diegogiacomelli.puzzimals.unity.migc.
If you have doubted what is the exact package name for your game on a specific store on UDP, you can click on Advanced link of that store on the Publish tab of UDP
Now in the field SHA-1 certificate fingertip you should paste the value you copy before from the original OAuth 2.0 Client IDs configuration.
Then click on the button Create.
You will need to repeat those steps for each store that change your package name.
3. Game Info
What docs says: On the UDP console, provide app store listing information and resources for your game, such as multi-language descriptions, multi-currency price points, screenshots, video trailers, and create releases for distribution.
3.1 Import from Google Play
As you follow the UDP documentation you will reach the point will need to create your game on the UDP dashboard.
If you already have the game published on Google Play, as was my case with Puzzimals, you can use the right-top button IMPORT FROM GOOGLE PLAY in the game page.
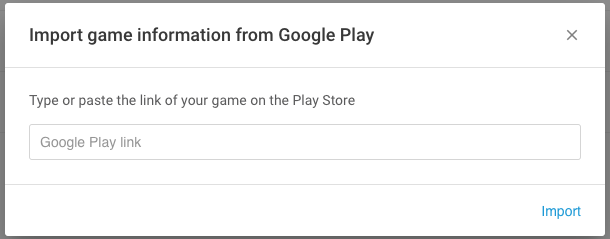
After the import, you can edit the information as well.
You can add the argument hl to your Google Play url to import a specific translation, like https://play.google.com/store/apps/details?id=br.com.diegogiacomelli.puzzimals&hl=pt to import Portuguese translation
4. Submission
What docs says: Sign up with the stores using your UnityID, and register your game with the app stores directly from inside the UDP console.
Go to the Publish tab, select a store and click on Sign up to....
Follow the needed steps for each store you would like to publish.
5. Publish
What docs says: Select the stores you want to submit your game to. UDP automatically repacks your game into store-specific builds and submits them to the stores along with the relevant game descriptions.
5.1 Upload
Now that you have a valid UDP .apk and game info filled, you can upload it on the UDP dashboard, inside the Binary section.
5.2 Testing your repack .apk
Now the specific store should show a Repack game dropdown on the UDP dashboard.
Select Repack game and UDP should generate a new .apk of your game with the store SDK. This .apk will be available to download on the Advanced link. Download it from the Download APK Certificate.
For each store, you need to test your repack .apk to certificate that everything in your game is running ok.
Open the repack .apk on an emulator or an Android device.
Test your IAP and Google Play Services, they are working as expected?
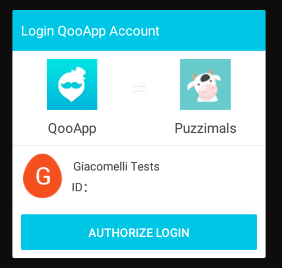
For each store, you will see different screens. For example, for QooApp you will see something like this:
5.3 Send it to review
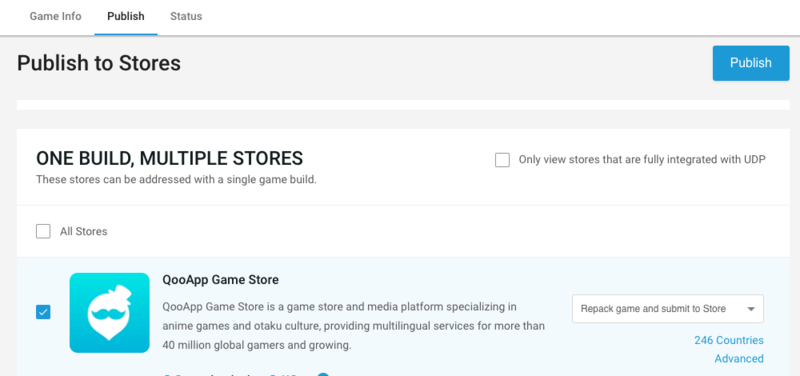
Now you can select Submit to Store in the dropdown, then select the checkbox store on Publish page and click on the Publish button.
UDP will send the game to store review and you can monitor the progress on the dashboard.
UDP will send to you an e-mail when the game is approved.
6. Performance
What docs says: When your game is published, monitor its performance across the different stores from the UDP reporting dashboard.
Wait the game been published on the store and will see the Reporting Dashboard been populated with stats about the game.
Conclusion
With these tips and tricks that I learned while using UDP I hope I helped you to the UDP Journey:
- Implement UDP in your Unity project
- Build and deploy your game to UDP
- Edit your game information
- Prepare your game for submission
- Publish to stores
- Track game performance