Using Gulp for Chrome Extension development workflow

In this tutorial, we will learn how to create a development workflow for a Chrome extension, with different configurations and manifest.json for each environment, like DEV, TEST, and PROD.
Introduction
A few months ago we built a Chrome Extension to a customer to allow users to capture Netflix captions and sent them to the customer web site to study them later.
While we were developing it we needed to change some configurations on the extension to use different URLs of our API depending on what environment the Chrome Extension was using, like DEV (local), TEST, and Production.
Chrome Extension

For this tutorial, I’ll use a Chrome Extension basic sample called Hello Extensions.
You can download it from this page https://developer.chrome.com/extensions/samples or directly from here.
Is not the intent of this tutorial explains how to create a Chrome Extension from scratch, for this you can use the official documentation: Getting Started Tutorial
Gulp
At that time we did not find any builtin or other solution to make this workflow easier and streamlined, so we decided to create our own solution using
Gulp. This whole solution will be explaining below.
gulp is an open-source JavaScript toolkit created by Eric Schoffstall used as a streaming build system in front-end web development.
We decided to use gulp, because a Chrome Extensions is a bunch of .js, .html and .json files. Perfect to use gulp.
The problem

If we just try to open our download Hello Extension .zip file or the opened folder directly on the Chrome extensions page, it will work and you see the extension’s icon in the toolbar.
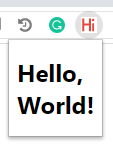
This is not a problem if you have only one environment or if you don’t need different configurations for different environments, but as I’ve already explained, we needed different configs for different environments.
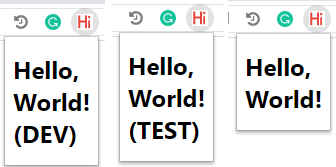
To the purpose of this tutorial we will work with 3 environments: DEV, TEST, and PROD and will use our configuration file just to change our plugin hello.html text:
- DEV: Hello, World! (DEV)
- TEST: Hello, World! (TEST)
- PROD: Hello, World!
Files structure
Move the Hello Extensions files to a subfolder called src.
At the end of this tutorial, our files structure will look like this:
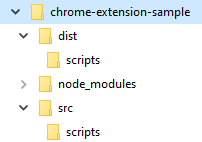
If have any doubt about the files structure during this tutorial, you can download the full solution in section Download at the end of the tutorial
Installing gulp
To allow us to build our workflow, first, we need to install gulp.
Follow the instructions described in Quick Start.
In the section Create a project directory and navigate into it you just need to open the root folder of our file structure described in the previous section
In the section Create a package.json file in your project directory you can use the default values for all the questions of the npm init
You don’t need to perform the section Create a gulpfile, because we will perform it in the next section.
The gulpfile.js file
Create a file called gulpfile.js in the root folder.
This is the full gulpfile.js file that will allow our development workflow for different environments.
The gulpfile.js sections

Now I will explain each section of it.
Requires section
This section define the NPM packages need for our gulpfile.js.
The first one is gulp, then we need the package del that will allow us to clean our dist folder,
after gulp-merge-json to allow us to merge our environment config files. The last one is fs to allow read and write files.
Consts section
This is quite simple, we are just reading the command-line argument called config. If it is not present, the default value is DEV.
Exports section
Now we jump to the last line of the file to explain the exports.default.
Here we are basically defining the order of each function that will be called when we run our gulpfile.js file:
Clean section
Cleans our dist folder.
CopyAllFiles section
Copies all files from src folder to the dist folder
TransformConfig section
Transforms our config.json files, merging the source one with the environment one.
WriteConfigJsFile section
Writes our transformed config.json file to the scripts folder to allow our Chrome Extension’s .js files access the config values.
TransformManifest section
Transforms our manifest.json file too.
Watch section
Watches for any change in the src folder and automatically repeat the previous steps.
packages.json file

Change the content of packages.json file to the content below to update the dependencies.
Then run the command npm install in the root folder, after that run the command npm install gulp.
Running the gulp for the first time
Now, if you just run the command gulp in the root folder, you should see an output like this:
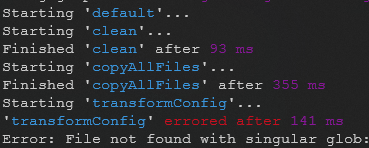
Creating the config.json files

We need to create our config.json files.
They are 3 files:
config.json: the baseline file, our common configuration should be defined here and will be used for the DEV environment.config.TEST.json: the file that the define specific configuration values for the TEST environmentconfig.PROD.json: the file that the define specific configuration values for the PROD environment
If you’re familiar with Web.config File Transformations or appsettings.json files transformation, the philosophy used here is the same: the baseline file (config.json) contains all the common configuration values, and the specific environment files, like config.TEST.json and config.PROD.json, need to define only the values that are different for that environment
Create the 3 files inside the subfolder src.
Here is the content of each one:
Running the gulp for the second time
Run the command gulp in the root folder, you should see an output like this:
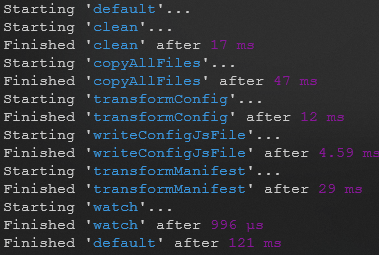
There is a new subfolder dist created. Load it on Chrome Extensions page:
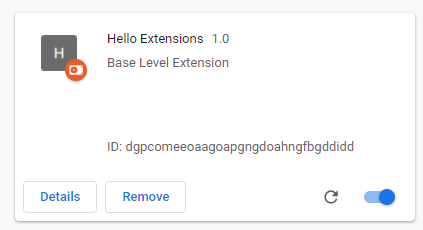
The plugin should work ok.
Remember to remove the plugin previously loaded on Chrome and add it again from the dist folder.
Creating the hello.js
Create a new file called hello.js inside the subfolder scripts.
We will use this file to change the H1 tag inside the hello.html
Loading scripts on hello.html
Change the content of hello.html file to the content bellow:
This will load the .js and add an id attribute to our H1 tag.
Reading the configuration inside the scripts
The first thing we need to do is change our manifest.json file to allow the content of scripts/config.js and scripts/hello.js been read by the extension .js.
Open the manifest.json and change it to the content below:
The line "/scripts/config.js" is what we need to access the configuration values.
Creating the manifest.json files

We need to create our manifest.json files, in the same way, we created our config.json files.
They are 3 files:
manifest.json: the baseline file, our common manifest definition, and used by DEV environment (already created).manifest.TEST.json: the file that the define specific manifest configuration values for the TEST environmentmanifest.PROD.json: the file that the define specific manifest configuration values for the PROD environment
Create the 2 files inside the subfolder src.
Here is the content of each one:
Running the gulp for each environment

Run the command gulp in the root folder.
This will use DEV configuration from config.js and manifest.json
Is the same if you run gulp --config DEV
Now, try to run gulp --config TEST.
In the Chrome Extensions page you should see something like this:
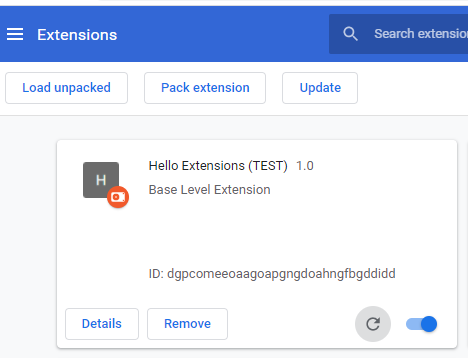
Your extension is using the TEST environment values. When you click on the extension icon on the Chrome toolbar, you should see something like this:
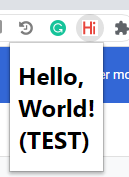
You can try to run gulp --config PROD. To see the PROD environment values on the extension.
Running gulp --watch
To have a fast and streamline workflow, we need that every time we change something on our src folder, the dist folder automatically updates and we can see the changes right on Chrome.
Run the command gulp --watch. It’ll monitor your src folder and update the dist.
You can use the --config option combine, like gulp --watch --config TEST.
Download
You can download the full source code of the plugin of this tutorial: chrome-extension-sample.zip.
In this .zip are all files mentioned in this tutorial, you just need to set up your gulp environment and call the npm install and npm install gulp before starting to use it.
Conclusion

In this tutorial, we learned how to create a development workflow for a Chrome extension, with different configurations and manifest.json for each environment, like DEV, TEST, and PROD.
Icons made by Freepik, Vignesh Oviyan and Eucalyp from www.flaticon.com is licensed by Creative Commons BY 3.0